Recipes

Chicken Katsu

Ingredients_
For the chicken_
3-4 boneless, skinless chicken breasts, cut into cutlets
12 cup flour
2 large eggs, beaten
1 12 cup panko breadcrumbs
Salt and pepper

For the sauce
12 cup ketchup (Thankfully more and more brands have HFCS-free bottles!)
2 tablespoons soy sauce
2 teaspoons sugar
2 teaspoons Worcestershire sauce

Instructions
1. Heat oven to 400*F.  Line baking sheet with parchment paper. 

2. Place flour in shallow container, eggs in a second container, and panko in a third. 

3. Dredge chicken cutlets in flour, then dip in egg, then coat with panko, patting to adhere.

4. Place breaded chicken on baking sheet and bake 20 minutes or until cooked through.  Remove from oven and let chicken rest on sheet for 1 minute before slicing. 

5. Meanwhile, mix all sauce ingredients together.  Serve sauce with chicken. 
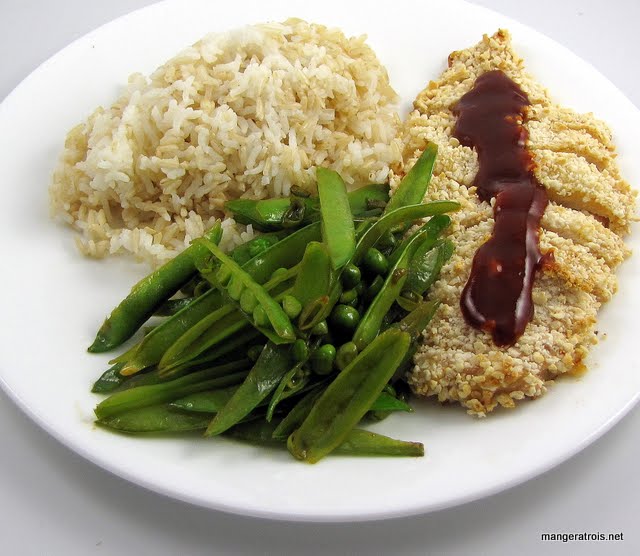
Chicken Katsu

Comments
This recipe is from Food Republik.  I’ve had katsu before in restaurants and it is delicious.  The entire recipe is super simple to bring together and takes a total of about 30 minutes if you’re slow at breading like I am.  The sauce has a great flavor and the panko gives the chicken nice crunch.  I can see this becoming a standby when I have an exciting new veggie dish to try and want a pretty simple chicken preparation to pair with it. 

Shown here with Spicy Stir-Fried Sugar Snap Peas (that turned out not to be sugar snap peas, but that’s another story).

Internet - Food Republik
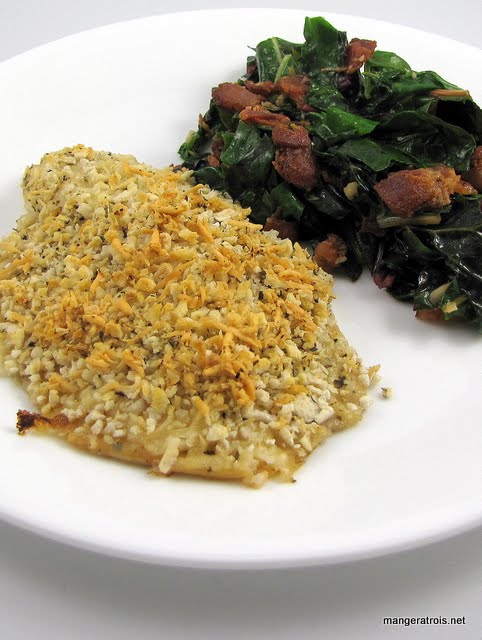
Panko and Parmesan Tilapia

Ingredients
12 cups panko breadcrumbs
12 cups Parmesan cheese, grated
1 teaspoon dried Italian seasoning
12 teaspoons garlic powder
2 tablespoons mayonnaise
4 (4-6 ounces each) tilapia filets

Instructions
1. Heat oven to 425*F.  Line baking sheet with parchment paper. 

2. Mix panko, Parmesan cheese, Italian seasoning and garlic powder in small bowl. 

3. Pat fillets dry with paper towel and place on baking sheet.  Spread mayonnaise evenly over tops of fish.  Top each fillet with 14 panko mixture, pressing gently to adhere.  Bake 12 to 14 minutes or until fish is cooked through and topping has lightly browned. 

Panko and Parmesan Tilapia

Comments
This recipe is from Tasty Kitchen and is, yet another, super simple way to prepare tilapia.  The crust is crispy and flavorful and this recipe is versatile enough to go with almost any side dish.  You could easily change the Italian seasoning for herbs that better suited the rest of your meal if desired.  Tilapia is such an easy fish to prepare and it’s super tasty!  It’s a nice change from salmon on our rare fish nights. 

Shown here with Swiss Chard Cheater Greens.

Internet - Tasty Kitchen

Mississippi Mud Cake

Ingredients
For the cake
4 eggs
2 cups sugar
1 cup butter, melted
1 12 cups flour
13 cup cocoa powder
1 teaspoon vanilla
1 cup coconut, flaked or shredded (optional)
12 cup pecans, chopped (optional)
1 7 ounce jar marshmallow fluff
_
For the frosting_
12 cup butter, melted
13 cup cocoa powder
1 teaspoon vanilla
6 tablespoons milk
6 cups powdered sugar

Instructions
1. Heat oven to 350*F. Grease 13 by 9-inch baking dish.

2. Beat eggs until thick. Beat in sugar until combined.

3. Combine butter, flour, cocoa powder, vanilla, coconut and pecans in medium bowl. Add flour mixture to sugar-egg mixture. Stir well. Pour into pan and bake 30 minutes, or until done toothpick inserted comes out clean.

4. Remove cake from oven and spread marshmallow fluff gently over warm cake. (The warmth from the cake will help to melt the fluff.)

5. Mix all frosting ingredients. Spread frosting over fluff using a table knife to swirl frosting into marshmallow. Cool before serving. 

Mississippi Mud

Comments
This recipe is from my most excellent mother.  I assume that she initially got it from a magazine or newspaper, since her recipe card is a glued clipping.  This recipe has been in my life for as long as I can remember and it was always a grand treat for birthdays when we’d get Mississippi Mud.  The best part of the cake is when you get a piece 3 to 4 days after it has been made because the frosting crystallizes a bit and it’s stellar.  Not that the cake often lasts so long, but it’s great when it does! 

I think that, in the future, I might make a few changes because no one in the family has quite the sweet teeth that we did 20+ years ago.  In the future I’d double the cake part of the recipe and keep the frosting the way it is.  Or bake it in a 9 by 9 and halve the frosting while keeping the cake the same.  As the recipe stands, the frosting layer is about as thick as the cake layer, and it would be nice to have a 1:2 ratio. 

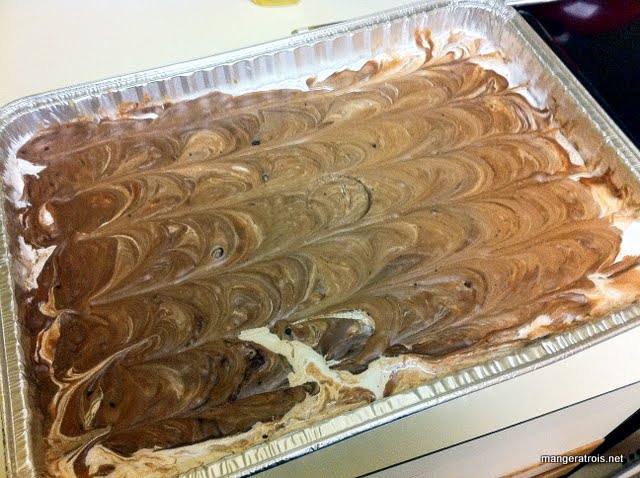
This specific cake was made for my mother’s birthday.  I’m sure she was happy that there were 6 other people to help her eat it all!  (We only had one votive candle, which is why there’s a round dent in the middle of the cake.)

Person - Mom

Zucchini Risotto

Ingredients
1 tablespoon butter
1 medium onion , chopped
1-2 cloves garlic, minced
2 cups Arborio rice
12 cup white wine
8 cups chicken broth
3-4 small zucchini, diced (around 3-4 cups of diced zucchini)
10 oil-packed sundried tomatoes, chopped
1 teaspoon dried thyme
6 tablespoons Parmesan cheese, grated or shredded
1-2 tablespoons fresh basil, chopped
Freshly ground black pepper, to taste

Instructions
1. Melt butter in large pot or Dutch oven over medium heat.  Stir in onions and cook 2 minutes, or until starting to soften.  Add garlic and cook until fragrant, 30 to 60 seconds.  Add rice and cook, stirring often, until rice is opaque and well coated with oil, about 1 to 2 minutes.  Add wine and stir until absorbed. 

2. Working 12 to 1 cup at a time, add broth to rice mixture.  Stir often until broth is almost completely absorbed before adding more.  Repeat until rice is almost tender, about 20 to 30 minutes.  (This might not use all of the broth, which is okay.  If it ends up needing more broth than you’ve got, use water.) 

3. When rice is almost tender, stir in zucchini, sundried tomatoes and thyme.  Continue cooking, stirring, and adding more broth as necessary until rice is tender.  Stir in Parmesan and basil and season with salt and pepper before serving. 

Zucchini Risotto

Comments
This recipe is from [all(recipes.com](http://all(recipes.com/Recipe/zucchini-risotto/Detail.aspx) and it makes quite a bit of risotto.  Feel free to halve all of the ingredients if you’re not feeding an army or don’t want leftovers.  I had plans to use the leftovers to make Arancini, so I wasn’t too worried about the large amount of food this generates. 

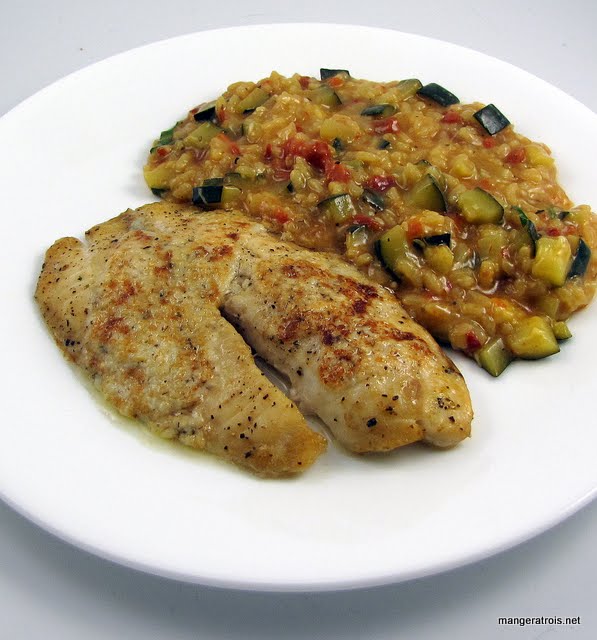
The verdict on this risotto was mixed.  Art and I loved it and loved all of the flavors.  Lance felt that all of the added stuff overwhelmed the taste of the rice itself and thought the risotto was better in Arancini form later in the week.  The risotto you see on the plate was also a bit wet, but it firmed up once it cooled and absorbed more of the liquid – I was just impatient to serve it and have dinner!

You will not that I don’t advocate heating the broth ahead of time in this recipe and that’s a shift I’ve made over the last few years as I cook more and more risottos.  When cooking small amounts of risotto like this, it doesn’t seem to be necessary to heat the broth in advance.  I just pour it into the pot direct from the container and the risotto is just as tasty and correct texturally as it is when I heat the broth prior to use.  This is all a matter of personal preference, and I recommend that you cook the way that works best for you. 

Shown here with Baked Parmesan Tilapia.

Internet - all(recipes

Baked Parmesan Tilapia

Ingredients
4 (4-6 ounces each) tilapia filets
Salt and pepper, to taste
3 tablespoons butter, softened
14 cup Parmesan cheese, grated or shredded
1 clove garlic, minced
14 teaspoon thyme

Instructions
1. Heat oven to 400*F. 

2. Pat tilapia dry with paper towel and season with salt and pepper.  Place on baking sheet lined with parchment paper and bake for 10 to 12 minutes. 

3. Meanwhile, mix butter, Parmesan, garlic, and thyme in small bowl.  Remove fish from oven and gently flip with wide spatula.  Heat broiler and divide butter mixture evenly between fish.  Broil fish for 2 to 3 minutes, or until cheese turns golden and bubbly.

Baked Parmesan Tilapia

Comments
This recipe is from How Sweet it Is and it’s  super simple!  Tilapia is a fish I’d never had until recently and I find myself loving how simple it is to prepare.  It’s a very moist fish that lends itself to a wide variety of flavors.  This recipe is great for a busy night and works well with a strongly flavored side to contrast with the mild flavors of the fish. 

Shown here with Zucchini Risotto.

Internet - How Sweet It Is

Skillet Cornbread with Corn

Ingredients
12 cup butter, softened
1 12 cup plain yogurt (I used Greek.)
2 eggs
12 cup brown sugar plus 2 tablespoons
1 cup yellow cornmeal
1 cup flour
1 12 teaspoons baking soda
1 teaspoon salt
1 tablespoon olive oil
12 ounces frozen corn

Instructions
1. Heat oven to 375*F. 

2. Beat together butter, yogurt, eggs, and 12 cup brown sugar.  Add cornmeal, flour, baking soda and salt.  Mix until batter forms. 

3. In 10-inch ovenproof skillet heat olive oil over high heat.  Add frozen corn and 2 tablespoons brown sugar and sauté 5 minutes. 

4. Pour batter over sautéed corn and stir to combine.  Place skillet in oven and bake 30 to 35 minutes or until top turns golden and toothpick comes out clean.  Cool 5 minutes before serving. 

Skillet Cornbread with Corn

Comments
This recipe is from Five Dollar Dinners.  Many years ago, Art and I used to spend quite a bit of weekend time in Rockville, MD and there was a specialty food store there called Eatzi’s.  Sadly, it went out of business but it had the most amazing skillet cornbread that had bits of corn in it, not just cornmeal.  We’d often pick one up to take home with us and the bread was always devoured.  I’ve been looking for a recipe that comes close to that deliciousness for quite some time now and I think this might be the one.  The bread had just the right amount of sweetness, great texture due to the corn, and a nice crust from the skillet.  This might just be the cornbread of my dreams. 

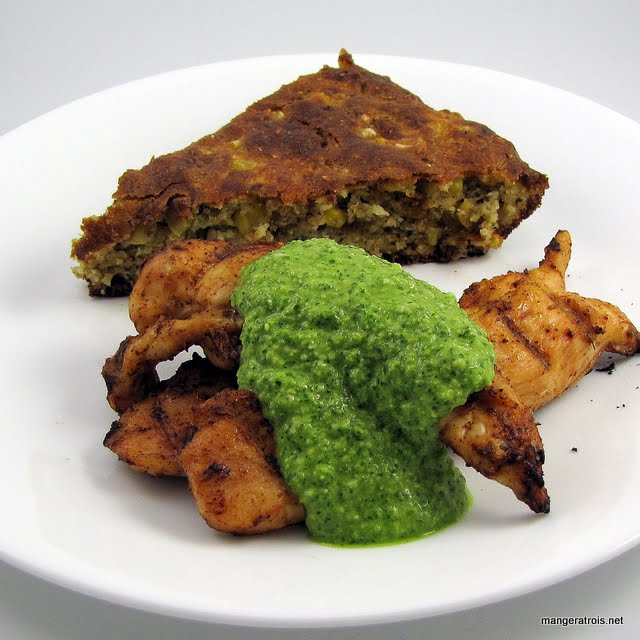
Shown here with Spice-Rubbed Chicken Fingers with Cilantro Dipping Sauce.

Internet - Five Dollar Dinners

Creamy Lemon Pasta with Spinach and Tomatoes

Ingredients
1 pound rotini pasta or other small shaped pasta
3 tablespoons olive oil
4 cloves garlic, minced
2 cups half and half
4 lemons, zested and juiced
1 teaspoon salt
12 teaspoon black pepper
6 ounces baby spinach
12 cup grated Parmesan
1 pint grape or cherry tomatoes, halved

Instructions
1. Bring large pot salted water to boil and cook pasta 2 minutes less than package directions.  Drain well and return pasta to pot.

2. Heat oil in saucepan over medium heat.  Add garlic and cook until fragrant, about 1 minute.  Add half and half, lemon zest, lemon juice, salt and pepper.  Bring to boil then reduce heat and simmer 10 minutes or until sauce begins to thicken. 

3. Pour sauce over pasta and cook over medium low heat 2 to 3 minutes, or until most of sauce has been absorbed.  Remove pot from heat and add spinach, Parmesan and tomatoes.  Toss well until spinach wilts.  Season to taste and serve. 

Lemon Pasta with Spinach and Tomatoes

Comments
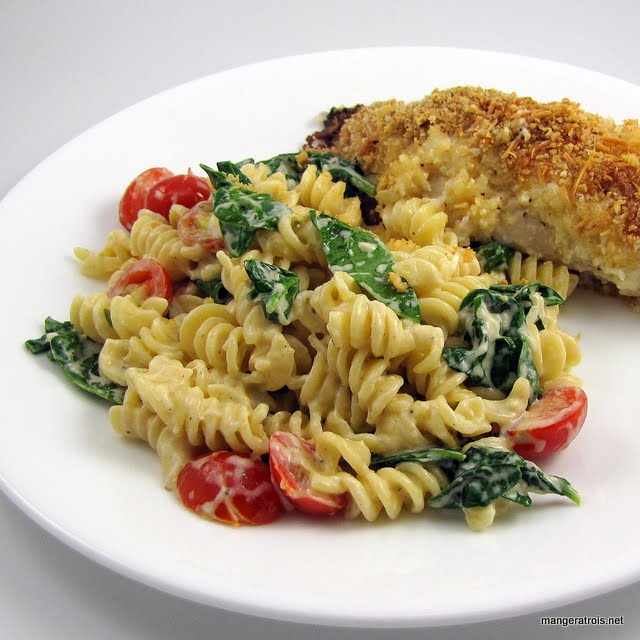
This recipe is from Sunshine and Bones.  It was scrumptious.  The sauce was almost like a lemony alfredo and the spinach and tomatoes tasted fantastic.  I would make this again in a heartbeat and it’s a perfect summery pasta dish with beautiful vibrant colors. 

Shown here with Baked Italian Chicken.

Internet - Sunshine and Bones

Sirloin Tip Roast with Bacon

Ingredients
2 12-3 pound boneless sirloin tip roast
2-4 cloves garlic, thinly sliced
2 tablespoons Dijon mustard
12 teaspoons dried thyme
12 pound bacon

Instructions
1. Heat oven to 325*F. 

2. Cut slits into the roast and insert garlic slices, placing them evenly around the whole roast.  Mix Dijon and thyme in small bowl and rub mixture over entire roast.  Place roast on rack inside roasting pan. 

3. Cover top of roast with bacon slices.  Insert meat thermometer into thickest part of roast.  Cook until thermometer reads 125*F to 130*F for medium rare.  Remove from oven and let rest 15 minutes before carving. Serve with bacon slices. 

Sirloin Tip Roast with Bacon

Comments
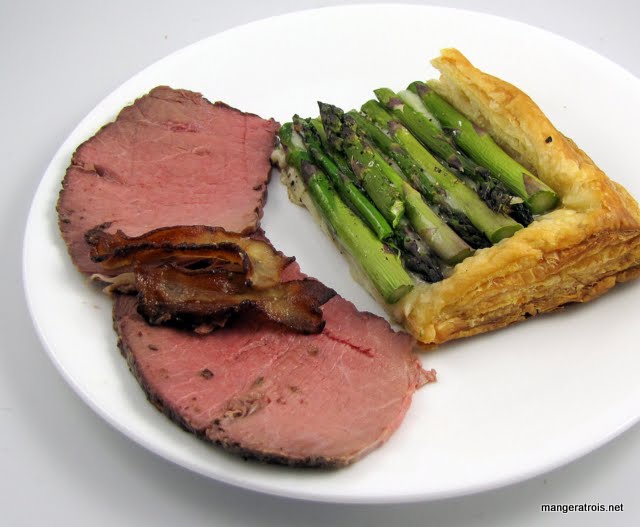
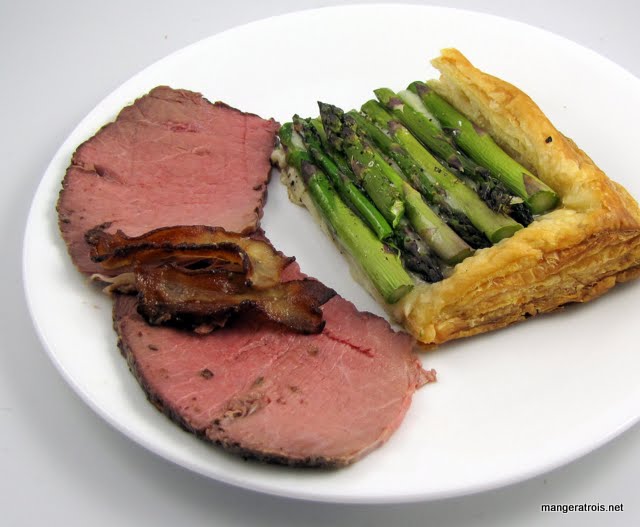
This recipe is from Cooks.com and we were pleased with the results.  The meat was tender, the bacon was delicious, and the mustard added great flavor to everything.  Sirloin tip isn’t a great cut of meat, but this is preparation turns it into something tasty. 

Shown here with Asparagus Gruyere Tart.

Internet - Cooks.com

Chuck Steaks with Balsamic Mushrooms

Ingredients
1-2 pounds chuck steaks, about 1 inch thick
14 teaspoon salt
18 teaspoon black pepper
1 tablespoon olive oil
1 tablespoon butter
1 pound mushrooms, sliced
1 shallot, finely chopped
14 cup balsamic vinegar
2 tablespoons soy sauce
12 cup plus 2 tablespoons beef broth
1 teaspoon cornstarch

Instructions
1. Prepare grill.  Season steaks with salt, pepper, and rub with olive oil.  Grill until done to your liking.  (I assume that you know how your grill works, I only know how mine works!)  Remove steaks to plate and let rest while preparing sauce. 

2. Melt butter in large skillet over medium-high heat.  Saute mushrooms and shallot, stirring frequently, until mushrooms are browned and tender, about 4 to 5 minutes.  Transfer mushrooms and shallot to plate with steaks. 

3. Add vinegar and soy sauce to skillet and simmer, stirring and scraping up any brown bits, about 2 minutes.  Add 12 cup beef broth and simmer 2 minutes.  Mix cornstarch with remaining beef broth and stir mixture into sauce.  Simmer, stirring, about 1 minute or until sauce thickens.  Return steaks, mushrooms, shallot, and any accumulated juices to skillet.  Simmer, turning steaks over in sauce, until steaks are coated and heated through. 

Chuck Steaks with Balsamic Mushrooms

Comments
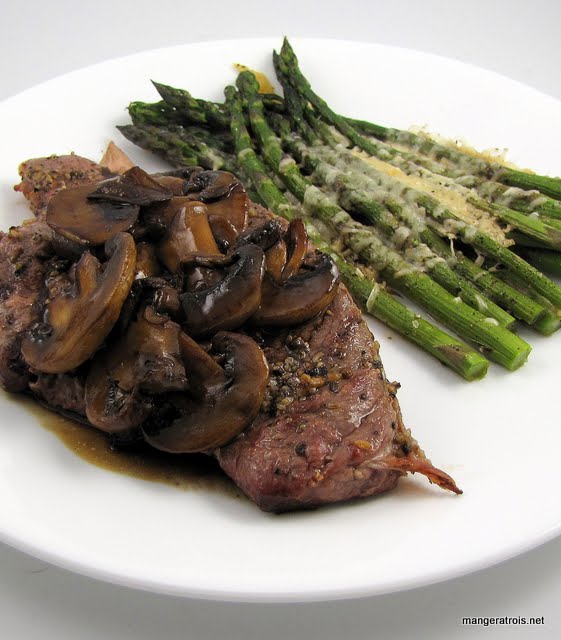
This recipe is from Epicurious.com.  I actually don’t know how it tasted because I made while I had a kidney stone and was particularly uninterested in eating steak.  However, Art and Lance thought the steaks and sauce were great.  The sauce certainly smelled delicious! 

Shown here with Parmesan Roasted Asparagus.

Internet - Epicurious

Asparagus Gruyere Tart

Ingredients
14-16 ounces frozen puff pastry
1-1 12 cups Gruyere cheese, shredded or thinly sliced
2 pounds asparagus, woody ends trimmed
1 tablespoon olive oil
Salt and freshly ground black pepper

Instructions
1. Thaw puff pastry in refrigerator following package instructions. 

2. Heat oven to 400*F.  Roll pastry into 14 by 11-inch rectangle.  With sharp knife, score dough 1-inch from edge of dough, being careful not to cut all the way through.  Pierce inside of dough repeatedly with fork at 12-inch intervals.  Bake until golden brown, about 15 to 18 minutes. 

3. Sprinkle baked pastry with cheese.  Line pastry with asparagus, alternating ends and tips.  Sprinkle with oil, salt and pepper.  Bake 20 to 25 minutes, until dough is well browned and asparagus is tender.  Serve warm or room temperature with a drizzle of balsamic vinegar, if desired. 

asparagus tart

Comments
This recipe is from Scarpetta Dolcetto, although it’s another that I’ve seen posted often on various blogs recently.  It is the season for asparagus after all!  I loved this recipe, the dough was perfectly cooked, not raw at all at the bottom and deliciously crispy all over.  The gruyere went very well with the flavor of the asparagus and I probably could have eaten the entire thing in one fell swoop if no one had been watching.  This recipe is scrumptious and easy, a great combination!

Shown here with Sirloin Tip Roast with Bacon.

Internet - Scarpetta Dolcetto