Sourdough

Experiments in Sourdough #?

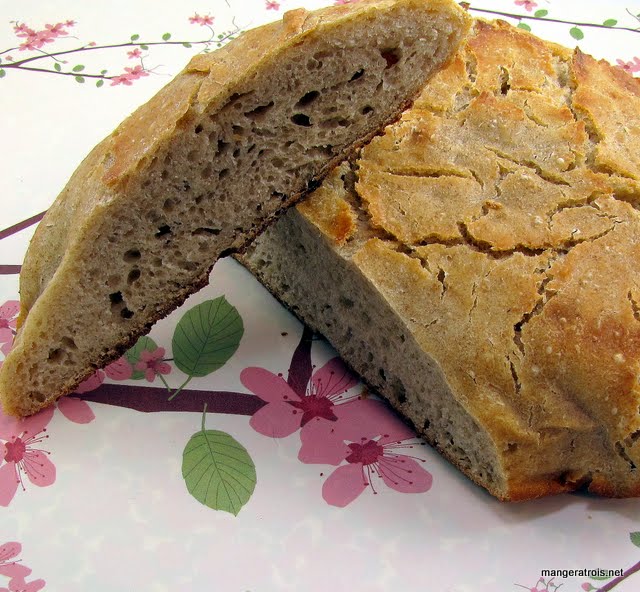
I think this might be the 8th or 9th attempt I’ve made at perfecting Almost No-Knead Sourdough and I think that I might have nailed it.  I’ll need to try it a few times more to make sure, and I’d like to ensure that I can substitute half of the white flour for whole wheat flour as well.  But I’m feeling really good about this method and, in the end, the only change I really needed to make was to reduce the resting and rising times.  Who knew? 

Apparently, if you allow sourdough to rest for too long, whatever bonds there are that should keep the dough together sort of disintegrate and the dough turns into a wet, gloppy mess. 

Ingredients
15 ounces all purpose flour (3 cups)
14 teaspoon yeast
1 12 teaspoons table salt
7 ounces water, at room temperature (34 cup plus 2 tablespoons)
3 ounces mild-flavored lager (14 cup plus 2 tablespoons), such as Budweiser
14 cup sourdough starter
1 tablespoon white vinegar

Instructions
1. Whisk flour, yeast, and salt in large bowl. Add water, beer, starter, and vinegar. Using rubber spatula, fold mixture, scraping up dry flour from bottom of bowl until shaggy ball forms. Cover bowl with plastic wrap and let sit at room temperature for 6 hours.

2. Lay 12- by 18-inch sheet of parchment paper inside 10-inch skillet and spray with nonstick cooking spray. Transfer dough to lightly floured work surface and knead 10 to 15 times. Shape dough into ball by pulling edges into middle. Transfer dough, seam-side down, to parchment-lined skillet and spray surface of dough with nonstick cooking spray. Cover loosely with plastic wrap and let rise at room temperature until dough has double in size and does not readily spring back when poked with finger, about 1 hour.

3. About 30 minutes before baking, adjust oven rack to lowest position, place 6- to 8-quart heavy-bottomed Dutch oven (with lid) on rack, and heat oven to 500*F. Lightly flour top of dough and, using razor sharp blade or sharp knife, make one 6-inch long, 12-inch-deep slit along top of dough. Carefully remove pot from oven and remove lid. Pick up dough by lifting parchment overhang and lower into pot (let any excess parchment hang over pot edge). Cover pot and place in oven. Reduce oven temperature to 425*F and bake covered for 30 minutes. Remove lid and continue to bake until loaf is deep brown and instant-read thermometer inserted into center registers 210*F, 20 to 30 minutes longer. Carefully remove bread from pot; transfer to wire rack and cool to room temperature, about 2 hours.

4. Refresh starter by mixing in 14 cup flour and 14 water. 

Sourdough!

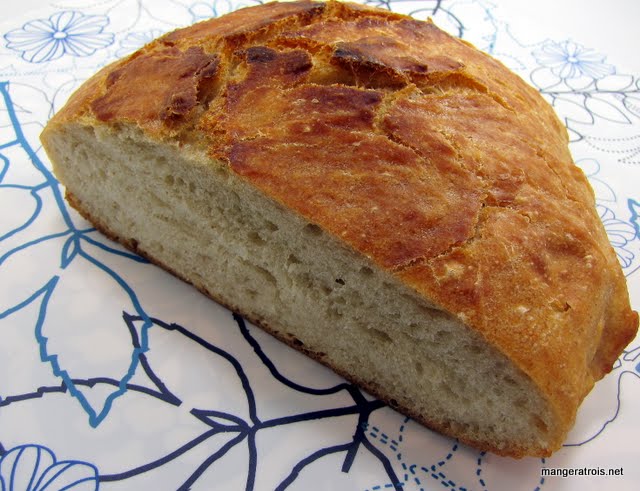
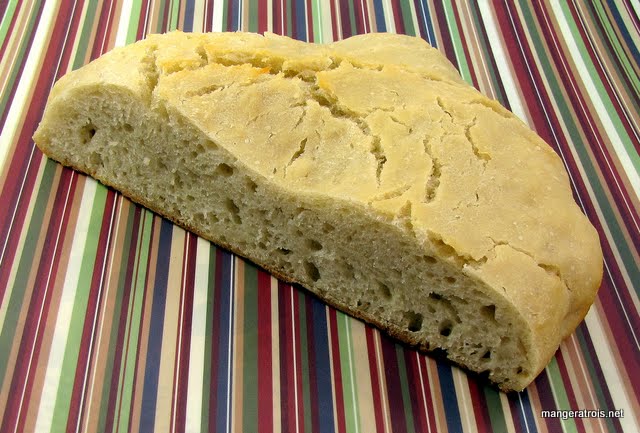
I forgot to put a slit in the bread, so it’s not quite as pretty as my original Almost No-Knead Bread loaf, but that’s an easy fix for next time.  I’m still refreshing my starter with whole wheat flour and that seems to be having a nice effect.  Next time I’ll try replacing half of the flour with whole wheat flour.  The sourdough flavor in this loaf was nice and pronounced. 

I am feeling a bit sheepish that the only thing I really needed to do was change the rising and resting times, but it’s been a fun journey.  It’s nice to finally have achieved something resembling success! 

In theory, if I was more confident in the rising abilities of my starter, I could omit the yeast entirely, but my starter has proven finicky.  Hopefully this will change in time.

Experiments in Sourdough #5-6

I am not quite ready to give up!  I feel like I’m so close to success and just need to make a few more tweaks to achieve it. 

Attempt #4 left me with the sad realization that my starter just doesn’t seem to be started well enough to generate the yeast that bread needs to rise.  I feel that it will get there with love, time, and care, but it’s not there yet.  This means that a major culprit of my non-rising dough is probably due to the lack of yeast.  To combat this, I opted to add yeast for attempt #5.  Sadly, I seem to have lost my notes for that attempt.  It didn’t rise as much as it should have because my dough was entirely too dry thanks to my earlier attempts that involved adding more flour. 

Attempt #6, however, was much more successful!  That attempt went something like this:

Morning Day #1
Proof Starter: Pour starter into large bowl, add 1 cup water and 1 cup flour, stir and set aside until evening.  (Here I opted to start feeding my starter with wheat flour instead of white flour, just to reduce the amount of refined flour in the bread.)

Evening Day #1
15 ounces all purpose flour
1 12 teaspoons salt
14 teaspoon yeast
9 ounces sourdough starter
4 ounces water
3 ounces beer
1 tablespoon white vinegar

1. Whisk flour, salt and yeast in large bowl.  Add starter, water, beer and vinegar.  Using rubber spatula, fold mixture, scraping up dry flour from bottom of bowl.  Cover bowl with plastic wrap and let sit at room temperature until morning. 
**
Morning Day #2**
1. Lay 12- by 18-inch sheet of parchment paper inside 10-inch skillet and spray with nonstick cooking spray. Transfer dough to lightly floured work surface and knead 10 to 15 times. Shape dough into ball by pulling edges into middle. Transfer dough, seam-side down, to parchment-lined skillet and spray surface of dough with nonstick cooking spray. Cover loosely with plastic wrap and let rise at room temperature until dough has doubled in size and does not readily spring back when poked with finger, about 2 hours.

2. About 30 minutes before baking, adjust oven rack to lowest position, place 6- to 8-quart heavy-bottomed Dutch oven (with lid) on rack, and heat oven to 500*F. Carefully remove pot from oven and remove lid. Pick up dough by lifting parchment overhang and lower into pot (let any excess parchment hang over pot edge). Cover pot and place in oven. Reduce oven temperature to 425*F and bake covered for 30 minutes. Remove lid and continue to bake until loaf is deep brown and instant-read thermometer inserted into center registers 210*F, 20 to 30 minutes longer. Carefully remove bread from pot; transfer to wire rack and cool to room temperature, about 2 hours.

Attempt 6

Since I didn’t post pictures of the failed attempts 4 and 5, you can’t see how much better this loaf is than those loaves were!  This loaf has almost twice the height of loaves 4 and 5!  It did rise better than attempt #3 as well.  This loaf definitely felt like progress.  The wheat flour in the starter added a nice dimension to the flavor and the lack of refrigerator didn’t diminish the sourdough tang at all. 

I believe that my problem with this loaf was that I didn’t allow it to rise long enough on the morning of day 2.  It did readily spring back when I poked it, but I went with it anyway.  Very foolish.  For my next attempt I’ll be using a different vessel for the rising so that I can easily see when the dough is doubled. I think this will work better for me than the skillet where I have a hard time gauging things.  The house was pretty cold as well, so it might be that the temperature affected the rise. 

I think I’m close.

Experiments in Sourdough #4

I’m not including a picture with this article because, well, it didn’t turn out any better than the previous experiment! 

This time around I decided to give the Cook’s Illustrated method of refreshing the starter prior to use a try and I also increased the flour to 15 ounces from the 12.5 I tried last time. 

Evening Day #1
1. Stir starter well, measure out 2 cups (18 ounces), and discard remaining starter (or give to a friend).  Place measured starter in glass bowl or container with at least 1 12-quart capacity.  Stir in 1 cup (8 ounces) water until combined, then stir in 1 cup (5 ounces) flour until combined.  Let stand at room temperature. 

Morning Day #2
1. Stir starter well, measure out 2 cups (18 ounces), and discard remaining starter (or give to a friend). Place measured starter in glass bowl or container with at least 1 12-quart capacity.  Stir in 1 cup (8 ounces) water until combined, then stir in 1 cup (5 ounces) flour until combined.  Let stand at room temperature. 

Evening Day #2
1. Stir starter well, measure out 2 cups (18 ounces), and discard remaining starter (or give to a friend).  Place measured starter in glass bowl or container with at least 1 12-quart capacity.  Stir in 1 cup (8 ounces) water until combined, then stir in 1 cup (5 ounces) flour until combined.  Let stand at room temperature. 

Morning Day #3
15 ounces all purpose flour
1 12 teaspoons salt
9 ounces sourdough starter
4.5 ounces water
3 ounces beer
1 tablespoon white vinegar

1. Whisk flour and salt in large bowl.  Add starter, water, beer and vinegar.  Using rubber spatula, fold mixture, scraping up dry flour from bottom of bowl.  Cover bowl with plastic wrap and let sit at room temperature.  Feed starter.

Evening Day #3
1. Refrigerate dough and starter.

Morning Day #4
1. Lay 12- by 18-inch sheet of parchment paper inside 10-inch skillet and spray with nonstick cooking spray. Transfer dough to lightly floured work surface and knead 10 to 15 times. Shape dough into ball by pulling edges into middle. Transfer dough, seam-side down, to parchment-lined skillet and spray surface of dough with nonstick cooking spray. Cover loosely with plastic wrap and let rise at room temperature until dough has double in size and does not readily spring back when poked with finger, about 2 hours.

2. About 30 minutes before baking, adjust oven rack to lowest position, place 6- to 8-quart heavy-bottomed Dutch oven (with lid) on rack, and heat oven to 500*F. Lightly flour top of dough and, using razor sharp blade or sharp knife, make one 6-inch long, 12-inch-deep slit along top of dough. Carefully remove pot from oven and remove lid. Pick up dough by lifting parchment overhang and lower into pot (let any excess parchment hang over pot edge). Cover pot and place in oven. Reduce oven temperature to 425*F and bake covered for 30 minutes. Remove lid and continue to bake until loaf is deep brown and instant-read thermometer inserted into center registers 210*F, 20 to 30 minutes longer. Carefully remove bread from pot; transfer to wire rack and cool to room temperature, about 2 hours.

I made dough for two loaves and, once I realized that the first loaf was too wet, I added an extra 12 cup (2.5 ounces) of flour to the dough of the second loaf.  Sadly it was just as flat as the first loaf. 

I’m not quite ready to give in and use the Cook’s Illustrated recipe for sourdough in its entirety, so I’m going to give a few more things a try.  First, I’m going to remove the 4.5 ounces of water entirely and keep everything else the same.  Second, I’m going to skip the Cook’s Illustrated refreshing method.  The method I was using before that just involved feeding the starter after use was working quite well, and it’s a lot less time consuming.  I think I might also add a little yeast, since maybe it’s my starter that’s the problem. 

The toughest part about this is waiting for the starter to be ready to use again!

Experiments in Sourdough #3

I recently tried out Cook’s Illustrated’s Almost No-Knead Bread and it was fantastic.  The shape reminded me of sourdough loaves I’ve made in the past and, since I’ve got sourdough starter going in my fridge, I wondered if I’d be able to find a sourdough version of this bread. 

Internet searching turned up lots of sourdough variations of the original No-Knead Bread, but nothing that modified the Almost No-Knead Bread that turned out so wonderfully.  I read some explanations and (recipes for the sourdough breads and thought, “I can do this!” 

Here’s the recipe I came up with:

Almost No-Knead Sourdough Bread
Ingredients

12.5 ounces all purpose flour
1 12 teaspoons salt
9 ounces sourdough starter
4.5 ounces water
3 ounces beer
1 tablespoon white vinegar

Instructions
1. Whisk flour and salt in large bowl.  Add starter, water, beer and vinegar.  Using rubber spatula, fold mixture, scraping up dry flour from bottom of bowl.  Cover bowl with plastic wrap and let sit at room temperature for 8 hours.  Refrigerate for 8-10 hours. 

2. Lay 12- by 18-inch sheet of parchment paper inside 10-inch skillet and spray with nonstick cooking spray. Transfer dough to lightly floured work surface and knead 10 to 15 times. Shape dough into ball by pulling edges into middle. Transfer dough, seam-side down, to parchment-lined skillet and spray surface of dough with nonstick cooking spray. Cover loosely with plastic wrap and let rise at room temperature until dough has double in size and does not readily spring back when poked with finger, about 2 hours.

3. About 30 minutes before baking, adjust oven rack to lowest position, place 6- to 8-quart heavy-bottomed Dutch oven (with lid) on rack, and heat oven to 500*F. Lightly flour top of dough and, using razor sharp blade or sharp knife, make one 6-inch long, 12-inch-deep slit along top of dough. Carefully remove pot from oven and remove lid. Pick up dough by lifting parchment overhang and lower into pot (let any excess parchment hang over pot edge). Cover pot and place in oven. Reduce oven temperature to 425*F and bake covered for 30 minutes. Remove lid and continue to bake until loaf is deep brown and instant-read thermometer inserted into center registers 210*F, 20 to 30 minutes longer. Carefully remove bread from pot; transfer to wire rack and cool to room temperature, about 2 hours.

Sourdough

This is half of my resulting loaf.  Why only half?  Because we quickly devoured the first half.  The sourdough flavor is fantastic.  It’s very strong and just perfect.  This bread turned out much sourer than previous attempts at sourdough bread. 

However, the texture was not perfect.  The loaf spread out too much and it was a bit dense.  I googled some bread troubleshooting information and I’m pretty sure the texture issues are a result of too little flour.  Attempt #2 will include more flour, I think I’ll try 15 ounces and see what happens.

Experiments in Sourdough #2

So far, so good.  I put together my sourdough starter on Monday, January 4.  On Wednesday, January 7 I followed the instructions for the first feeding.  Then I went out of town until Sunday, January 10 and the first thing I did when I got home was start my first loaf of sourdough bread.  Then I fed the starter and the process begins again! 

Sourdough Starter Replenishment
Ingredients

1-1 13 cups any flour (Flour type will depend on what you used in the original starter.)
1-1 13 cups water
1 heaping tablespoon plain yogurt or a pinch of sugar, optional

Instructions
1. Let the refrigerated starter come to room temperature.  Stir well.  Discard half of the starter if you haven’t used any and you don’t want to accumulate too much.  Pour the remaining starter into a bowl.  Add equal amounts of flour and water.  Add yogurt or sugar if you want to increase starter activity.  Mix well. 

2. Wash out the original starter container using soap and hot water, or by running it through the dishwasher, to get rid of any remaining bacteria.  Then return the starter to the original container and cover it with several thicknesses of cheesecloth held in place with a rubber band.  Let the starter stand at room temperature, stirring several times a day, until bubbly, overnight to 2 days depending on how sour you want it.  It will continue to bubble and expand.  If the starter turns colour, has an unpleasant aroma, or grows any type of mold, the starter is out of balance and must be completely discarded.  Do not leave the starter at room temperature longer than 5 days without feeding it. 

3. After the starter has been allowed to stand at room temperature to ferment, cover it with a layer of plastic wrap help in place with a rubber band, or transfer it to a freezer-quality self-sealing bag, and refrigerate it.  The best starters are those used and replenished at least weekly. 

Starter

Experiments in Sourdough #1

I love sourdough bread and have, in the past, attempted to get a starter going and keep it going in order to have fresh homemade sourdough bread at whim.  And every time I have failed for various reasons. 

I had the brilliant idea that I could make this easier by using a Pampered Chef pitcher that my parents gave me years ago, so I pulled that out of the cabinet, washed it really well, and was all set to go.  I found the following recipe in The Bread Lover’s Bread Machine Cookbook and selected it because I have all of the ingredients on hand. 
**
French Buttermilk Starter**
Ingredients
34 cup flour
Large pinch of yeast
1-1 14 cups buttermilk

For the first feeding
2 tablespoons flour
3 tablespoons water

Instructions
1. Whisk together the 34 cup flour, yeast, and buttermilk in a medium bowl; the mixture should be thick like a pancake batter.  Add a bit more flour to adjust the consistency, if necessary.  Transfer to a plastic container or crock.  Cover with a few layers of cheesecloth and secure with a rubber band; then cover loosely with plastic wrap.  Let stand at warm room temperature 24 hours.  It will be bubbly, begin to ferment, and smell delightful.  There will be tiny yellow dots of butter from the buttermilk on the top.

2. After 36 hours when the starter begins to smell sour, feed it with the 2 tablespoons of flour and the water; whisk to combine.  Let stand for 1 to 2 more days, until the desired degree of sourness is achieved.  This started can be used 3 or 4 days after it is initially mixed.  The longer you let it sit, the more sour it will be; you can judge how sour the starter has become by the way it smells.  If you are not ready to use it after 3 or 4 days, let it stand a few more days to continue to sour, or store it in the refrigerator, covered loosely, until you are ready to use it. 

All of this seems easy enough, right? 

I looked at this self stirring pitcher, looked at the ingredients, and thought “I should double the ingredients because this pitcher is huge!”  So I did.  I dumped them all into the pitcher and realized, quickly, that the stirring mechanism doesn’t work very well when you’ve only got 1-2 inches of stuff in the bottom. 

So I decided to move the starter to a 4 cup screw-top container instead and just hope that a cat doesn’t knock it over in the night.  Then I went online and decided I really needed a stoneware crock, so I ordered that.  Here’s hoping the plastic container suffices for the next 5 to 7 business days. 

I suppose the better course of action would have been to remake the starter for the new container, after the flub in the Pampered Chef pitcher, but I’m out of buttermilk now so that’s not an option.  I’ll know in a few days if it’s working or not.  Right?  I hope?