Rice

Rice Pilaf with Vermicelli and Mushrooms

Ingredients
1 12 cups rice
2 cups water
1 14 cups beef broth
Salt and pepper
3 tablespoons unsalted butter
4 ounces cut spaghetti or spaghetti broken into 1-inch pieces
1 small onion, chopped fine
1 pound button mushrooms, thinly sliced
2 cloves garlic, minced
14 teaspoon ground allspice
1 tablespoon fresh thyme, chopped
1 tablespoon soy sauce

Instructions
1. Place rice in sieve and rinse under cold water until the water runs clear. 

2. Microwave water and beef broth until hot, about 5 minutes. 

3. Melt 1 12 teaspoons butter in Dutch oven over medium heat until foaming.  Add pasta and cook, stirring occasionally, until browned, about 3 minutes.  Transfer to small bowl and set aside.  Add remaining butter to pan and heat until foaming.  Add onion, mushrooms, and sauté until lightly browned, about 10 to 15 minutes.  Stir in garlic, allspice, thyme, and soy sauce and cook until fragrant, about 30 seconds.  Add pasta and rice and stir to coat.  Cook until edges of rice grains begin to turn translucent, about 3 minutes. 

4. Stir in warmed broth and bring to boil.  Cover, reduce heat to low, and cook until liquid is absorbed and rice and pasta are tender, about 20 minutes.  Remove from heat and let stand, covered, for 10 minutes.  Fluff with fork, season with salt and pepper, serve. 
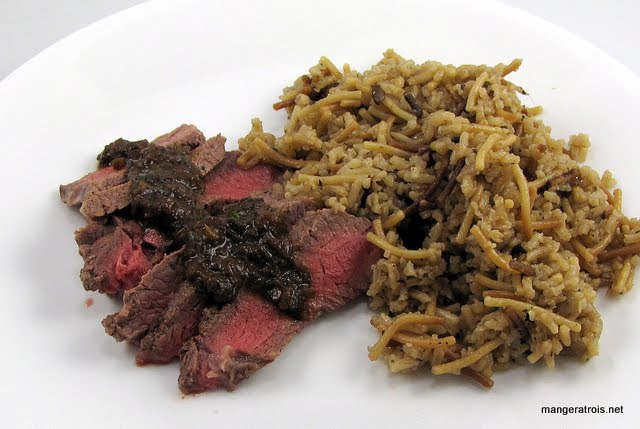
Rice a Roni

Comments
This recipe is from the 2010 Cook’s Country Annual.  It’s essentially homemade rice-a-roni and it was pretty tasty.  However, I did think it was a little bit bland and I’m not entirely sure why.  Next time I’ll add more spices, more salt, more broth instead of a mix of broth water… I’ll tweak it up somehow. 

Shown here with Strip Steaks with Balsamic Cream Sauce.

Cook’s Country 2010
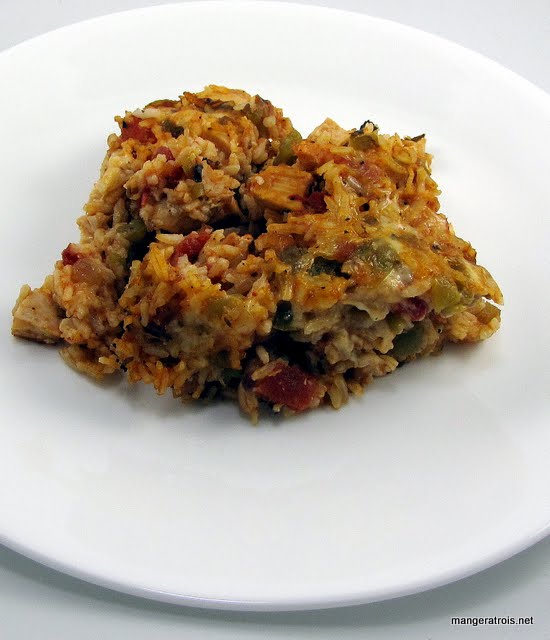
Mexican Chicken Rice Casserole

Ingredients
2 tablespoons olive oil
1 large onion, chopped
4 cloves garlic, minced
2 teaspoons kosher salt or 1 teaspoon table salt
1 teaspoon dried oregano
1 teaspoon cumin, ground or whole
14 teaspoon freshly ground black pepper
1 (14.5 ounce) can diced fire-roasted tomatoes (Muir Glen is the only brand I’ve found with these.)
2 (around 7 ounces each) cans roasted green chilies, drained and chopped
2 cups cooked rice (I used white, any type would work well.)
1 12 cups Monterey jack cheese, shredded
3-4 boneless skinless chicken breasts, cooked and chopped

Instructions
1. Preheat oven to 350*F. 

2. Heat olive oil in large ovensafe skillet over medium heat.  Add onion, garlic, salt, oregano, cumin, and pepper.  Cook, stirring occasionally, until onion is tender, about 5 minutes. 

3.  Add tomatoes and chilies to skillet, increase heat to high and simmer, until thickened, 4 to 5 minutes. 

4. Stir in rice, cheese, and chicken.  Transfer skillet to oven and bake until browned and bubbly, 30 to 35 minutes.  Remove from oven and let stand 10 minutes before serving. 

Note: If you do not have an ovensafe skillet, transfer everything to a lightly greased baking dish in step 4 and bake as directed. 

Mexican Chicken Rice Casserole

Comments
This recipe is from How to Boil Water, one of my favorite beginner cookbooks.  This recipe also demonstrates how important it is to read recipes carefully.  The original recipe called for “1 4-ounce can” of chilies and I parsed that as “14-ounce can”.  How important that space between the 1 and the 4 is!  That said, the end result was fantastic and we all had seconds of this for dinner.  I’m the most sensitive to spice and while the extra chilies made the dish spicy, it was a well-spiced sort of spiciness instead of a too-hot sort of spiciness.  And to think that I’d been worried this dish would be bland! 

Omitting the meat not only makes the dish vegetarian, but it would also make a fantastic side dish to a Mexican themed meal.  Much better than the rice from a box I usually make.  Other meats would also work well - ground beef, sausage, etc.  Additional veggies could also be added - sauteed red bell peppers, corn, zucchini, green onion, cilantro, or black beans.  Experiment at will!

How to Boil Water

Butternut Squash Risotto

Ingredients
1 medium butternut squash
1 tablespoon olive oil plus extra for brushing squash
Salt and pepper, to taste
2 leeks
1 tablespoon butter
1 clove garlic, minced
1 cup arborio rice
14 cup white wine
4 cups chicken or vegetable broth
12 cup Parmesan cheese

Instructions
1. Preheat oven to 425*F. Cut butternut squash in half, scoop out seeds, and brush all sides with olive oil.  Season with salt and pepper.  Place cut-side up on baking sheet and roast for 45 to 55 minutes, or until squash is tender.  Remove from oven and let cool.  Once cooled, scoop out squash into bowl and mash with fork. 

2. Trim leeks and cut in half lengthwise then cut into half moon slices.  Place in large bowl, fill with water, and separate with fingers to ensure all of the dirt is removed.  Rinse well. 

3. Heat butter and 1 tablespoon olive oil in medium pot over medium heat.  Add leeks and sauté until tender.  Add garlic and stir until just fragrant, 30 to 60 seconds.  Add rice and cook, stirring, for 1 to 2 minutes. Add wine and stir until absorbed. 

4. Working 12 to 1 cup at a time, add broth to rice mixture.  Stir often until broth is almost completely absorbed before adding more.  Repeat until rice is tender. 

5. Remove pot from heat and stir in squash, Parmesan cheese, and extra salt and pepper to taste. 

Risotto

Comments
This recipe is from Naturally Ella.  I chose it with Art in mind since he is a huge fan of squash risotto.  He’s actually a fan of winter squash in general which is pretty fantastic since I love the stuff.  Risotto is a great way to use most types of winter squash – it works well with most of them except spaghetti squash.  This will probably be a stable in the weeks to come.  I like the flavor of the leeks in this recipe, it’s a milder flavor than the usual onions I use. 

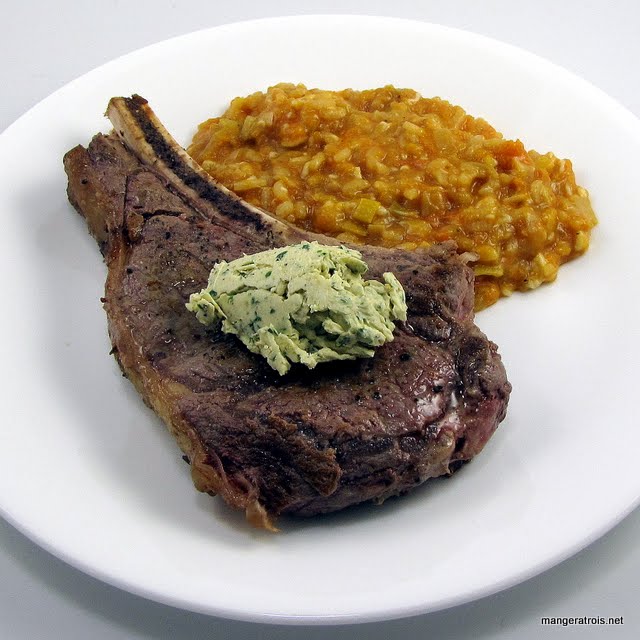
Shown here with Pan Seared Rib Eye and Garlic Butter.

Internet - Naturally Ella

Rice Cooker Ginger Green Rice

Ingredients
2 tablespoons olive oil
1 onion, chopped
4 cloves garlic, minced
2 cups jasmine rice, rinsed well
2 14 cups chicken broth
Salt and pepper, to taste
12 cup cilantro, minced
2 tablespoons ginger, finely grated
Juice of 1 lime

Instructions
1. Heat oil in a medium skillet over medium heat.  Add onion and cook until onion is translucent, about 5 to 7 minutes.  Add garlic and cook until fragrant, about 30 to 60 seconds.  Add rice and stir to coat.

2. Transfer mixture to rice cooker pot.  Add chicken broth and season with salt and pepper.  Stir.  Close the cover, set for regular cycle, and start. 

3. When machine finishes stir in cilantro, ginger, and lime juice  with a wooden spoon or rice paddle. 

Ginger Green Rice

Comments
I found this recipe at the blog “Week of Menus” and, since we love rice, thought it would be great to try some time.  The original recipe is made on the stovetop, which can be done easily by cooking the veggies in a pot and then adding the broth and rice, covering, and cooking 15-25 minutes or until tender.  I opted to make it in the rice cooker since it’s still my new toy and I’m always looking for new ways to use it as a result. 

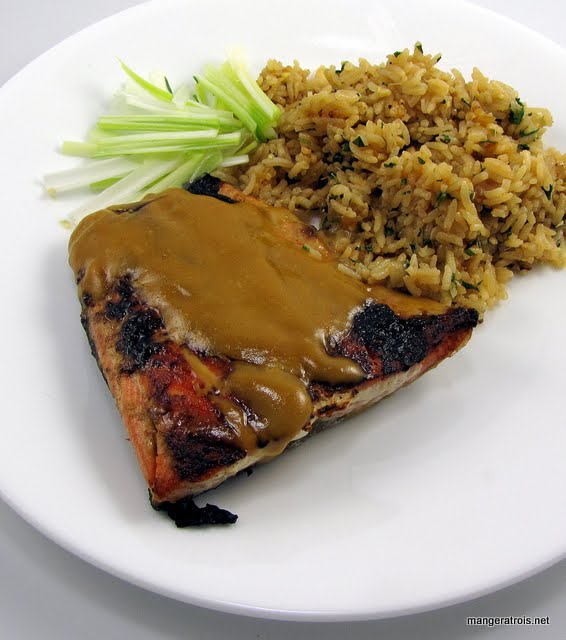
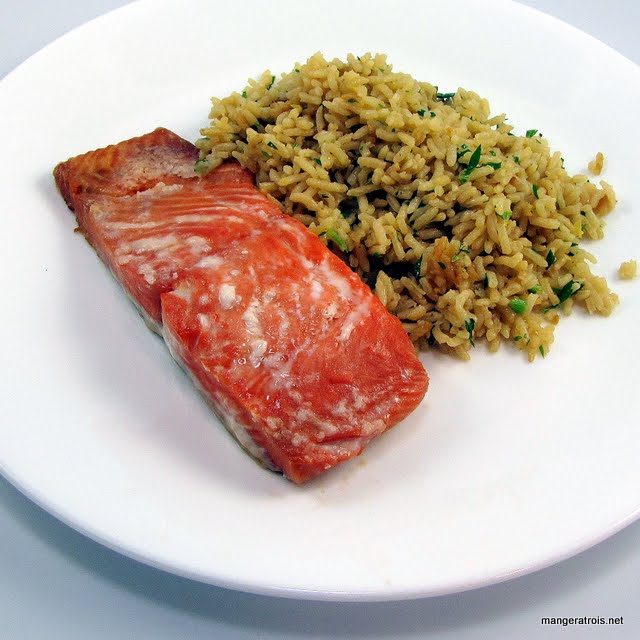
The rice was extremely flavorful thanks to the ginger and the cilantro; it also went very well with the flavors in the salmon and would go equally well with similarly flavored chicken dishes.  This recipe is definitely a keeper. 

Shown here with Asian Salmon.

Internet - Week of Menus

Rice Cooker Bell Pepper Jasmine Rice

Ingredients
1 tablespoon butter
12 onion, diced
1 large red, yellow, or orange bell pepper, diced
2-3 cloves garlic, minced
Zest and juice of 1 lemon
2 cups water, plus more if necessary
2 cups jasmine rice, rinsed well
Salt and freshly ground black pepper, to taste

Instructions
1. Melt butter in medium skillet over medium heat.  Add onion and bell pepper and cook, stirring, until softened.  Add garlic and cook until fragrant, about 30 to 60 seconds. 

2. Transfer cooked vegetables to rice cooker pot.  Add lemon zest.  Pour lemon juice into 4-cup liquid measuring cup and add water to equal 2 14 cups liquid total.  Add liquid and rice to rice cooker.  Season with salt and pepper.  Close the cover, set for regular cycle, and start. 

3. When machine finishes, fluff rice with wooden spoon or rice paddle and serve. 

Rice

Comments
I had planned on having delicious fresh corn to go along with grilled squash and steak but, alas, the corn was not fit for human consumption.  I did have much to work with in the fridge so I decided to make a quick lemon garlic rice dish.  Once I realized I had some onion and bell peppers, this was created.  The dish would be easy enough to make in a pot instead of a rice cooker, just add the liquid, cover the pot, and cook 15-25 minutes or until the rice is tender.  Other types of rice could also be used, just make sure to use the correct ratio of water to rice for the rice in question. 

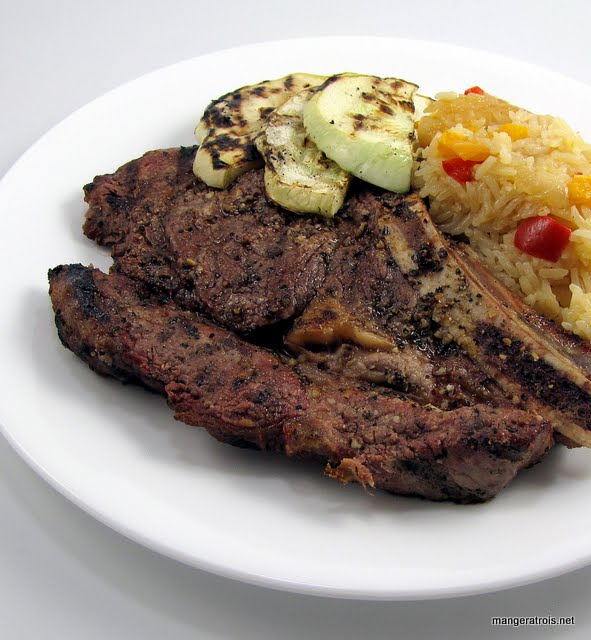
Shown here with grilled rib eye steak and grilled pattypan squash.  Aside from the rice, butter, and lemon, everything in this meal was local!

Person - Gwen

Rice Cooker Riz au Parmesan

Ingredients
3 tablespoons unsalted butter
14 cup onion, finely chopped
12 teaspoon garlic, minced
1 cup long grain white rice
1 23 cups chicken broth
Salt
Freshly ground black pepper
3 tablespoons Parmesan cheese, freshly grated

Instructions
1. Set the rice cooker for the Quick Cook or regular cycle. Place 2 tablespoons of the butter in the rice bowl. When melted, add the onion and garlic. Cook, stirring occasionally, until softened, about 2-10 minutes. Add the rice and cook, stirring, until all the grains are evenly coated and hot, about 10 minutes. Add the broth and salt and pepper to taste; stir just to combine. Close the cover and reset for the regular cycle.

2. When the machine switches to the Keep Warm cycle, let the rice steam for 10 minutes. Fluff the rice with a wooden spoon or rice paddle. This pilaf will hold on Keep Warm for up to 1 hour.

3. When ready to serve, stir in the remaining 1 tablespoon butter and the cheese. Serve immediately. 

Rice Cooker Riz au Parmesan

Comments
This recipe The Ultimate Rice Cooker Cookbook.  I hadn’t known that you could sauté in the rice cooker, but apparently you can!  I think that some of the heating element in my cooker might be controlled by weight, since nothing got really hot until I added the rice.  Everything went well once the rice was added and the resulting dish was pretty great.  Lance felt that it was a very light-feeling dish, the rice was nice and fluffy compared to my usual rice preparations.  It also wasn’t overwhelmingly cheesy which is always a plus with Lance. 

I doubled the recipe because I’ve got a large (10-cup) rice cooker, but if you have a 5-cup one you don’t need to double what’s shown here.  If you don’t have a rice cooker, you could make this in a saucepan with your usual rice to liquid ratio. 

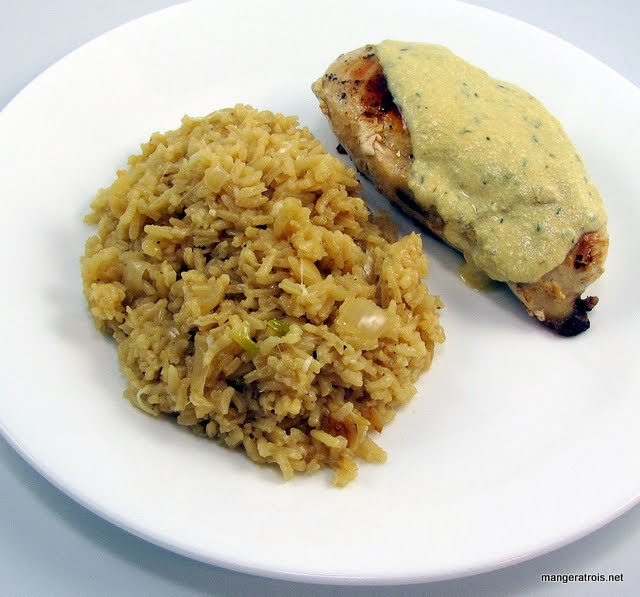
Shown here with Chicken with Mustard Wine Cream Sauce.

The Ultimate Rice Cooker Cookbook

Rice Cooker Lemon Rice

Ingredients
1 cup long grain white rice
1 12 cups chicken broth
1 pinch salt
1 clove garlic, peeled
2 teaspoons lemon zest
2 tablespoons unsalted butter
2 tablespoons fresh parsley, minced

Instructions
1. Place the rice in the rice cooker bowl. Add the broth and salt, stir to combine, then place the garlic in the center on top of the rice. Close the cover and set for the regular cycle.

2. When the machine switches to the Keep Warm cycle, add the lemon zest, butter, and parsley; stir to combine. Close the cover and let the rice steam for 10 minutes. Fluff the rice with a wood spoon or rice paddle. This rice will hold on Keep Warm for 1 to 2 hours.

Rice Cooker Lemon Rice

Comments
This recipe is from The Ultimate Rice Cooker Cookbook which I bought recently when I got my rice cooker.  One of my goals this week was to try out some rice cooker (recipes and I figured this would go well with the fish I planned to prepare.  I doubled the recipe because I’ve got a large (10-cup) rice cooker, but if you have a 5-cup one you don’t need to double what’s shown here. 

Next time, I think I’d increase the lemon zest and maybe add some lemon juice in with the chicken stock, I’d have preferred a more lemony rice dish.  I did enjoy it quite a bit and the lemony rice went well with the salmon. 

If you don’t have a rice cooker, you could make this in a saucepan with your usual rice to liquid ratio. 

Shown here with Salty Sugared Salmon.

The Ultimate Rice Cooker Cookbook

Smoked Salmon Risotto with Lemon and Mascarpone

Ingredients
6 ounces smoked salmon, divided (Not the lox style smoked salmon.)
2 tablespoons olive oil
1 onion, finely chopped
1 23 cups Arborio rice
1 clove garlic, finely chopped
1 cup white wine
4 cups chicken broth
3 ounces mascarpone cheese
3 tablespoons parsley, chopped
1 teaspoon lemon zest
Lemon juice, to taste
Salt and freshly ground pepper

Instructions
1. Reserve a few large pieces of salmon for garnish and roughly chop the remaining salmon.  Set aside. 

2. Heat oil in a large pot over medium high heat.  Add onion and sauté until soft and translucent, about 5 minutes.  Add the rice and garlic and cook for 2 more minutes, until rice is opaque and garlic is fragrant.  Add the white wine and 1 cup of broth.  Bring to a boil and reduce heat to medium.  Simmer, stirring frequently, until most of the liquid has been absorbed.  Add another cup of broth and continue to cook, stirring often, until absorbed.  Repeat additions until all the broth is used and rice is tender and creamy.  (If the rice is not tender after you’ve added all of the broth, add extra broth or water in the same manner until rice is tender.) 

3. Remove from heat.  Add mascarpone and stir until melted.  Add the chopped salmon, parsley, and lemon zest.  Stir well, season with lemon juice, salt, and pepper. 

4. Serve topped with pieces of  reserved salmon. 

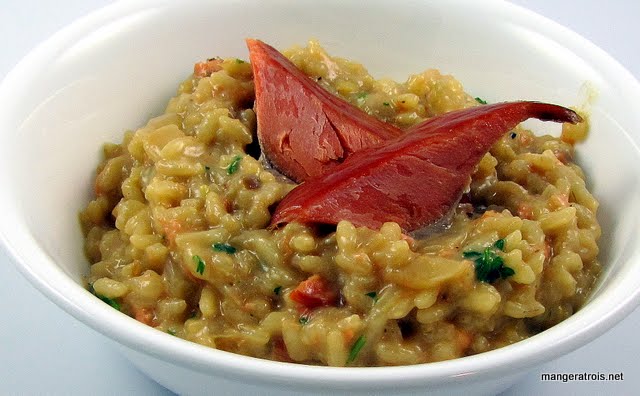
Smoked Salmon Risotto

Comments
It’s pretty safe to say that risotto is one of my favorite foods.  It’s infinitely flexible, easy to prepare, and always delicious.  I’ve averaged one new risotto recipe a month in the last 10 months and I’m always on the lookout for new variations.  I found this one at the Not So Humble Pie blog and knew I had to give it a try.  Better yet, with the addition of a nice salad, it’s a complete meal in and of itself.  This is always a bonus on busy evenings. 

It is a bit different than the risotto method I’ve used in the past as it doesn’t call for the broth to be heated prior to adding to the rice.  But I gave it a go and it worked!  How easy!  I might use this method for all risottos in the future! 

This risotto was fantastic and I hope it’s one that I’ll revisit in the future.  I highly recommend it.  The measurements for the mascarpone and smoked salmon don’t need to be exact, so feel free to eyeball the measurements if you don’t have a scale.

Internet - Not So Humble Pie

Cheesy Broccoli and Rice

Ingredients
2 slices white sandwich bread, torn into pieces
34 cup Parmesan cheese, grated
4 tablespoons unsalted butter, melted
1 clove garlic, minced
2 tablespoons unsalted butter, chilled
2 pounds broccoli, florets cut into 1-inch pieces, stems chopped
1 onion, chopped
1 14 cups white rice
4 cups chicken broth
1 14 cups half and half
1 teaspoon salt
2 cups extra-sharp cheddar cheese, shredded
18 teaspoon cayenne pepper

Instructions
1. Adjust oven rack to middle position and heat oven to 400*F. Pulse bread, 14 cup Parmesan, and melted butter in food processor until coarsely ground. (Or use a mini-grinder.)  Add garlic.

2. Microwave broccoli florets, covered, in large bowl until bright green and tender, 2 to 4 minutes; set aside. Melt remaining butter in Dutch oven over medium heat. Cook onion and broccoli stems until softened, 8 to 10 minutes. Add rice and cook, stirring constantly, until rice is translucent, about 1 minute. Stir in broth, half and half, and salt and bring to boil. Reduce heat to medium-low and cook, stirring often, until rice is tender, 20 to 25 minutes. Off heat, stir in cheddar, cayenne, remaining Parmesan, and broccoli florets.

3. Place Dutch oven in oven and bake until sauce is bubbling around edges and top is golden brown, about 15 minutes. Cool 5 minutes. Serve. 

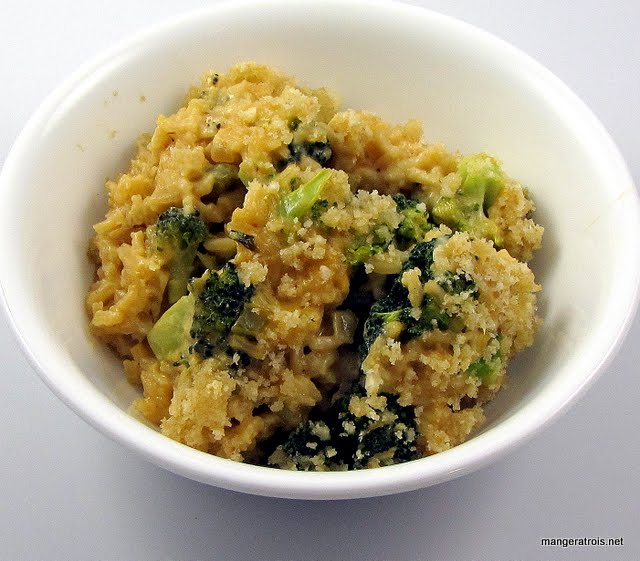
Cheesy Broccoli Bake

Comments
I thought this dish was fantastic.  It sort of reminded me of risotto, only in baked casserole form.  It was scrumptious.  The original recipe is from the 2009 Cook’s Country Annual.  I did exchange the food processor for my mini-grinder and baked it in the Dutch oven instead of the 13 by 9-inch pan the recipe called for in order to spare my dish washer.  He appreciated my generosity and benevolence.  He was also pleased that this dish wasn’t as cheesy as he thought it would be – since he’s not a lover of cheese, this is a good thing.

Cook’s Country 2009

Bacon and Egg Risotto

Ingredients
1 pound thick-cut bacon, cut into 14”-thick pieces
1 large onion, chopped
1 12 cups Arborio rice
1 clove garlic, minced
6-8 cups chicken broth, warmed (I do this in the microwave because I’m a heathen.  Feel free to do it in a saucepan if you’re not.)
14 cup Parmesan cheese, grated
4 green onions, sliced thinly
Salt and pepper
3-4 egg yolks 

Instructions
1. In large pot over medium heat, cook the bacon and onion until the bacon begins to crisp.  Stir in rice and cook for 3-4 minutes, or until the rice is opaque.  Drain rice mixture in a fine-mesh sieve and return to pot.  Add garlic, stirring until fragrant. 

2. Stir in 12 cup warm broth and continue to cook rice, stirring, until the broth is absorbed.  Repeat this process, adding 12 cup broth at a time, until the rice is tender.  (This will take 20-25 minutes and use 6-8 cups of broth.) 

3. Stir in the cheese and green onions. Season with salt and pepper, to taste.  (I added lots of pepper and no salt at all since the bacon and the cheese added enough for my tastes.)

4. While the risotto is still very, very hot, divide it among 3 or 4 warmed bowls. (I put them in the oven after I’d removed the roast and turned the oven off.  You could easily microwave them if you’d like.  Or just work quickly.)  Make an indentation in each mound of risotto for a yolk. Place a yolk in the center of each mound and serve immediately, instructing your diners to use their forks to mix the yolk in with the rice in order to cook the yolk slightly and make a sauce.

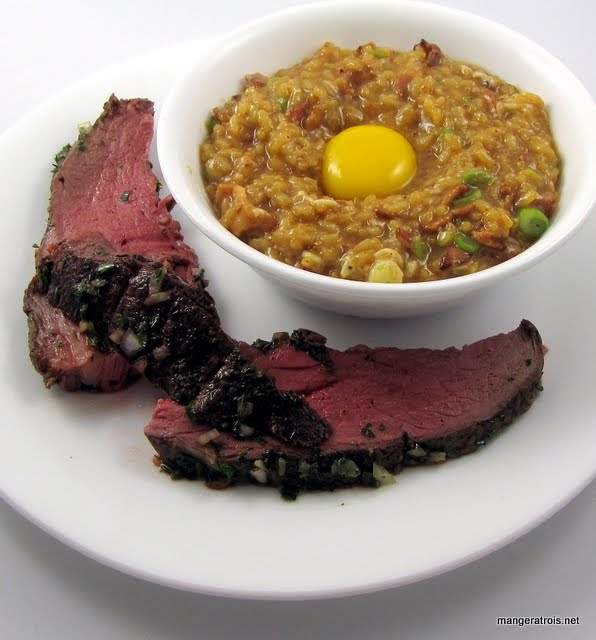
Bacon and Egg Risotto

Comments
I love risotto.  I love bacon.  I love eggs!  And this recipe, from the brilliantly named Crepes of Wrath, combines ALL THREE.  Oh happy (and unhealthy) day!  It was scrumptious and extremely bacony.  So bacony that I believe I will only use 12 pound the next time I prepare this risotto version.  Still, it was delicious. 

Shown here with Herbed Roast Beef.

Internet - Crepes of Wrath