Gardening

Gardening - The Layout

I keep worrying about losing my garden layout, so I thought I’d go ahead and share it here.  That way you can see my plan and I won’t have to worry about misplacing it!  Each cell is one square foot of garden space.

The Left Side

Tomato

Cucumber x2

Tomato

Cucumber x2

Parsley x4

Garlic x4-9

Garlic x4-9

Garlic x4-9

Basil x1-4

Garlic x4-9

Garlic x4-9

Garlic x4-9

Cilantro

Garlic x4-9

Garlic x4-9

Garlic x4-9

The Center

Tomato

Bell Pepper

Tomato

Summer Squash

Garlic x4-9

Garlic x4-9

Garlic x4-9

Garlic x4-9

Garlic x4-9

Garlic x4-9

Garlic x4-9

Garlic x4-9

Garlic x4-9

Garlic x4-9

Garlic x4-9

Garlic x4-9

The Right Side

Tomato

Zucchini

Tomato

Onion x16

Garlic x4-9

Garlic x4-9

Garlic x4-9

Swiss Chard x4

Garlic x4-9

Garlic x4-9

Garlic x4-9

Lettuce x4

Garlic x4-9

Garlic x4-9

Garlic x4-9

Lettuce x4

Gardening – Building a Better Mini Greenhouse

As mentioned in my previous gardening post, I have to start seeds outside due to the presence of cats inside.  To achieve this goal, I ordered a mini greenhouse that seemed like it would work well enough for my little operation. 

The first mini greenhouse I ordered was the Misco GH31 Three Shelf Greenhouse and, well, it sucked.  The plastic struts were brittle and broke when the metal rods were inserted.  The top plastic struts were miscut so that the metal rods didn’t even fit.  I used quite a bit of duct tape to secure the metal to the plastic and figured it would be good enough to last until I found a better solution. 

The second greenhouse I ordered was the Esschert Design GT32 Hardwood Small Greenhouse.  With a hefty price tag and quality materials, I figured I’d be all set.  Sadly, when it arrived, the hinges were damaged beyond use, one of the wood frames had come apart, and the wood was gouged in a number of places.  Really neat design but super poorly manufactured.  (The shipping box didn’t show any damage, so it seems that the product was just very poorly assembled.)  This one got returned to Amazon with quite a bit of disappointment.  It had so much potential!

Next, I decided that the MacGuyver’d greenhouse would suffice for this first season and that Art and I could take our time to build a better one together.  Shortly after I made this decision, the zipper decided to detach from the plastic, requiring more duct tape, and causing me to reevaluate my decision to wait. 

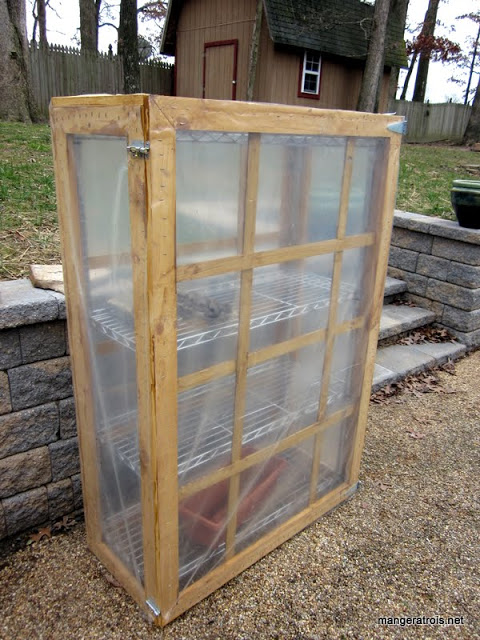
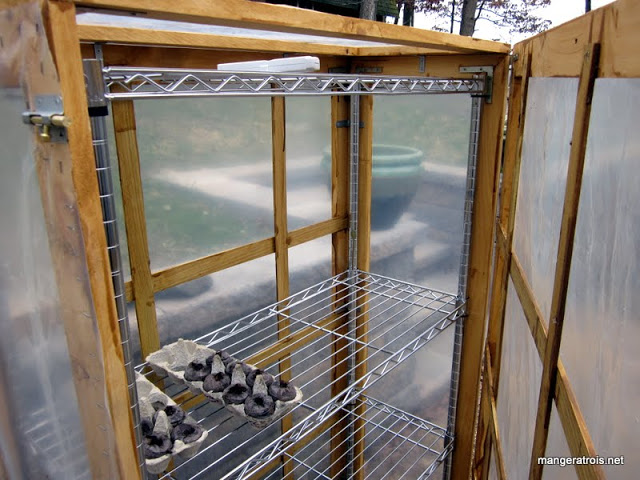
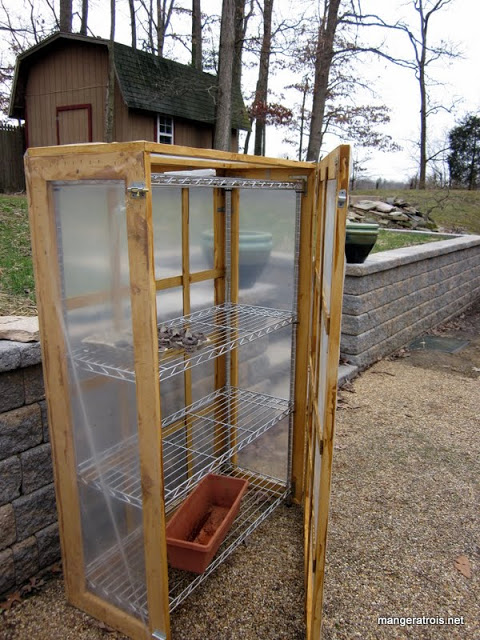
After thinking about possibilities, I decided that the best, and hopefully easiest, option would be to build a wood frame out of 1x3s that would surround a purchased shelving unit.  We picked up this unit from our local Home Depot, wood, hinges, brackets, screws, wood glue, and waterproofing.  And lath, sponge brushes, a drop cloth, and probably a few other things I’ve forgotten about. 

We built three walls, a door, and a top.  The goal was two tops – one to frame and give support and one that would be hinged - but I realized late last night that I’d measured for the tops wrong, so we couldn’t  build them as planned.  We did end up using one of the incorrect ones anyway, but we’re going to attach a hinged top later on that will allow for better temperature control once the days warm up.  We’re also going to build an interior frame for the door to give the whole structure more support that it has now. 

For the most part, everything went well.  Then we got to the part where we put the door on and things stopped going so well.  We had picked up the wrong size of hinges and what we had doesn’t quite do the trick.  It’ll work for now and I’ll be able to handle a few minor adjustments by myself during the next few weeks.  Art and I got the bulk of the work taken care of and it’s certainly functional as it is now! 

greenhouse

Right now I’ve only got two cartons of seeds starting – parsley and lettuce.  The white thing on the top shelf is the remote sensor for the weather station. 

greenhouse

The whole thing!  The bin on the bottom is from the defective composter (the company has since sent us a new one that ROCKS so far) that will eventually be filled with compost to help warm up the air in the greenhouse. 

greenhouse

With the door closed.  We used 6mil greenhouse film to cover the walls. 

weather

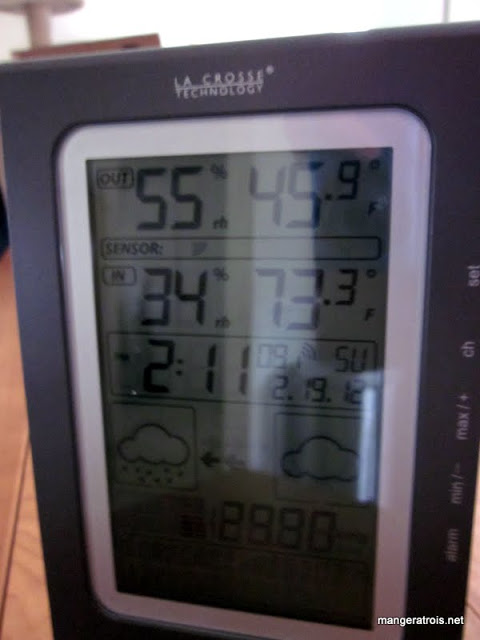
This is the weather station receiver which we keep on the dining table.  My parents gave us this for Christmas since my family sort of has this Thing about the weather.  I tend to use NOAA and my eyeballs for the weather, so I thought that using the weather station to monitor the greenhouse’s stats was a great idea!

Gardening - Gathering the Supplies

Today is the day.  The last day of the year.  The day to get my act together for Gardening 2012.  Since I already mapped out my garden, this mainly involved figuring out which plants to order from my chosen seed vendor and ordering my seed starting stuff. 

To rewind slightly, I’ve already planted 30 square feet of garlic.  Lance and I attempted to do this before Thanksgiving but I managed to forget how to walk down stairs thanks to our beautiful new wall and ended up in Urgent Care with a badly twisted ankle.  Art, Lance, and I all finally finished the planting of garlic on November 27th. 

Since I’m planning on doing Square Foot Gardening, I’m planning everything by the square foot.  I have 48 square feet to work with in my garden, 30 of which are taken up by garlic, and the remaining 18 will be taken up by various vegetables and herbs. 

My main trial with garden planning is the whole “need to start seeds inside” issue.  I have cats.  My cats like to eat plants, knock them off counters, etc.  I don’t have a place where I can set up a seed starting rig that would be safe from these kitties which limits my options significantly.  Hopefully House 2.0 will have some sort of garage.  Or spare room.  Or something. 

In the meantime, I needed to explore other options and, after research and talking with my awesome local farmers, I opted to try a mini outdoor greenhouse.  I might try it out inside first, but it will probably end up on the patio in the backyard.  I’m going to start seeds in peat pellets placed in old egg cartons and then transplant them when they’re ready.  Hopefully this will work out well! 

I also went ahead and ordered all of my seeds and transplants for the garden.  It’s quite the list.  I’ll include the number of square feet I’m planning for and any other notes below. 

Tomatoes
Aside from garlic, tomatoes are my main reason for gardening.  I’m planning on six square feet in my raised bed plus two extra plants to go into the lovely pots my parents gave us for our new wall.  Tomatoes come in two varieties.  The indeterminate ones grow as vines – I’ve got six of those coming.  The determinate ones grow as bushes – I’ve got two of those ordered for the pots.  Since I’m paranoid about tomatoes, I also ordered six indeterminate transplants, just in case my seed starting fails.  I’m not sure what I’ll do with the transplants if the seed starting succeeds, but I’ll cross that bridge when I get to it.  You can probably tell by the tomato plant names that I started at the beginning of the list and picked the first eight I came to. 

Tomato #1 – Austin’s Red Pear OG
Tomato #2 – Beam’s Yellow Pear
Tomato #3 – Black from Tula
Tomato #4 – Black Krim
Tomato #5 – Black Plum
Tomato #6 – Blondklopfchen
Tomato #7, determinate – Black Sea Man OG
Tomato #8, determinate – Cream Sausage
Tomato Transplant #1 – Amish Paste
Tomato Transplant #2 – Brandywine
Tomato Transplant #3 – Cherokee Purple
Tomato Transplant #4 – Gold Medal
Tomato Transplant #5 – Mexico Midget
Tomato Transplant #6 – Lemon Drop

Cucumbers
I’m doing two squares of cucumbers.  I can’t believe I used to hate them since now I can’t get enough!  (The OG stands for organic.)  Cucumbers are planted two to a square foot, so I should have four plants total.  They also grow in vines like the tomatoes do. 

Cucumber #1 – Early Fortune OG
Cucumber #2 – Bushy OG

Lettuce
I’m devoting two squares to lettuce which I hope will be enough.  In theory, I can grow four plants per square so I went ahead and ordered four different varieties. 

Lettuce #1 – Amish Deer Tongue
Lettuce #2 – Green Oakleaf OG
Lettuce #3 – Webb’s Wonderful OG
Lettuce #4 – Forellenschluss

Onion
I’m not sure how well the onion attempt will work, but I’ve got one square slated for them.  I can plant 16 per square, which I think might mean I get 16 onions total?  Seems space intensive to grow onions. 

Onion – Long Red Florence

Bell Pepper
These are one to a square so I might not end up with enough.  We’ll see.  This is why the first year is an experiment, eh? 

Bell Pepper – Bull Nose Bell

Summer Squash
I’ve been told that people who grow summer squash always end up with too much.  I’m sticking to just two squares and, therefore, two plants.  One zucchini and one yellow.  We’ll see if we’ve got it coming out of our ears at the end of the growing season.

Zucchini – Black Beauty OG
Yellow Squash – Summer Crookneck OG

Swiss Chard
I love the stuff even though it’s only been a part of my life for the last three years or so.  Apparently my mom loves it as well.  Who knew?  I guess she didn’t want to share it with anyone when I was a kid.  This variety has beautiful multicolored stalks. 

Swiss Chard – Five Color Silverbeet OG

Herbs
I’ve got three squares for herbs so I’m sticking to the ones I use most – basil, parsley, and cilantro.  I can always branch out into more pots if I need to, but we’ll see how they go in the raised bed. 

Basil #1 – Genovese OG
Basil #2 – Lettuce Leaf
Cilantro – Cilantro OG
Parsley – Giant from Italy

Since this is the first year of gardening, I’m trying to keep the vegetable selection simple and only plant the veggies I know that we’ll use.  In the future, if all goes well, I’ll branch out a bit with plants that are more challenging both in terms of growing and usage.  Until then, I’m keeping it simple.

It looks like I’ll be starting my earliest seeds in February, but I’ll try to make a garden update before then with pictures of my seeds and seed starting rig once everything arrives.
Gardening – The Build

I have wanted to start gardening for quite some time.  I’ll bounce the idea around in my head but I’ve never actually taken the plunge to just do it and get started.  I experimented with growing my own herbs in pots, which was enjoyable, but I’ve really wanted to grow garlic and tomatoes and other delicious goodies to supplement what I can get at the farmers market

Needless to say, I’ve had quite a lot of time to research and figure out which methods I believe will suit me best.  Then, a friend of mine linked to an awesome looking composter and that was the thing that finally pushed me over the precipice.  I couldn’t justify getting an awesome composter if I didn’t garden, you see! 

This week, during one of the many rain storms, I dragooned Art into going to Lowes with me to pick up some wood, screws, brackets, and weed paper.  Aside from getting drenched, this was a fairly easy process.  Actually, the entire construction was fairly easy and took us less than an hour total. 

building

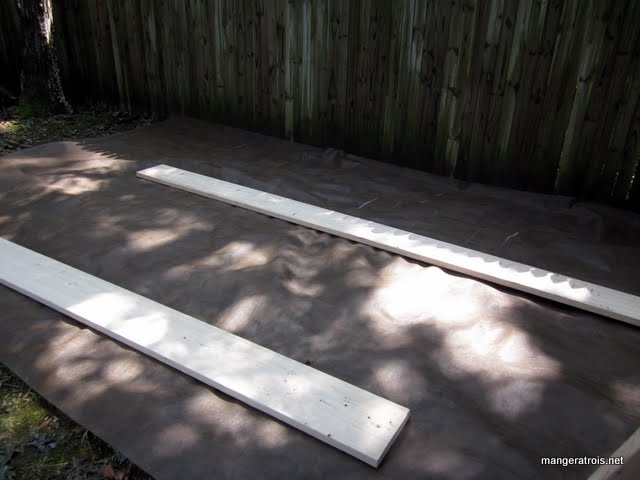
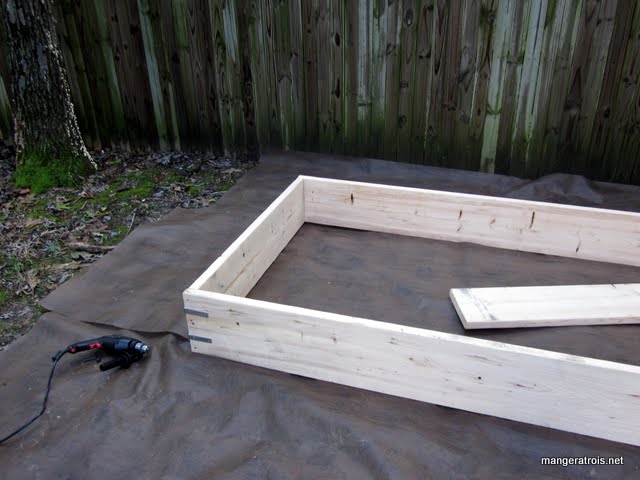
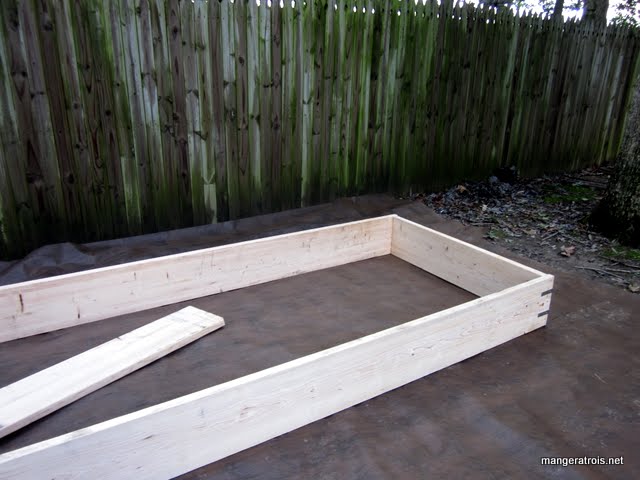
We started by spreading out three 16-foot lengths of 4-foot weed paper.  This will go under the raised bed to keep weeds from invading my veggies.  The two long sides of the bed are made from 2x12s that are 12 feet long. 

building

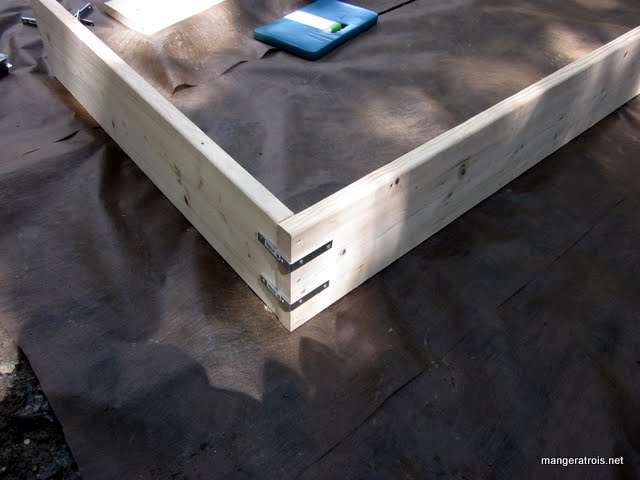
We screwed each corned together with three 3-inch screws and then secured them even more with two L brackets held in by 1 14-inch screws. 

building

Working together, we made short work of all four corners. 

building

Although we did get eaten by bugs. 

building

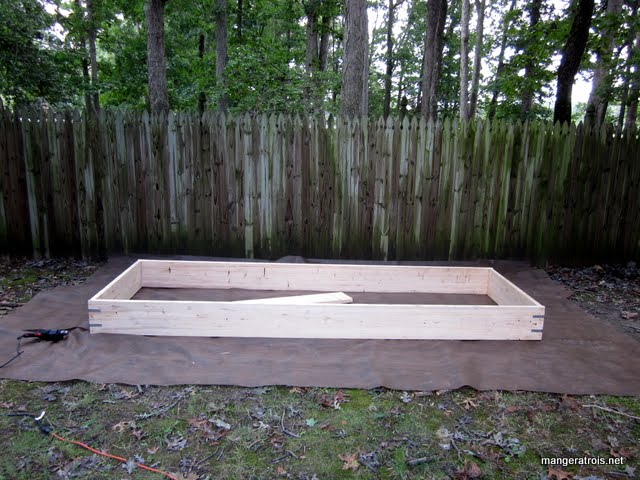
The final bed is 4-foot by 12-foot.  We’re going to mulch around it at some point and then fill it with soil enriched with our own compost.  I was worried it would be too small when I was planning it, but now that we’ve built the thing it seems HUGE. 

My first planting project will be to plant garlic in the fall and we’ll see where it goes from there!