Vegetables

Stir-Fried Sesame Broccoli

Ingredients
14 cup orange juice
2 tablespoon soy sauce
1 tablespoon sesame oil
1 12 teaspoons brown sugar
14 teaspoon red pepper flakes
1 12 teaspoons cornstarch
3 cloves garlic, minced
2 teaspoons fresh ginger, minced
2 teaspoons olive or vegetable oil
2 12 pounds broccoli, cut into florets and stems cut into 14-inch thick pieces
2 teaspoons sesame seeds

Instructions
1. Whisk orange juice, soy sauce, 2 teaspoons sesame oil, brown sugar, pepper flakes, and cornstarch in medium bowl. Combine garlic, ginger, and remaining 1 teaspoon sesame oil in small bowl.

2. Heat vegetable oil in now-empty skillet over medium-high heat until just smoking, Add broccoli and stir-fry for 30 seconds. Add 12 cup water, cover, and cook over medium heat until broccoli is tender-crisp, 2 to 4 minutes. Drain broccoli and transfer to serving bowl tented with foil. Add garlic mixture to empty skillet and cook over medium-high heat until fragrant, about 30 seconds. Add orange juice mixture and cook until sauce thickens and coats back of spoon, about 2 minutes. Pour sauce over broccoli and sprinkle with sesame seeds. Serve. 
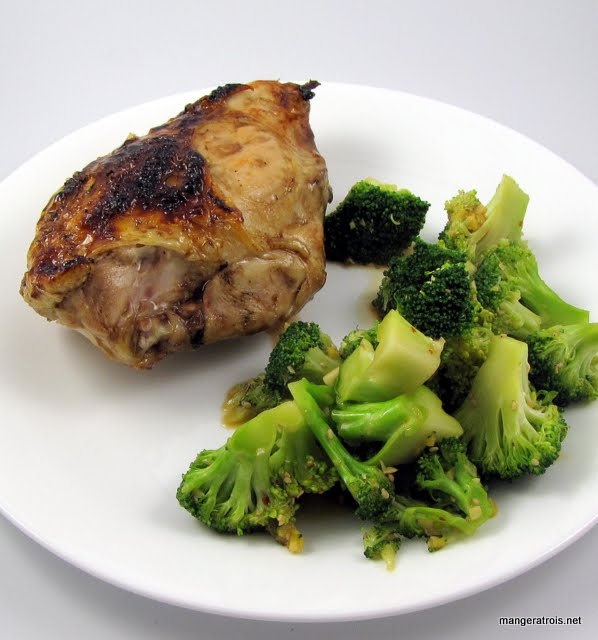
Stir-Fried Sesame Broccoli

Comments
I found this recipe in the 2007 Cook’s Country Annual and, since I’m always looking for new ways to prepare broccoli, decided to try it out.  The broccoli was sweet, spicy, and very flavorful.  It was also perfectly done, just at the border between tender and crisp.  Very delicious and extremely easy!

Shown here with Balsamic Glazed Chicken.

Cook’s Country 2007
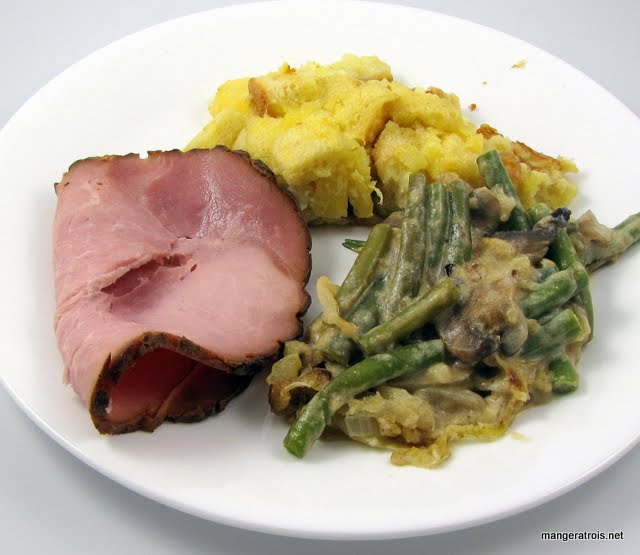
Green Bean Casserole (The From Scratch Version)

Ingredients
For the topping
2 medium onions, thinly sliced
14 cup all purpose flour
2 tablespoons panko bread crumbs
1 teaspoon kosher salt
2-3 tablespoons olive oil

For beans
1 pound fresh green beans, rinsed, trimmed and cut in half

For sauce
2 tablespoons unsalted butter
12 ounces mushrooms, sliced
1 teaspoon kosher salt
12 teaspoon freshly ground black pepper
2 cloves garlic, minced
14 teaspoon ground nutmeg
2 tablespoons all purpose flour
1 cup chicken broth (Vegetable broth works as well.)
1 cup half and half

Instructions
1. Preheat oven to 475*F.  Combine the onions, flour, panko, salt and olive oil in a large mixing bowl and toss to combine.  Spread the onions out on a large baking sheet and bake in the oven until golden brown, tossing every 10 minutes, about 30 minutes.  Remove from oven and set aside.  Reduce oven heat to 400*F. 

2. Meanwhile, bring a large pot of salted water to boil.  Add the green beans and blanch for 5 minutes.  Drain in a colander and rinse well with cold or ice water to stop cooking.  Drain well and set aside. 

3. Melt the butter in a large oven-safe skillet or Dutch oven over medium-high heat.  Add the mushrooms, salt and pepper and cook, stirring occasionally, until the mushrooms give up some of their liquid, about 4 to 5 minutes.  Add the garlic and nutmeg and continue to cook for another 1 to 2 minutes.  Sprinkle the flour over the mixture and stir to combine, cook for 1 minute.  Add the broth and half and half.  Bring to a simmer and stir until the mixture thickens, about 5 to 10 minutes. 

4. Remove from the heat and stir in 14 of the onions and all of the green beans. Top with the remaining onions. Place into the oven and bake until bubbly, approximately 15 minutes. Remove and serve. 

GB Casserole

Comments
This recipe is from my favorite food tv personality, Alton Brown.  I saw him prepare it a few years ago and, although it looked good, I dismissed it because I was quite happy with the Traditional Green Bean Casserole that I’d grown up eating. 

Time passed and I realized, at Thanksgiving 2009, that traditional Green Bean Casserole just wasn’t doing it for me anymore.  I remember Alton Brown’s recipe and decided to give it a try with my mom over Christmas.  We were all very pleased with the results so I made it again to be able to post it here. 

I think this recipe has won a spot in my Thanksgiving repertoire! 

Shown here with Pineapple Stuffing (and store-bought ham).

Internet - Alton Brown

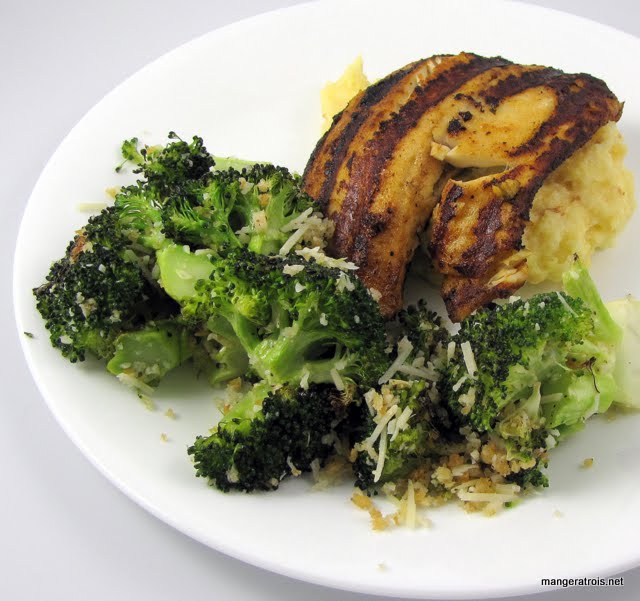
Oven Roasted Broccoli

Ingredients
1 pound broccoli, cut into bite size pieces (Stem included where it’s not dried out.)  
2 tablespoons olive oil
2 cloves garlic, minced
12 teaspoon kosher salt
14 teaspoon freshly ground black pepper
13 cup panko bread crumbs
14 cup Parmesan cheese, shredded or grated (Cheddar will also work.)

Instructions
1. Preheat oven to 425*F.

2. Place the broccoli into a mixing bowl and toss with the olive oil, garlic, kosher salt and pepper and set aside.

3. Spread the panko into a rimmed baking sheet and place into the oven for 2 minutes or until lightly toasted. Remove the panko from the oven and add to the bowl with the broccoli mixture. Toss to combine. Return the mixture to the baking sheet, place in the oven and roast just until the broccoli is tender, 8 to 10 more minutes. Remove from the oven, toss in the cheese and serve immediately.

Broccoli

Comments
This recipe is from Alton Brown and it made me a believer in the goodness of roasted broccoli.  I’ve been a believer in broccoli my whole life, but this is the first recipe I ever tried that called for roasting it and, wow, it’s something awesome.  

The only problem I have with this recipe is that I find the cheese and panko doesn’t adhere very well to the broccoli, so I have to sort of smoosh the florets into the coating as I eat them.  I’m not sure how to rectify this.  Next time I’ll try using grated parmesan instead of shredded in hopes that the smaller bits might work better.  

Shown here with Grilled Tilapia with Smoked Paprika and Parmesan Polenta.

Internet - Alton Brown

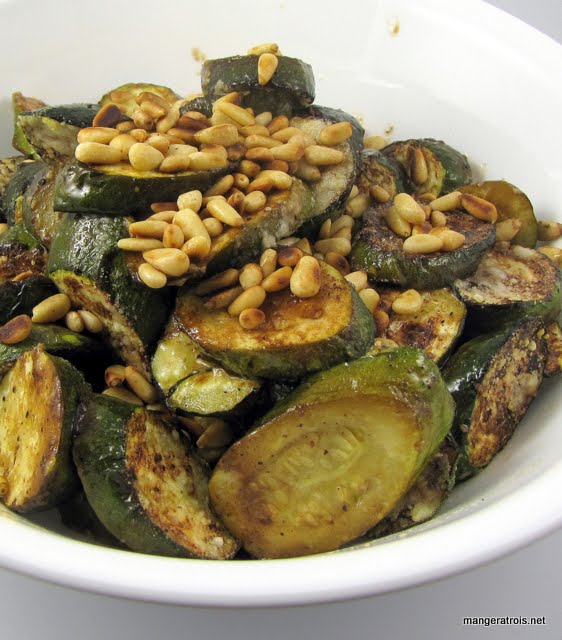
Balsamic Zucchini

Ingredients
4 pounds zucchini, cut diagonally into 34-inch-thick slices
14 cup olive oil
34 teaspoon salt
12 teaspoon coarsely ground black pepper
14 cup balsamic vinegar
1 12 ounces Parmesan cheese, grated (about 12 cup)
13 cup pine nuts, toasted (about 1 ounce)

Instructions
1. Preheat broiler.

2. Toss zucchini with oil, salt and pepper in a large bowl.  Arrange zucchini in a single layer on one or two shallow baking sheets.  

3. Broil one pan of zucchini 3 to 5 inches from the heat, without turning, until browned in spots and beginning to soften, 4 to 6 minutes.  Drizzle 2 tablespoons (or 4 if using one pan) over broiled zucchini and shake pan a few times.  Continue to broil until most of the vinegar is evaporated, about 2 minutes.  Sprinkle 14 cup cheese (or 12 cup cheese if using one pan) over broiled zucchini and broil until cheese is melted, about 1 minute more.  

4. Cook second pan of zucchini the same way, if using two pans.  

5. Serve sprinkled with pine nuts.  

Zucchini

Comments
I found this recipe on epicurious.com quite some time ago and finally got around to making it for Game Day to serve with manicotti.  I was pretty pleased with the dish.  It was relatively simple and extremely tasty.  My zucchini filled up one sheet pan, so I added all of the balsamic and cheese to that pan.

Internet - Epicurious

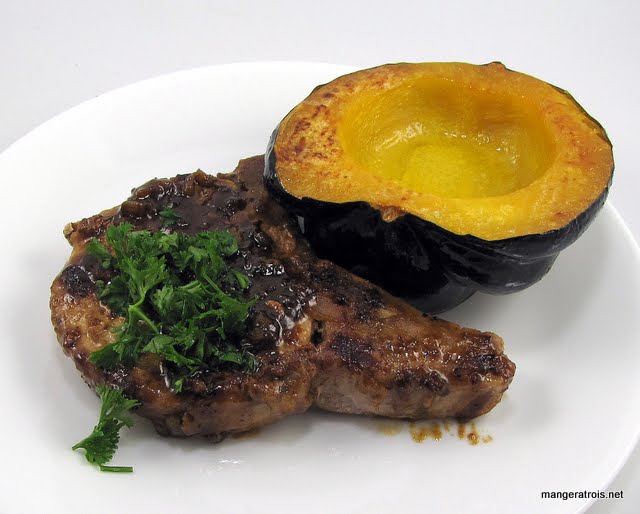
Roasted Acorn Squash

Ingredients
2 acorn squash
Olive oil
Salt and pepper
Butter or margarine (I use Brummel.  I love Brummel.)

Instructions
1. Preheat oven to 350*F.  

2. Carefully cut acorn squashes in half and remove the seeds and stringy bits.  Lightly coat inside and out with olive oil and season with salt and pepper.  

3. Place squash cut side down on a baking sheet and cook until tender, about one hour.  (For easy clean up, line the baking sheet with aluminum foil.)  

4. Remove from oven, turn cut side up with tongs, spoon some butter into each squash half, and cook for 5 more minutes or until it melts.  

Roasted Acorn Squash

Comments
I am the big (and only) lover of acorn squash in my family, so I try not to serve it too often during the season.  However, I’ve been stockpiling them throughout the last few weeks of the market season and finally decided to roast them all up.  I emailed my mom for advice on how to do that and this is the method she described to me.  They turned out deliciously and Art even had two halves!  Impressive!  

Shown here with Maple-Mustard Pork Chops.

Person - Mom

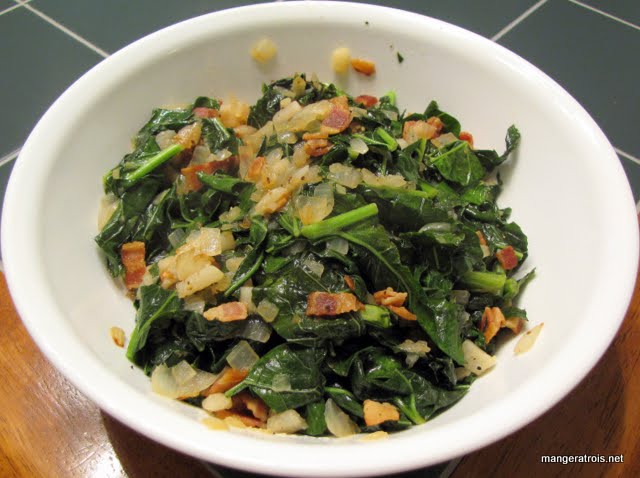
Deluxe, or not, Turnip Greens

Ingredients
1 small turnip, peeled and diced
Dash of sugar
1 large bunch turnip greens, chopped
6 slices bacon, diced
1 onion, diced
1 tablespoon lemon pepper seasoning
Salt and pepper, to taste

Instructions
1. Bring a small pot of water to boil and add the sugar and turnip.  Cook for 10 to 15 minutes, or until tender.  Drain.  

2. In a large skillet, sauté the bacon until almost crisp.  Add the onion and cook 7 minutes, or until the onion is soft.  Add the greens, toss, and cook until just wilted.  Add the turnip, lemon pepper, and salt and pepper to taste.  

Turnip Greens

Comments
I was looking for a way to spruce up Cheater Greens and ran across this recipe on epicurious.com.  Sadly, we all felt that Cheater Greens would have been much tastier.  I’m not sure what didn’t work about this recipe, but it just wasn’t very enjoyable. I think we just prefer something more simple and this was too busy.

Internet - Epicurious

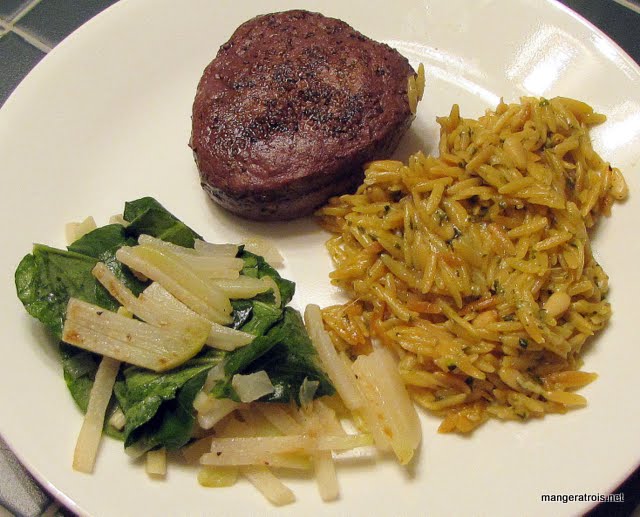
Sautéed Kohlrabi and Cress

Ingredients
1 pound small kohlrabi
1 bunch cress (The cress I had was land cress from my CSA.  You can use whatever cress you’ve got.)
2 tablespoon unsalted butter
2 tablespoons fresh lemon juice

Instructions
1. Peel kohlrabi with a vegetable peeler and cut into 2-inch long matchsticks.  Discard coarse stems from cress.  

2. In a large nonstick skillet heat butter over medium high heat until foam subsides.  Saute kohlrabi, stirring, until tender crisp, 5 to 10 minutes.  Add lemon juice and continue stirring for 1 more minute.  Remove skillet from heat and stir in cress.  Season with salt and pepper and serve.  

Kohlrabi

Comments
I got this recipe from epicurious.com and, well, I goofed.  I read the comments before making the dish, as I usually do, and decided to take the advice of the commenters.  This involved boiling the kohlrabi for 10 minutes before sautéing it.  The result was fine, but it would have been significantly better if the kohlrabi had still been on the crispy side of the spectrum instead of the soft side.  

This was the first time I’ve ever had kohlrabi and there’s a story that goes along with it.  I went into the kitchen to start dinner prep and commented to Lance that I had started to feel hungry all of a sudden.  He said that he was feeling hungry too, so I offered him a piece of kohlrabi.  And this is when I found out that a) kohlrabi is really fantastic raw, it’s got a sort of cabbage flavor and b) Lance grew up eating raw kohlrabi as a snack and loves the stuff.  I was actually surprised that I had enough left to cook the dish with!  I ran back to the market and got two more just because it was so tasty!  Who knew?  

Shown here with Filet Mignon with Red Wine Sauce and Creamy Parmesan Orzo.

Internet - Epicurious

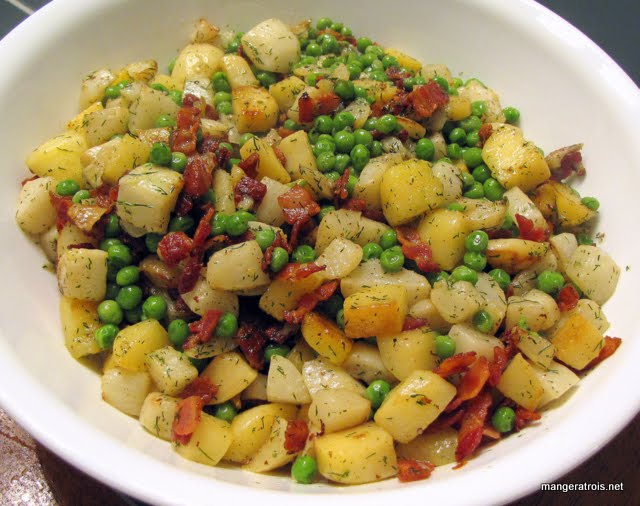
Peas and Turnips with Bacon and Dill Butter

Ingredients
6 tablespoons butter, room temperature
4 tablespoons fresh dill, chopped
12 ounces center-cut bacon, chopped
1 14 pounds turnips, peeled and cut into 12-inch cubes
16 ounces frozen peas, thawed

Instructions
1. Mix 6 tablespoons butter and 3 tablespoons dill in small bowl to blend. Season with salt and pepper.

2. Sauté bacon in heavy large skillet over medium heat until brown and crisp. Using slotted spoon, transfer bacon to paper towels leaving fat in pan.  

3. Increase heat to medium-high.  Add turnips to bacon fat and sauté until tender and golden, about 10-15 minutes. Drain turnips and return to skillet, leaving heat at medium-high.  Add peas and dill butter and stir until peas are heated through, about 3 minutes. Stir in bacon. Season with salt and pepper. Transfer to bowl and serve.  

Turnips, peas, bacon

Comments
This recipe is from epicurious.com, I found it while trying to find a new way to use the turnips in my CSA box.  Oh my gosh, it was delicious.  The flavor of the dill went extremely well with the turnips and the bacon was a great component as well.  I believe that, next time, I’d make this with only 4 tablespoons of butter instead of the 6, because it was a bit buttery in the end.  The recipe called for twice as many peas, but we all thought it was better with 16 ounces instead of 32.  Turnips have a lovely flavor and this dish was extremely simple.

Internet - Epicurious

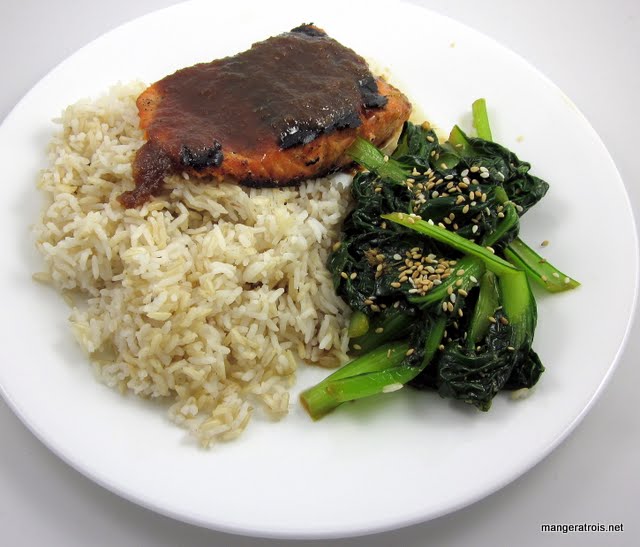
Chilled Sesame-Ginger Tatsoi

Ingredients
14 cup rice wine vinegar
4 dashes Sriracha
Black pepper, to taste
2 tablespoons sugar
Salt, to taste
2 tablespoons sesame oil
1 12 pounds tatsoi, washed and dried
13 cup soy sauce
1 tablespoon ginger, minced
Sesame seeds, for garnish

Instructions
1. Bring a large pot of salted water to a rolling boil. Add the tatsoi, blanch for I minute, drain, immediately plunge into ice water to stop the cooking process, and drain again.

2. In a small bowl, combine the soy sauce, sesame oil, ginger, sugar, vinegar and sriracha. Mix well, and season to taste with salt and pepper.

3. In a large bowl, combine the tatsoi and dressing, and mix well.  Refrigerate until well chilled, garnish with sesame seeds and serve.

Chilled Sesame-Ginger Tatsoi

Comments
This recipe is from eCuisine.org and was delicious!  Be careful with the sriracha if you’re not a lover of spicy foods, I think I might have used a smidgen too much for my liking, but all the other flavors were great.  The last time I made Tatsoi we were a bit disappointed by the bitterness of the leaves.  This recipe takes care of that nicely by blanching in salted water; there wasn’t even a trace of the bitterness we experience before.  In a way, this reminded me a lot of seaweed salad that you get in Japanese restaurants.

Shown here with Soy-Ginger Salmon.

Internet - eCuisine

Eggplant and Summer Squash Parmesan

Ingredients
2 small eggplants
2 yellow squash
2 zucchini
3 eggs
3 tablespoon water
13 cup all purpose flour
18 teaspoon salt, or to taste
Oil for frying (I used 12 cup olive oil and 12 cup butter)  
2 cups marinara sauce, plus more to taste (I used Roasted Tomato Sauce #2 and wished that I had used something a bit more plain)
2 cups mozzarella cheese, shredded
13 cup Parmesan cheese, grated

Instructions
1. Preheat oven to 375*F.

2. Cut eggplant into 14-inch thick slices.  Cut yellow squash and zucchini into 14-inch thick planks lengthwise.  

3. In a large, shallow bowl, beat the eggs with the water. Using a whisk, stir in the flour and salt until smooth.

4. In a large skillet, heat the oil over medium heat until it bubbles when a drop of batter is tossed in.

5. Dip 3 or 4 of the vegetable slices into the batter, and then fry in a single layer until browned on the bottom, about 3-4 minutes. Turn and cook until browned on second side. Remove from skillet and drain on paper towels. Repeat with remaining eggplant slices until all are fried.

6. Spread 12 cup of the sauce in the bottom of a 9 x 13 x 2-inch baking pan. Layer 12 of the slices on the bottom of the pan. Top with 1 cup of the sauce, spreading to cover the vegetable slices. Sprinkle 1 cup of the mozzarella over the sauce and top with 2 tablespoons of the Parmesan.

7. Place the remaining vegetable slices over the cheese and spread the remaining 12 cup of the sauce over the vegetables. Sprinkle the remaining 1 cup of mozzarella over the sauce. Sprinkle with the remaining Parmesan.

8. Cover with aluminum foil and bake 20 to 25 minutes or until heated through and the cheese has melted.  Serve with pasta if desired.  

Note: If you prefer saucier Parmesan, add more sauce in steps 6 and 7.  
Vegetable Parmesan

Comments
I firmly believe that the best way to sell a non-believer on eggplant is through Eggplant Parmesan.  Over the years, I’ve found that summer squash also makes fantastic Parmesan and that combining the two is even better.  It came as a surprise when I realized that I haven’t made Eggplant Parmesan yet this market season so I decided to rectify that.  It also came as a surprise when I realized that I didn’t have a recipe for the dish in my files.  I found this one in the awesome 1,000 Vegetarian Recipes by Carol Gelles.  It’s the cookbook that carried me through my years of vegetarianism and I still turn to it as a valuable resource.  

I wasn’t completely thrilled with how this turned out, it uses a non-traditional coating that’s closer to tempura than the normal breading that the dish calls for.  It was delicious, but I think I prefer the traditional method.

1,000 Vegetarian Recipes