Recipes

Funeral Potatoes

Ingredients
2 pound bag frozen hash browns (I prefer “southern style”)
1 tablespoon oil or butter
14 cup onion, diced
1 can (10 12 ounces) cream of mushroom soup (I prefer Healthy Request)
12 soup can milk
1 cup sour cream
Salt and pepper, to taste
2.8 ounce can French’s Fried Onions
1 cup sharp cheddar cheese, shredded

Instructions
1. Heat oven to 350*F.  Thaw frozen potatoes in a sieve under running water.  

2. Heat oil or butter over medium heat in a small skillet.  Add onion and sauté until soft.  

3. Place onions, potato, cream of mushroom soup, milk, and sour cream into a 9x13-inch baking dish and stir well.  Add salt and pepper to taste.  

4. Sprinkle fried onions over top, followed by cheddar cheese.  Bake, uncovered, for 40 minutes or until hot and bubbly throughout.  

Funeral Potatoes

Comments
I have no idea why these are called funeral potatoes, I think it might be because they’re a common food to take to those who are grieving, but your guess is as good as mine.  It’s a pretty traditional dish, super easy, and always delicious.  You can increase the milk if you want a creamier dish, but I find them great just the way they are.  

Shown here with Crunchy Baked Pork Chops.

Unknown

Crunchy Baked Pork Chops

Ingredients
Table salt
4 boneless center-cut pork chops 6-8 ounces each, 34 to 1 inch thick, trimmed of excess fat
4 slices hearty white sandwich bread torn into 1-inch pieces
1 small shallot, minced (about 2 tablespoons)
3 medium cloves garlic, minced (about 1 tablespoon)
2 tablespoon olive oil
Ground black pepper
2 tablespoon Parmesan cheese, grated
12 teaspoon fresh thyme leaves, minced
2 tablespoon fresh parsley, minced
14 cup plus 6 tablespoons flour
3 large egg whites
3 tablespoon Dijon mustard

Instructions
1. Adjust oven rack to middle position and heat oven to 350*F. Dissolve 14 cup salt in 1 quart water in medium container or gallon-sized zip-top bag. Submerge chops, cover, and refrigerate 30 minutes. Rinse chops under cold water and dry thoroughly with paper towels.

2. Meanwhile, pulse bread in food processor until coarsely ground, about eight 1-second pulses (you should have about 3 12 cups crumbs). Transfer crumbs to a rimmed baking sheet and add shallot, garlic, oil, 14 teaspoon salt, and 14 teaspoon pepper. Toss until crumbs are evenly coated with oil. Bake until deep golden brown and dry, about 15 minutes, stirring twice during baking time. Increase oven temperature to 425*F.   Cool crumbs to room temperature. Toss crumbs with parmesan, thyme, and parsley.

3. Place 14 cup flour in shallow dish. In second shallow dish, whisk egg whites and mustard until combined; add remaining 6 tablespoons flour and whisk until almost smooth, with pea-sized lumps remaining.

4. Spray wire rack with nonstick cooking spray and place in rimmed baking sheet. Season chops with pepper. Dredge 1 pork chop in flour; shake off excess. Using tongs (or your hands), coat with egg mixture; let excess drip off. Coat all sides of chop with bread crumb mixture, pressing gently so that a thick layer of crumbs adheres to chop. Transfer breaded chop to wire rack. Repeat with remaining 3 chops.

5. Bake until instant-read thermometer inserted into center of chops registers 150*F, 17 to 25 minutes. Let rest on rack 5 minutes before serving.
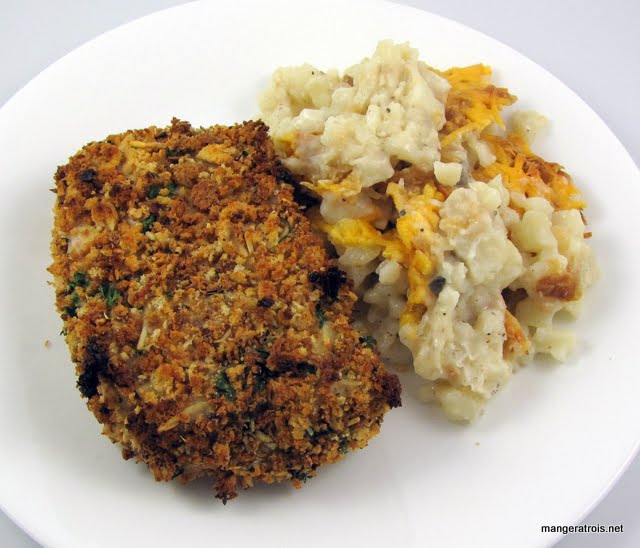
Baked Pork Chop

Comments
This recipe is from the 2008 Annual of Cook’s Illustrated.  I recently caught the episode of America’s Test Kitchen where they made these chops and decided that they’d be worth a try.  They came together without too much trouble and took maybe an hour start to finish.  You can assemble the bread crumbs and dredging stations while the pork brines, so there isn’t a lot of idle time.  

These were fantastic.  The breading is super flavorful and the chops came out flavorful and moist.  Even Art, who has never been a fan of pork chops, had a hard time resisting his urge to eat the one we had leftover.  I will definitely be making these again in the future.  

Shown here with Funeral Potatoes.

Cook’s Illustrated 2008

Swiss Chicken Cutlets

Ingredients
4-6 chicken cutlets
2 tablespoons flour
12 teaspoon black pepper
1 tablespoon butter
12 cup chicken broth
14 cup dry white wine
1 tablespoon fresh oregano, chopped, or 1 teaspoon dried oregano
4-6 thin slices Swiss cheese

Instructions
1. Combine flour and pepper, then toss gently with chicken.

3. Heat butter over medium heat in a large skillet.  Sauté chicken for 5-6 minutes on each side or until nicely browned.  

4. Add remaining ingredients, reduce heat and simmer, covered, until cooked through, 10-12 minutes.  Place cheese on top of chicken in the last 5 minutes of cooking.  Serve.  

Swiss Chicken Cutlets

Comments
I’ve had this recipe for years but rarely make it.  The original recipe called to roll the cheese in the chicken but that method always failed for me.  I finally gave up on the rolling thing and just melted the cheese on top of the chicken at the end.  Perfection.  Flavorful, tender, moist chicken.  The flavors are mild enough that this dish will pair well with a wide range of side dishes.

Shown here with Peas au Gratin and Roasted Potatoes.

Unknown

Spaghetti Squash with Lemon and Capers

Ingredients
1 large spaghetti squash
2 tablespoons olive oil
Salt and pepper
4 tablespoons butter
1 tablespoon capers, drained and rinsed
14 cup onion, diced
14 cup zucchini, diced
2 tablespoons fresh lemon juice
2 tablespoons parsley leaves, minced
18 cup tomato, diced

Instructions
1. Preheat the oven to 400*F.

2. Cut squash in half lengthwise and scoop out all seeds.  Rub all over with olive oil, salt and pepper.   Place squash cut side down on a baking sheet, cover with foil, and bake until the rind is slightly soft, about 20-45 minutes.  (I got tired of waiting for mine to bake at about the 30 minute mark and I finished them up in the microwave.  Feel free to cook them all the way in the microwave if you’re pressed for time.)  

3. Scrap the meat out with a fork (it will be stringy) and reserve, keeping warm.  

4. Meanwhile, in a hot skillet, melt the butter and continue to cook until it darkens slightly.  Add the capers, onion and zucchini and cook, stirring, until tender.  Stir in the lemon juice and parsley and season with salt and pepper.  

5.  In a large bowl combine the squash, butter sauce, and tomatoes.  Serve.  

Spaghetti Squash

Comments
This is adapted from a recipe I found on Foodtv.com while searching for an exciting way to use the spaghetti squash from my CSA haul.  Art and Lance aren’t huge winter squash fans, so it’s a challenge to figure out how to prepare it in a way that will be appealing.  I grew up eating winter squashes roasted with butter, so I’m pretty easy to please!  This recipe looked appealing and has the bonus of using many of the vegetables I already have from the market.  (It actually called for red bell pepper as well but I didn’t have those so I just doubled the zucchini instead.)  It would be simple to double if you’re serving more than three people.  The flavor was great, nice and lemony from the juice and the capers.  It went extremely well with the salmon I served it with and also the jerk chicken that Art made for himself.  

Shown here with Grilled Sweet and Saucy Salmon.

Internet - Food TV

Grilled Sweet and Saucy Salmon

Ingredients
1 teaspoon lime zest
2 tablespoon lime Juice
2 cloves garlic
2 green onions, cut into 2-inch lengths
12 cup cilantro
12 cup jelly (The original recipe calls for jalapeno jelly which I couldn’t find.  I used some Peach Jalapeno Jelly that I got from a local farmer at the market and it was amazing)  
2 tablespoons butter
4 salmon fillets (6-8 ounces each, 1 14 inches thick), skin removed if desired
Salt and freshly ground black pepper

Instructions
1. Place the lime zest, juice, garlic, green onions, cilantro, and jelly into a food processor, blender, or immersion blender container and process until smooth.  Heat the glaze in a small saucepan over medium heat until just bubbling, 2 to 3 minutes. Remove from the heat and transfer 14 cup of the glaze to a small bowl to cool slightly. Stir the butter into the glaze remaining in the saucepan, cover, and set aside.

2.  Fire up grill and heat until hot.  

3. Make a 6 to 7-inch strip of aluminum foil that will cover the length of the grill.  Spray it with cooking spray and place on the grill.  (This is what you will cook the salmon on.)  Season the salmon with salt and pepper, brush each side of fillet with 12 tablespoon of the reserved glaze (without butter), and place skin(ned) side up on the foil.

4. Place the salmon over the hot fire and grill until the glaze forms a golden brown crust, 6 to 8 minutes. (Move the trays to the cooler part of the grill if the fillets darken too quickly.) Using tongs, flip the salmon and cook 1 minute. Spoon half the buttered glaze over the salmon and cook until the center of each fillet is still just translucent, about 1 minute. Transfer the salmon to a platter and spoon the remaining buttered glaze over it. Serve.  

Grilled Salmon

Comments
This is adapted from a recipe from The Best of America’s Test Kitchen 2008.  I admit, I had a lot of trepidation since I felt like I was doing everything wrong.  I forgot to spray the foil; I didn’t let the salmon cook long enough for all the steps, etc.  However, even with the mistakes, this was fantastic.  The peach jalapeno jelly worked great and added a neat sweetness to the fish.  I’m pretty thrilled about how this turned out, Lance and I both enjoyed our pieces.  (Art had chicken.)  Aside from remembering to spray the foil, I wouldn’t change a thing the next time I make this.  

Shown here with Spaghetti Squash with Lemon and Capers.

America’s Test Kitchen 2008

Panzanella (Bread Salad)

Ingredients
1 pound loaf bread, something crusty that won’t get mushy (I used “Como” bread from my local Safeway)
3 pints cherry tomatoes, halved
1 cucumber, diced
1 medium red onion, diced
14 12 ounce can chickpeas, drained and rinsed
2 tablespoons fresh basil, chopped
2 tablespoons fresh oregano, chopped
6 ounces olive oil
3 ounces red wine vinegar
2-3 cloves garlic
Salt and pepper, to taste

Instructions
1. Preheat oven to 400*F.  While it’s heating cut bread into 1-inch cubes.  Spread cubes out on rimmed baking sheet and place in oven.  Toast for 10-20 minutes until slightly crispy but not hard.  Remove from oven and let cool on the sheet.  

2. Meanwhile, prepare remaining ingredients.  Place tomatoes, cucumber, onion, and chickpeas in a large bowl and toss.  Add basil and oregano and stir to combine.  

3. Using a whisk or an immersion blender combine oil and vinegar.  If using an immersion blender blend the garlic as well.  Otherwise, mince the garlic and whisk it into the dressing.  

4. Add bread to bowl and toss to combine.  Add the dressing and stir well to coat the bread and vegetables.  Add salt and pepper to taste and enjoy!  

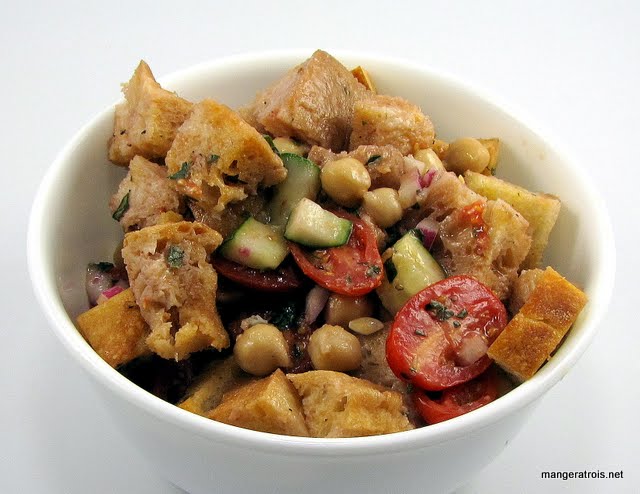
Panzanella

Comments
Panzanella is one of those things that I’ve always been interested in trying but haven’t ever gotten around to.  I’ve been seeing quite a few recipes cropping up in various places online, so I figured that I’d give it a go.  I’m not entirely sure that red wine vinegar was the correct choice, I might use balsamic next time or a mixture of the two. Red wine vinegar is definitely the right choice.

This was amazing.  The bread held up really well and it was even better after sitting in the fridge for 3-4 hours.  The bread held up even after 8 hours in the fridge, which is when I took this picture.  Yum!

Unknown

Nacho Beef Skillet

Ingredients
1 12 pounds lean ground beef
1 (14 12 ounces) can diced tomatoes with mild green chile, undrained, plus enough water to equal 2 12 cups
1 (8 ounces) box Zataran’s Yellow Rice (or similar)
1 (16 ounces) bag frozen corn kernels, thawed
1 (16 ounces) bag frozen Southwest Blend, thawed (The kind I buy has corn, black beans, jalapenos, and red bell peppers)
2 cups Mexican cheese blend, shredded

Instructions
1. Brown ground beef in large skillet over medium-high heat until thoroughly cooked, stirring frequently. Drain.

2. Add water, tomatoes, and rice mix; mix well. Bring to boil over high heat, reduce heat to low; cover and cook 10 minutes.  Add corn and southwest blend, cook for 10 more minutes or until rice is tender and water is absorbed.

3. Stir in cheese until melted and serve.  

Nacho Beef Skillet

Comments
This recipe originally came from one of those checkout aisle cooking magazines, I believe it was a Pillsbury one.  I’ve modified it significantly and then tweaked my modifications over time.  This is the end result.  It’s a great simple skillet meal when you’re pressed for time.  It also works well as a dip for chips.  I thaw the veggies in a sieve with some running water but they’re still cold when I add them to the dish so the corn retains a nice bite.  If you can’t find the southwest blend, you could add a can of rinsed black beans instead.

Unknown

Red Pepper Risotto

Ingredients
8 cups chicken broth
3 tablespoons olive oil
12 medium onion, diced
2 red bell peppers, diced (Mine weren’t quite completely red yet)
1 34 cup Arborio rice
34 cup dry white wine
Salt and pepper, to taste
12 teaspoon turmeric
4 to 6 ounces soft goat cheese (I used half of a 10.5 ounce log)
12 cup Parmesan cheese, grated

Instructions
1. Bring broth to a simmer in a medium pan or microwave until hot.  

2. In a large pot, heat olive oil over medium heat. Add diced onions and cook until translucent, about 1 to 2 minutes. Add red peppers and cook until soft, 8 to 10 minutes. Add rice and stir for a minute or two to coat.

3. Add wine and cook, stirring, until fully absorbed.  

4. Start adding the broth, 1 cup at a time.  Stir often until the broth is fully absorbed into the rice.  Repeat this process, slowly adding more broth and stirring until absorbed, until the rice is tender, about 20-30 minutes.  You might not need to use all the broth, save what you don’t use for future cooking.)  

5. Once rice is done, turn off the heat and stir in the turmeric.  Test for seasoning and add salt and pepper as needed.  Add cheeses and stir until fully melted and incorporated.  Serve.  

Red Pepper Risotto

Comments
This recipe comes from the great Pioneer Woman.  I saw it a few days before last week’s market and remembered it when I saw the red bell peppers.  Most risotto recipes I make only call for one cup of rice and this makes nearly double.  As a side dish, this could easily serve 6 people, if not more.  

The only change I would make to this next time is to add some garlic with the onion.  

Shown here with Pan Seared Duck Breasts Attempt #1.

Internet - Pioneer Woman

Pan Seared Duck Breasts Attempt #1

Ingredients
4 boneless duck breasts
Salt and freshly ground black pepper, to taste

Instructions
1. Preheat oven to 400*F. Score the duck fat with a sharp knife, being careful not to pierce the flesh.

2. Season well with salt and pepper and place into an oven safe skillet fat side down.

3. Turn heat under the skillet to low and cook until the fat is rendered. 20-30 minutes.

4. Turn the breasts over and place skillet into the oven. Cook until breasts are medium-rare to medium, about 5-10 minutes and 165*F on an instant-read thermometer.

5. Let rest 5 minutes before serving. Save fat for future use if desired.  

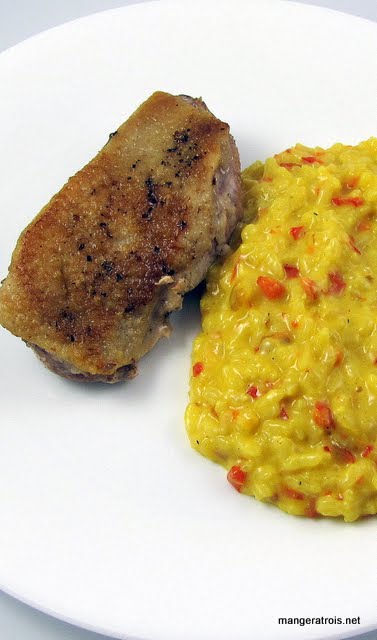
Duck

Comments
This represents my first attempt at cooking duck breasts.  I picked them up after dinner at BRABO and then scoured the internet and my cookbooks for the best way to prepare them.  The skin didn’t crisp up the way I was hoping that it would, hopefully that’s something I’ll be able to rectify in future attempts.  The duck was delicious, flavorful, and perfectly medium-rare.  

Shown here with Red Pepper Risotto.

Unknown

Szechuan Green Beans with Pork

Ingredients
4 tablespoons soy sauce
4 tablespoons water
2 tablespoons dry sherry
2 teaspoons sugar
1 teaspoon cornstarch
12 teaspoon ground white pepper
12 teaspoon red pepper flakes
12 teaspoon dry mustard
2 tablespoon vegetable oil
1 pound green beans, stem ends snapped off and cut into 2-inch pieces
1 pound ground pork
6 cloves garlic, minced
2 tablespoons fresh ginger, minced
3 green onions, sliced thin
1 teaspoon sesame oil

Instructions
1. In a small bowl, stir together the soy sauce, water, sherry, sugar, cornstarch, white pepper, pepper flakes, and mustard until sugar dissolves; set aside. (You can use an immersion blender for this step.)  

2. Heat the vegetable oil in a 12-inch nonstick skillet over high heat until just smoking. Add the beans and cook, stirring frequently, until crisp-tender and the skins are shriveled and blackened in spots, 5 to 8 minutes (reduce heat to medium-high if beans darken too quickly). Transfer the beans to a large plate or serving bowl.  

3. Reduce the heat to medium-high and add the pork to the now empty skillet. Cook, breaking the pork into small pieces, until no pink remains, about 2 minutes. Drain the pork and return to hot skillet.  

4. Still over medium-high heat, add the garlic and ginger; cook, stirring constantly, until fragrant, about 30 seconds. Stir the sauce to recombine and return the beans to the pan with the sauce. Toss and cook until the sauce is thickened, 5 to 10 seconds. Remove the pan from the heat and stir in the green onions and sesame oil. Serve over rice, if desired.  

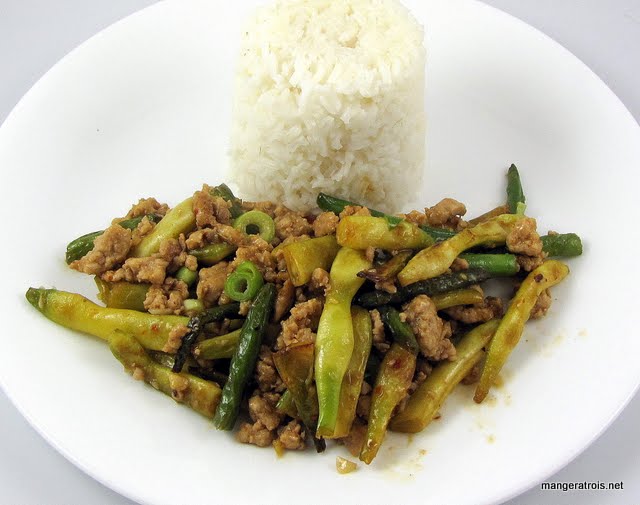
Szechuan Green Beans with Pork

Comments
This is adapted from a recipe found in The Best of America’s Test Kitchen 2008.  I’m sort of on an American’s Test Kitchen/Cook’s Illustrated kick at the moment.  I increased the sauce ingredients and the pork from what the original recipe called for.  I actually made what you see here with a mixture of wax and green beans, since I happened to get a bunch of wax beans in my CSA box this week.  In the future, I’d probably up the amount of green beans to 1 12 pounds to get a higher veggie to pork ratio.  I believe that this sauce and basic method would work quite well with broccoli and other vegetables as well.  It did have a kick to it thanks to the red pepper flakes, so if you’re not a fan of spicy food you might want to reduce the amount of red pepper or even omit it all together.

America’s Test Kitchen 2008