Recipes

Crispy Oven-Fried Cod

Ingredients
34 cup dry breadcrumbs
34 cup yellow cornmeal
1 teaspoon salt
14 teaspoon cayenne pepper
4 (6 ounce each) pieces cod
2 large eggs, lightly beaten
6 tablespoons olive oil

Instructions
1. Heat oven to 500*F. 

2. Combine breadcrumbs, cornmeal, salt, and cayenne in large, sealable plastic container and shake to mix.  Put eggs in shallow bowl or container. 

3. Season fish with salt and pepper.  Working with 1 piece of fish at a time, put fish in breadcrumb mixture and shake to coat.  Dip fish in eggs, then shake in crumbs again to coat.  Transfer fish to plate.  Repeat with remaining fish pieces. 

4. Heat 3 tablespoons oil in large oven safe skillet over high heat.  Fry fish on one side until golden brown, about 1 minute.  Flip fish, add remaining 3 tablespoons oil, and cook 1 minute more until second side is golden brown.  Transfer skillet to oven and bake until fish is just cooked through, about 5 to 6 minutes. 

Crispy Oven-Fried Cod

Comments
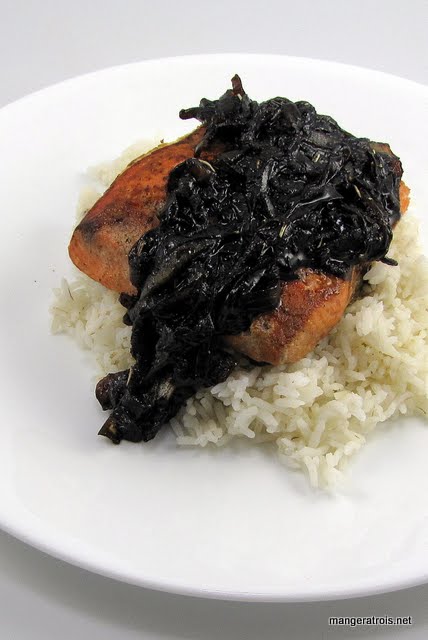
This recipe is from epicurious.com and I picked it because I haven’t made cod in a while.  I’d be happy to always have salmon on fish night, but I try to vary it up for Lance’s sake from time to time.  Aren’t I benevolent?  The coating on this cod was flavorful and I was pleased with how crispy it turned out.  I had leftovers in sandwich form with bread, mayonnaise and some relish.  This is a nice, basic recipe which means it pairs well with just about everything. 

Shown here with Parmesan Garlic Roasted Potatoes.

Internet - Epicurious

Cheeseburger Pie

Ingredients
1 unbaked pie crust (I like the Pillsbury kind.)
2 tablespoons olive oil
1 onion, finely chopped
4 cloves garlic, minced
1 pound ground beef
12 teaspoon paprika
1 teaspoon garlic salt
14 teaspoon black pepper
Pinch red pepper flakes
12 teaspoon thyme
3 tablespoons mustard
2 tablespoons balsamic vinegar
2 tablespoons Worcestershire sauce
13 cup seasoned breadcrumbs (I used garlic and herb breadcrumbs.)
1 12 cups sharp cheddar cheese, shredded
2 large eggs

Instructions
1. Heat oven to 400*F.  Spread pie crust into pie plate or round casserole dish.  Bake for 10 minutes, remove from oven. 

2. Heat oil in large skillet over medium-high heat.  Add onions and cook until onions start to brown, about 7 to 8 minutes.  Add garlic and cook until fragrant, about 30 seconds.  Add ground beef, paprika, garlic salt, black pepper, red pepper, and thyme.  Cook, stirring occasionally, until beef is browned and cooked through, about 5 minutes.  Drain beef mixture if necessary and transfer to large bowl. 

3. Add mustard, balsamic vinegar, Worcestershire, bread crumbs, and 12 cup cheese.  Stir well.  Add eggs and mix until well combined.  Spoon mixture into pie crust and top with remaining cheese.  Bake 40 minutes, until crust is golden and cheese has browned. 

Cheeseburger Pie

Comments
This recipe is from The Cookbook Chronicles blog and I think the cheese topping got a little bit too brown!  My mom used to make cheeseburger pie and I always loved it, so I figured this would make a nice winter dinner.  The flavors of the mustard, vinegar, and Worcestershire all shone through nicely and we enjoyed this “meat quiche.”  The picture does not do it justice at all.

Internet - The Cookbook Chronicles

Deviled Chicken

Ingredients
3 tablespoons yellow mustard
2 tablespoons mayonnaise
1 12 tablespoons hot sauce (I used Sriracha.)
1 tablespoon lemon juice
3 cloves garlic, minced
14 teaspoon dried thyme
1 14 teaspoons salt
1 tablespoon plus 14 teaspoon pepper
3-4 boneless, skinless chicken breasts
2 slices white sandwich bread, torn into pieces
2 tablespoons unsalted butter, melted

Instructions
1. Adjust oven rack to upper-middle position and heat oven to 450*F. Combine mustard, mayonnaise, hot sauce, lemon juice, garlic, thyme, 1 teaspoon salt, and 1 tablespoon pepper in large bowl or container. Add chicken and toss until coated. Refrigerate, covered, 30 minutes or up to 3 hours.

2. Pulse bread, butter, 14 teaspoon salt and 14 teaspoon pepper in food processor until coarsely ground. Remove chicken from bowl and transfer to wire rack set inside rimmed baking sheet. Sprinkle buttered bread crumbs evenly over top and sides of chicken, pressing gently to adhere. Bake until crumbs are golden brown and chicken registers 160*F, 20 to 60 minutes. Serve.

Deviled Chicken

Comments
This recipe is from the 2010 Cook’s Country Annual and I pretty much didn’t change anything.   This chicken was deliciously spicy and very moist.  The chicken breasts I had were huge, mutant breasts, so the original cooking time the recipe called for just did not cut it.  If you’re going to be cooking the chicken for more than about 25 minutes, cover it loosely with tinfoil after the coating browns to prevent it from burning.  Next time, since I’m not a huge spicehead, I’ll probably reduce the hot sauce in the recipe to just 12 tablespoon.  The recipe as written was at the upper limit of my spice tolerance. 

Shown here with Tomato Mac and Cheese.

Cook’s Country 2010

Creamy Chicken Picasso

Ingredients
3-4 boneless, skinless chicken breasts
2 tablespoons oil
1 tablespoon butter
2 onions, cut in half rings
3 bell peppers, cut in half rings (I used one each red, yellow, and orange.)
3-4 cloves garlic, minced
12 cup water
1 (14 ounce) can diced tomatoes
1 tablespoon Italian herbs
1 vegetable bouillon cube
Pinch nutmeg
Salt and pepper
12 cup half and half
2 cups Italian cheese blend, shredded

Instructions
1. Heat oven to 400*F. 

2. Season chicken with salt and pepper.  Heat butter and oil in large skillet over medium-high heat until butter has melted.   Lightly brown chicken on both sides, about 3 to 4 minutes per side.  Transfer chicken to 9 by 12-inch baking dish. 

3. Add onion to skillet and cook, stirring, until soft.  Transfer onions to baking dish.  Add bell peppers to skillet and cook, stirring, until soft.  Transfer bell peppers to baking dish. 

4. Add garlic to skillet and cook until fragrant, about 30 seconds.  Add water, diced tomatoes, Italian herbs, bouillon, nutmeg, and half and half.  Season with salt and pepper to taste and stir well.  Simmer sauce over low heat for 5 minutes.  Pour sauce over chicken and vegetables. 

5. Cover baking dish with aluminum foil and cook for 30 minutes.  Remove from oven and uncover.  Top with cheese and bake, uncovered, 15 minutes or until cheese has melted and chicken is cooked through.  Serve over pasta. 

Creamy Chicken Picasso

Comments
This recipe is from Kayotic Kitchen, one of my favorite blogs of all time.  I served the dish over thin spaghetti and we all thought it was delicious.  Lots of tasty bell pepper flavors.  If you want more color in the dish, feel free to use a green bell pepper instead of an orange or yellow.  I don’t care for the flavor that green bell peppers bring to the party, so I used other colors.  I think Art and Lance got all the leftovers for this, but they certainly vanished so I assume they were fantastic as well.  Thanks for another winner, Kay!

Internet - Kayotic Kitchen

Chantilly Potatoes

Ingredients
3 pounds Yukon gold potatoes, peeled and cut into 2-inch cubes
Salt and pepper
1 14 cups heavy cream, chilled
1 12 cups Gruyere or Parmesan cheese, grated (about 3 ounces)

Instructions
1. Place potatoes in large microwave-safe bowl and cover tightly with plastic wrap or lid. Microwave on high until tender, 8 to 12 minutes, shaking bowl halfway through cooking. Mash potatoes, cover tightly with plastic wrap, and microwave potatoes until heated through, 3 to 5 minutes. Season with salt and pepper.

2. Adjust oven rack to upper-third position and heat broiler. With mixer on medium speed, beat cream until stiff peaks form, about 2 minutes. Gently fold two-thirds of whipped cream into potatoes with rubber spatula until absorbed. Dollop potatoes in broiler safe 2-quart (9 by 9-inch) baking dish. 

3. With rubber spatula, fold 1 14 cups cheese into remaining cream. Spread over potatoes and sprinkle with remaining cheese. Broil until top is golden, 2 to 3 minutes. Let rest about 10 minutes. Serve. 

Chantilly Potatoes

Comments
This recipe is from the 2010 Cook’s Country Annual and I’m not sure what it was supposed to be like.  Served after the 4 minutes of resting called for in the original recipe, it was a bit liquidy however, by the end of the meal, it had set up nicely.  (Art tells me that the word “congealed” is not an appetizing word…)  The flavors of this dish were really nice but the soupiness of it was not so grand.  I’m sure leftovers will be much better.  All of that said, I’m not sure I’ll be revisiting this dish.  I’m not sure what I was expecting, but it definitely didn’t make my top 50 potato recipe list. 

Shown here with Spice-Crusted Grilled Pork Tenderloin.

Cook’s Country 2010

BLT Pasta

Ingredients
2 tablespoons unsalted butter
2 slices white sandwich bread, cut into 12-inch cubes
12 slices bacon, chopped (I used an entire package of 12 ounce package of center cut bacon.)
1 onion, chopped fine
1 clove garlic, minced
Salt and pepper
1 pound small pasta, such as shells
1 pint cherry or grape tomatoes, halved
5 ounces baby arugula
1 cup Parmesan cheese, grated

Instructions
1. Bring large pot water to boil. Melt butter in large nonstick skillet over medium heat. Add bread and cook, stirring frequently, until golden brown, 6 to 8 minutes. Transfer to bowl and wipe out skillet.

2. Cook bacon in empty skillet over medium-high heat until crisp, about 5 to 10 minutes. Transfer bacon to paper towel-lined plate or sieve set over bowl and pour off all but 2 tablespoons fat from skillet. Cook onion in bacon fat until softened, about 5 minutes. Add garlic and 12 teaspoon pepper and cook until fragrant, about 30 seconds.

3. Add pasta and 1 tablespoon salt to boiling water and cook until al dente. Reserve 1 12 cups cooking water. Drain pasta and return to pot. Stir in tomatoes, arugula, Parmesan, bacon, onion mixture, and 1 cup reserved pasta water (adding additional water as needed). Season with salt and pepper and top with croutons. Serve. 

BLT Pasta

Comments
This recipe is from the 2010 Cook’s Country Annual.  I loved this as a meal, the guys both felt that it was a summer dinner and not really a winter dinner.  I could have eaten the whole thing by myself.  I suggest adding the Parmesan at the end so it doesn’t melt and clump like mine did!  I appreciated the peppery bite of the arugula in this dish, but spinach could be substituted if you don’t have access to arugula.  Art ate the leftovers cold the following day and said that was tasty too!

Cook’s Country 2010

Green Bean Casserole v3

Ingredients
2 tablespoons unsalted butter
12 ounces mushrooms, sliced
1 teaspoon kosher salt
12 teaspoon freshly ground black pepper
2 cloves garlic, minced
14 teaspoon ground nutmeg
2 tablespoons all purpose flour
2 cups half and half
1 pound frozen cut green beans, cooked and drained
6 ounces French’s fried onions

Instructions
1. Preheat oven to 350*F. 

2. Melt the butter in a large oven-safe skillet or Dutch oven over medium-high heat. Add the mushrooms, salt and pepper and cook, stirring occasionally, until the mushrooms give up some of their liquid, about 4 to 5 minutes. Add the garlic and nutmeg and continue to cook for another 1 to 2 minutes. Sprinkle the flour over the mixture and stir to combine, cook for 1 minute. Add the broth and half and half. Bring to a simmer and stir until the mixture thickens, about 5 to 10 minutes.

3. Remove from heat and stir in half of onions and all green beans.  Bake 25 minutes or until hot and bubbling.  Stir well, top with remaining onions and bake until onions are browned, about 5 minutes. 

Green Bean Casserole again

Comments
This recipe is my attempt at combining the two previous green bean casseroles I’ve posted.  It was mostly good, but it was still missing something.  I think, maybe, it needed the addition of soy sauce?  I’ll be updating this again in a month or so once I make it again. 

Shown here with Pineapple Stuffing and ham.

Person - Gwen

Buttermilk Mashed Potatoes

Ingredients
2 pounds Yukon gold potatoes, peeled and quartered
6 tablespoons unsalted butter, cut into pieces
1 cup buttermilk
6 tablespoons water
18 teaspoon baking soda
Salt and pepper

Instructions
1. Add potatoes, 2 tablespoons butter, 34 cup buttermilk, water, baking soda, and 12 teaspoon salt to Dutch oven and stir to combine. Bring to boil, cover, and reduce heat to low.  Simmer, stirring occasionally, until potatoes are nearly tender, 20 to 25 minutes. Remove lid and cook over medium heat until liquid has nearly evaporated, about 3 minutes.

2. Off heat, add remaining butter to pot and mash with potato masher until smooth. Using rubber spatula, fold in remaining buttermilk until absorbed and potatoes are creamy. Season with salt and pepper. Serve.

Buttermilk Mashed Potatoes

Comments
This recipe is from the 2010 Cook’s Country Annual.  I love mashed potatoes and happened to have some leftover buttermilk.  I think I was expecting these to be tangier from the buttermilk and they really weren’t.  In fact, they tasted just like normal mashed potatoes made with milk and butter to me.  Still good, just not what I was expecting. 

Shown here with Smoked Pork.

Cook’s Country 2010

Salmon with Balsamic Rosemary Onions

Ingredients
4 tablespoons olive oil
2 large onions, sliced
1 cup balsamic vinegar
1 teaspoon dried rosemary
4 (6 ounces each) salmon fillet pieces with skin
Salt and pepper

Instructions
1. Heat 2 tablespoons oil in a large skillet over medium heat and add onions.  Cook onions, stirring often, until all liquid has evaporated and onions have started to color, about 20 minutes.  Add 13 cup balsamic vinegar and simmer until absorbed.  Add rosemary and remaining balsamic. Continue stirring and cooking until vinegar has reduced and onions are glazed.  Season with salt and pepper and remove from heat. 

2. Season both sides of salmon with salt and pepper.  Heat remaining oil in a large skillet over high heat.  Place salmon skin-side down in skillet and cook for 4 to 5 minutes, depending on thickness of the fish.  Turn carefully with wide spatula and cook for another 4 to 5 minutes.

3. Serve salmon topped with balsamic onions. 

Salmon with Balsamic Onions

Comments
This recipe is from Victory or Death and I modified it a bit to save my dishwasher and simplify the cooking process.  I served the salmon and onions over rice and found them delicious.  Lance thought the balsamic onions were a bit heavy on the vinegar, but I felt they were pretty much perfect.  Feel free to reduce the amount of balsamic if you don’t love it as much as I do!

Internet - Victory or Death

Bacon Horseradish Cheddar Cheese Ball

Ingredients
12 pound bacon, cut into pieces
2 cups extra-sharp cheddar cheese, shredded
8 ounces cream cheese, softened
2 tablespoons prepared horseradish
1 tablespoon Worcestershire sauce
1 clove garlic, minced
14 teaspoon cayenne pepper
12 cup topping such as parsley, almond pieces, or crisp crumbled bacon

Instructions
1. Heat large skillet over medium heat.  Add bacon and sauté until fully cooked and starting to crisp.  Drain on paper towels or in sieve set over bowl.

2. Process bacon, cheddar, cream cheese, horseradish, Worcestershire, garlic, and cayenne in food processor until smooth.

3. Transfer cheese mixture to center of large sheet of plastic wrap and tightly wrap, shaping cheese into rough ball. Refrigerate until firm, about 3 hours. (Cheese ball can be refrigerated for 2 days.)

4. Once cheese ball is firm, reshape as necessary to form smooth ball. Unwrap and roll in topping to coat. Let sit at room temperature for 15 minutes. Serve with crackers, bread, etc. 

Cheese Ball

Comments
Art’s favorite holiday treat, aside from Pumpkin Bread, is the cheese ball.  He requested that I make one for Junk Food Day 2011 and, lucky for him, I’d just seen a recipe for cheese balls in the 2010 Cook’s Country Annual.  I modified the recipe a bit since we wanted it to include bacon and horseradish.  I also neglected to coat the ball in the end since I didn’t want to cook up more bacon having used the other half pound in Deviled Eggs.  When I make these again, I’ll cook up a pound of bacon just for the cheese ball, or pick up some parsley for the coating. 

While not very pretty without the coating, Art tells me that this is the best cheese ball he’s ever had and I’d have to agree.  It was grand and I predict it will become a holiday tradition in our family.

Edit: You can also just spread this into a container, like a bowl, instead of making it into a ball.

Cook’s Country 2010