Recipes

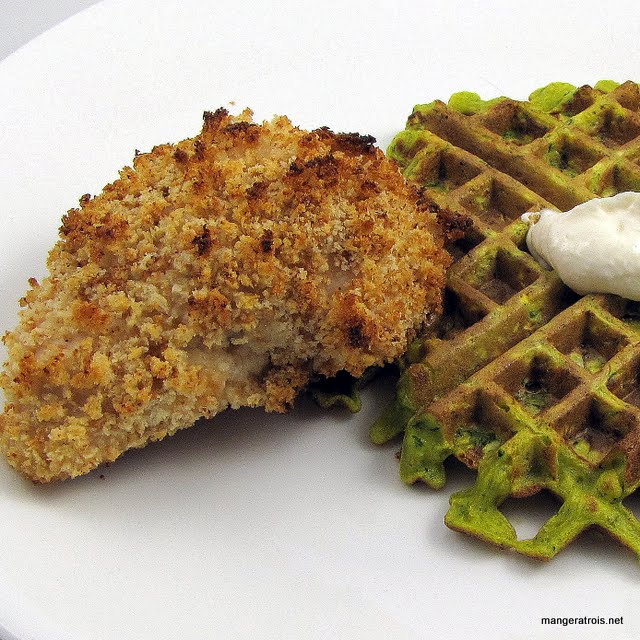
Buttermilk Baked Chicken

Ingredients
2 cups buttermilk
14 cup sour cream
6 tablespoons ranch seasoning mix
1 tablespoon salt
6-8 boneless, skinless chicken breasts, cut in half widthwise
5 slices white sandwich bread, torn into pieces

Instructions
1. Adjust oven racks to lowest and middle positions and heat oven to 450*F. Whisk buttermilk, sour cream, 4 tablespoons ranch seasoning mix, and salt in large bowl until salt dissolves. Add chicken and toss to coat. Refrigerate, covered, 30 minutes or up to 1 hour.

2. Meanwhile, pulse bread and 2 tablespoons ranch seasoning mix in food processor until finely ground. Bake bread crumbs on rimmed baking sheet on middle rack, stirring occasionally, until light golden brown, about 5 minutes. Transfer to shallow dish.

3. Line rimmed baking sheet with foil and spray lightly with cooking spray. Remove chicken from bowl, allowing excess brine to drip back into bowl, and dredge in bread crumbs, pressing to adhere. Transfer coated chicken to prepared baking sheet and spray lightly with cooking spray.

4. Bake on lower rack until bottom of chicken is golden brown, about 10 minutes. Move baking sheet to middle rack and reduce oven temperature to 400*F. Bake until chicken is golden brown and white meat registers 160*F (or dark meat registers 175*F), 20 to 25 minutes. Serve. 
Buttermilk Baked Chicken

Comments
This recipe is from the 2010 Cook’s Country Annual and I’ve got to say that it’s the first time the crew at America’s Test Kitchen have let me down.  This recipe was supposed to answer the lack of buttermilk flavor in most buttermilk chicken and I found the chicken to be pretty bland overall.  The crunch of the coating was definitely nice thanks to the homemade bread crumbs and the initial high heat cook, but the flavor just wasn’t there.  I couldn’t taste the buttermilk, sour cream, or ranch seasoning even after marinating the chicken for an hour.  Edit: I increased the ranch seasoning the second time I made it and it was much better!

I’m not sure what this recipe needs to make it better, but it’s definitely not all it should be as it currently stands. 

Shown here with Zucchini Fritterwaffles.

Cook’s Country 2010
Pasta with Zucchini Sauce

Ingredients
2 slices bacon, chopped
1 medium onion , diced
2 cloves garlic, chopped
2 medium zucchini, diced
4 tablespoons unsalted butter
3 tablespoons flour
1 cup milk
12 bouillon cube (I used vegetable bouillon)
12 cup Parmesan cheese
1 pound pasta
3 tablespoons fresh parsley, chopped
Salt and freshly ground black pepper, to taste

Instructions
1. In medium saucepan cook bacon until most of the fat renders.  Add onion and cook until softened.  Add garlic and zucchini and continue cooking until zucchini softens.  Remove zucchini mixture to large bowl. 

2. In now-empty saucepan, melt butter over medium heat.  Add flour and cook, stirring, 1 minute.  Pour in milk and stir constantly until sauce thickens and becomes smooth.  Add zucchini mixture and bouillon to pan then puree with immersion blender.  (Likewise you could put the zucchini mixture in a food processor at the end of step 1 to puree it before adding it to the cream sauce.) 

3. Reduce heat to low and simmer sauce five minutes.  Stir in Parmesan then taste for seasoning, add salt and pepper as necessary. 

4. Meanwhile, bring large pot of salted water to boil and cook pasta as instructed by packaging.  Drain well. Toss pasta together with sauce and parsley. 

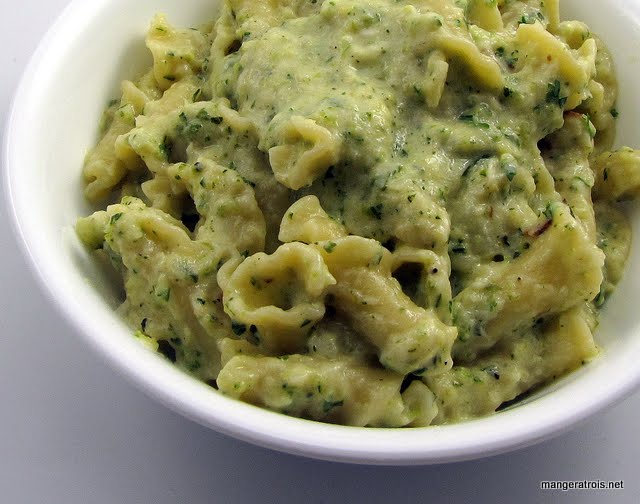
Pasta with Zucchini Sauce

Comments
This recipe is from Kayotic Kitchen.  I chose it because I had a lot of zucchini on hand and wanted something new to do with it.  The sauce probably generated enough sauce for 2 pounds of pasta, or at least a pound and a half.  This is probably because I used entirely too much zucchini.  Oops.  It was definitely tasty, but I’m glad I didn’t just dump the pasta into the sauce and stir it all together.  The bacon added that great bacony flavor to the sauce, but it’s easy to omit if you want.  I used an immersion blender to mix everything together because it’s easier on my dishwasher than the food processor.  Be sure to check for seasoning at the end and don’t over salt prior to adding the Parmesan which can be quite salty!

Internet - Kayotic Kitchen

London Broil Marinade

Ingredients
1 tablespoon red wine vinegar
1 tablespoon balsamic vinegar
2 tablespoons lemon juice
2 tablespoons Dijon mustard
1 tablespoon Worcestershire sauce
12 tablespoon soy sauce
13 cup olive oil
12 teaspoon oregano
12 teaspoon basil
12 teaspoon thyme
2 teaspoons garlic powder

Instructions
1. Combine all ingredients in a shallow sealable container or ziptop bag. 

London Broil Marinade

Comments
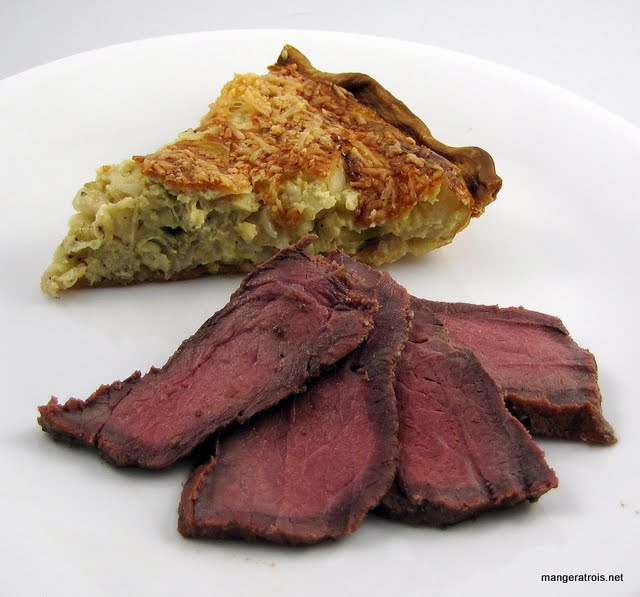
This marinade recipe is from food.com and I used it for a 1-2 pound London broil.  I marinated it for somewhere between 12 and 24 hours, then Art grilled it until it was perfect.  The marinade was delicious, the meat was super tender, there was a ton of flavor and we had a hard time not eating the entire broil in one sitting. 

Shown here with Sweet Onion Pie.

Internet - food.com

Caprese Salad

Ingredients
3-4 heirloom tomatoes, or other good in-season tomatoes, roughly chopped
1 cup fresh basil, roughly chopped
1 red onion, minced
8-16 ounces fresh mozzarella cheese, torn into small pieces
2 tablespoons olive oil
2 tablespoons balsamic vinegar
Salt and freshly ground black pepper

Instructions
1. Combine all ingredients.  Stir well and serve. 

Caprese Salad

Comments
This recipe is from Chez Us.  It’s basically a chopped up version of Caprese and it’s as scrumptious as the original.  I know the mozzarella measurement is very imprecise but it will really depend on personal taste and what quantities you buy fresh mozzarella in.  If you buy 12 ounce balls, use one.  If you can only get 6 ounce balls, you might want to use two.  This was really awesome, especially with how much I’ve been craving summer tomato season.  I gobbled up the leftovers and the guys probably never even knew what happened to them.  I could eat tomatoes like this for every meal!

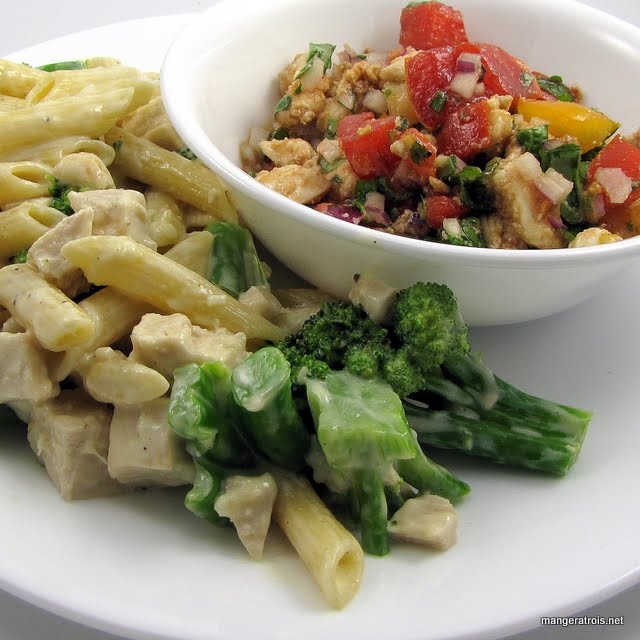
Shown here with Chicken Broccoli Alfredo.

Internet - Chez Us

Chicken Broccoli Alfredo

Ingredients
1 pound pasta, any shape will do
2-3 cups broccoli, cut into small pieces
3-4 boneless, skinless chicken breasts, cut into small pieces
1-2 teaspoons olive oil
12 cup butter
1 clove garlic, minced
2 cups heavy cream
18 teaspoon garlic powder
18 teaspoon freshly ground black pepper
14 cup Parmesan cheese, grated or shredded

Instructions
1. Bring large pot of salted water to boil and cook pasta as instructed by packaging.  Add broccoli to water during last 3 minutes of cooking time.  Drain well. 

2. Heat olive oil in large skillet and cook chicken, stirring occasionally, until done.  Combine chicken with pasta and broccoli. 

3. Melt butter with garlic in medium saucepan (or empty pasta pot) over medium-low heat.  Stir in cream, garlic powder, and pepper.  Simmer, stirring frequently, for 10 to 15 minutes, or until thick.  When sauce reaches desired consistency, stir in Parmesan cheese. 

4. Pour sauce over chicken, pasta, and broccoli and stir until well combined. 

Chicken Broccoli Alfredo

Comments
This recipe is from The Girl Who Ate Everything.  Alfredo is one of Art’s favorite foods so I’m really not sure why this is the first time I’ve ever cooked it.  It seems like something I would have tried sooner considering how much he loves it!  Maybe I was worried that mine would never stand up to what the restaurants serve?  I’m not sure.  Regardless of this, I finally made alfredo and Art loved it.  This is a pretty mild recipe, but you can easily increase the pepper, or use white pepper, if you’d like those flavors.  It’s nice and creamy and tastes great over the pasta, broccoli and chicken.  I think it might be even better if you grilled the chicken breasts first and then chopped them up for this dish because you’d get that delicious grill flavor in the mix as well.  This was definitely a success!

When waiting for the sauce to thicken you will go through a period where you’re thinking, “is this it?  Is this really thick enough?“  And then BAM, it will get really thick all of a sudden.  Try to wait for that to happen no matter how hard it is to be patient!

Shown here with Caprese Salad.

Internet - The Girl Who Ate Everything

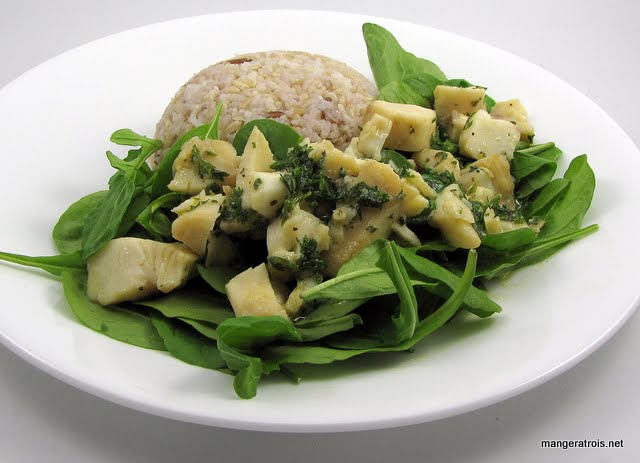
Butter Poached Tilapia

Ingredients
1 pound unsalted butter
4 (4 to 6 ounces each) tilapia filets, cut into pieces
Salt and pepper, to taste
4 tablespoon parsley, chopped
Arugula, for serving
Cooked rice, for serving

Instructions
1. Melt butter in medium saucepan over medium-low heat.  Add fish, parsley, and salt and pepper to taste.  Stir and cook fish very slowly until fish turns opaque, about 7 to 10 minutes.  If butter looks like it will start to brown, reduce heat. 

2. Remove fish with slotted spoon and serve over fresh arugula and steamed rice.  Drizzle with extra butter if desired. 

Butter Poached Tilapia

Comments
This recipe is from Okie Dokie Artichokie and I think it’s one of the most decadent things I’ve ever eaten.  I’m sure you could butter poach anything and have it taste delicious, but this tilapia was fantastic.  Even Lance thought the fish was great and he’s not a huge lover of butter.  It was moist, tender, and full of fantastic butter flavor. 

I ended up saving the butter from the pan to use for rice later on in the week.  I think that it would be possible to use half as much butter and cook the fish in two batches.  That seems like it would work with no problems.  I’ll probably do that next time because a pound of butter is a heck of a lot, especially when you can’t really do much with it afterward! 

You should make this.  It’s grand.

Internet - Okie Dokie Artichokie

Sweet Onion Pie

Ingredients
Pastry for 9-inch pie (I use Pillsbury, but you could make your own)
12 cup unsalted butter
2 pounds sweet onions, thinly sliced
3 large eggs, beaten
1 cup sour cream
3 tablespoons all-purpose flour
14 teaspoon kosher salt
12 teaspoon freshly ground black pepper
14 cup Parmesan cheese, grated or shredded

Instructions
1. Heat oven to 450*F.  Place pastry in 9-inch pie plate and bake 10 minutes. 

2. Melt butter in large skillet over medium.  Add onions and sauté, stirring often, until just beginning to color.  Remove from heat and stir in flour.  Stir in sour cream followed by eggs.  Season with salt and pepper.  Pour onion mixture into prebaked pie crust.  Top with Parmesan cheese. 

3. Bake 20 minutes then reduce oven temperature to 325*F and bake 20 more minutes or until center has set. 

Sweet Onion Pie

Comments
Years and years ago, when I still watched Food TV, I saw an episode of Food Network Specials and one of the contestants made the most delicious looking Vidalia onion pie.  Recently, I got some Bermuda sweet onions from the market and recalled the recipe while trying to figure out something excited to do with the onions.  This was scrumptious.  It was sort of like a quiche in some ways, but it felt richer to me.  The onions were melty and lovely. 

Shown here with marinated grill roasted London broil.

Internet - Food TV

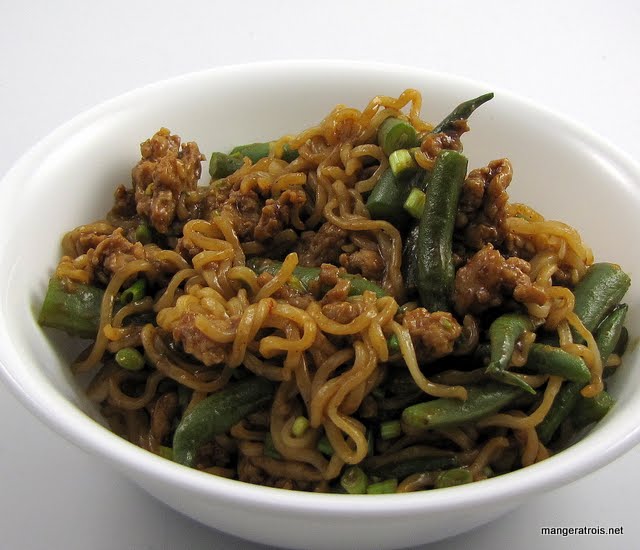
Hoisin Chicken with Noodles and Green Beans

Ingredients
12 pound green beans, trimmed and cut in half
3 packages ramen noodles, seasoning packet discarded (I recommend Top Ramen.)
12 cup hoisin sauce
1 small lime, juiced
3 tablespoons sweet chili sauce
1 teaspoon olive oil
1 pound ground chicken
4 cloves garlic, minced
1 bunch green onions, chopped

Instructions
1. Bring large pot of salted water to boil.  Add green beans and cook 6 to 10 minutes, or until tender.  Add ramen during last 3 minutes of cooking time.  Drain well. 

2. Combine hoisin sauce, lime juice and chili sauce in small bowl. 

3. Heat oil in large skillet over high heat and cook chicken until no pink remains.  Add garlic and cook until softened.  Stir in hoisin mixture.  Cook until bubbly.  Add noodles, green beans and green onions and stir until well combined. 

Hoisin Chicken with Noodles and Green Beans

Comments
This recipe is from Kitchen Simplicity and is the first time I’ve ever used ramen in cooking.  I was very pleased with the results!  The sauce was just a teeny bit too spicy, so I might use a little less chili sauce next time I make it.  I thought it was delicious and the guys enjoyed it as well.  Since I was only able to get ramen in 6 packs, I guess I’ll need to figure out something to do with the other 3 packs now!

Internet - Kitchen Simplicity

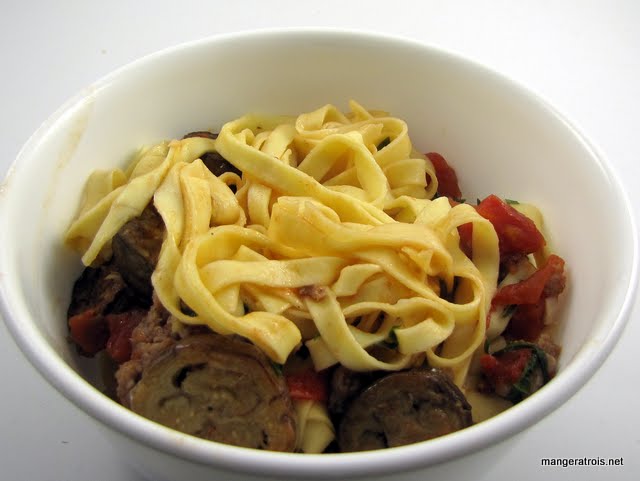
Pasta with Eggplant and Sausage

Ingredients
1 pound sweet Italian sausage, casings removed
12 tablespoons olive oil
6-8 Japanese eggplant, cut into 12 inch slices
2-3 cloves garlic, minced
1 (28 ounce) can diced tomatoes
Pinch sugar
16 basil leaves, torn or cut into small pieces
14 teaspoon red pepper flakes
Salt and freshly ground black pepper, to taste
1 pound fettucine, fresh or dried
14 cup Parmesan cheese, shredded or grated

Instructions
1. Cook sausage in large skillet over medium heat until cooked through.  Remove paper towels to absorb excess grease. 

2. Heat 10 tablespoons oil in same skillet over medium heat and fry eggplant slices in batches until light golden brown on outside and soft all the way through.  As each batch is done, set aside on paper towels to absorb excess oil. 

3. Add remaining oil to skillet and sauté garlic until fragrant, about 30 to 60 seconds.  Add tomatoes, sugar, and bring to boil.  Lower heat and simmer until reduced by half, about 5 to 10 minutes.

4. Cut eggplant into bite-size pieces.  Add eggplant, basil, red pepper flakes and sausage to sauce, season to taste with salt and pepper. 

5. Meanwhile, bring large pot of salted water to boil. Cook pasta as directed by packaging.  Drain well, reserving 1 cup pasta cooking water.  Toss pasta with sauce, adding pasta water if necessary.  Serve with Parmesan cheese. 

Pasta with Eggplant and Sausage

Comments
This recipe is from the Gourmet Traveller.  I added sausage because we love sausage.  This was super tasty and I probably should have doubled the recipe because I don’t think we had any leftovers at all.  I didn’t cut the eggplant into pieces but it would have been better if I had so that everything was of a similar size.  I used Japanese eggplant from the market, but you could easily use larger eggplant if that’s what you’ve got access to.

Internet - Gourmet Traveller

Pasta with Mascarpone and Prosciutto

Ingredients
1 pound short pasta
2 tablespoons butter
12 ounces prosciutto, thinly sliced then cut into small pieces
1-2 teaspoons olive oil
4-5 cups fresh spinach (I used the whole bag shown here.) 10 cloves garlic, minced
2 cups mascarpone cheese
2 lemons, zested and juiced
1 cup Parmesan cheese, shredded or grated
2 tablespoons fresh parsley, chopped
2 cups reserved pasta water

Instructions
1. Bring large pot of salted water to boil and cook pasta according to package directions.  Drain well, reserving 2 cups of cooking water.  Return pasta to pot and toss with 2 tablespoons butter. 

2.  Sauté prosciutto in large skillet over medium-low heat until it begins to curl and shrink around the edges, about 5 to 10 minutes.  Remove prosciutto to a plate. 

3.  Add 1 to 2 teaspoons olive oil to skillet and sauté garlic and spinach over low heat until garlic is fragrant and spinach has wilted.  Add pasta water to cover bottom of skillet, mascarpone, and lemon peel.  Stir until mascarpone has melted.  Increase heat to medium-low, add Parmesan cheese and simmer for 2 to 3 minutes.  If sauce is too dry, add extra pasta water. 

4. In pasta pot or skillet, combine pasta, spinach-cheese sauce, prosciutto, lemon juice, and parsley.  Stir well to combine and add extra pasta water if thinner sauce is desired. 

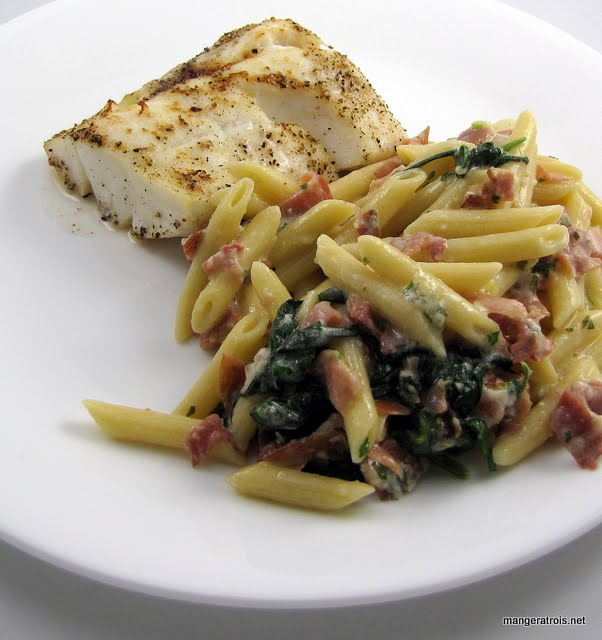
pasta with mascarpone and prosciutto

Comments
This recipe is from Cinnamon Spice and Everything Nice and it was certainly nice!  It’s hard to go wrong with prosciutto though, it’s such a powerful meat.  In fact it was almost overpowering in this dish!  Thankfully we all love prosciutto and we devoured this both with dinner the night I made it and the next few days with leftovers.  It heated up very well for leftovers, which is always a bonus for a household that relies on dinner leftovers for lunches. 

Lance was very surprised when I informed him that the pasta sauce came from mascarpone cheese, he’s not a super huge lover of cheese but he loved this dish anyway.  I served it with a very simply prepared fish which worked well due to all the strong flavors in the pasta.

If, like me, you are prone to forgetting to reserve pasta water, a good way to remind yourself is to put a measuring cup into the sieve when you put it in the sink before you start cooking.

Shown here with Broiled Cod.

Internet - Cinnamon Spice and Everything Nice