Recipes

Slow Cooker Honey Roasted Chicken with Rosemary and Dijon

Ingredients
1 whole chicken, about 5 pounds
Salt and freshly ground black pepper, to taste
1 tablespoon Dijon mustard
3 sprigs fresh rosemary
14 cup honey
1 lemon, zested, halved and juiced
4 cloves garlic, peeled
12 yellow onion, quartered

Instructions
1. Remove giblets and rinse the chicken under cold water and pat dry with paper towels. Season inside and out with salt and pepper.

2. Place the chicken in a slow cooker.  Mine is a 5 quart round pot and I’ve been able to fit birds up to 7-8 pounds into it.  It’s a tight squeeze, but it can be done.  For this recipe I used a chicken that was 5.8 pounds and it fit easily.  

3. Roughly chop two sprigs of the rosemary.  In a small bowl, mix together Dijon mustard, honey, chopped rosemary, lemon juice, and lemon zest.  

4. Turn chicken on its end and place the remaining sprig of rosemary, the onion quarters, garlic and both lemon halves if you can fit them in the cavity of the bird.  One lemon half is enough if you can’t fit both.  Using a pastry brush, coat the outside of the bird with the lemon honey glaze.  Place chicken breast side up.  Pour any remaining glaze over the top.  

5. Cook chicken on LOW for 6-8 hours or until you can grab a leg and wiggle it freely.  

6. If you’re around during the cooking time, pour the juices that collect in the bottom of the pot out into a container once or twice during the cooking time.    Save the liquid in a container in the fridge or just collect it all at the end of the cooking time.  Place the liquid into a pot on the stove, bring to a rolling boil for 5 minutes, strain, and then save for later use in the freezer or fridge.  If you don’t care to save the delicious broth, skip this step.  I find it makes a delicious soup base.  

7. Remove chicken carefully, it will be very tender and falling off the bone.  Pull the meat off the bones and serve.  

Slow Cooker Honey Roasted Chicken with Rosemary and Dijon

Comments
I first tried cooking a whole bird in the slow cooker in February 2009 as a dinner for my parents.  It worked so well that I cooked my own that very weekend.  While the chicken won’t have the same crispy skin it would from being roasted in the oven, this method is pretty much a no-brainer which makes it suit me just perfectly!  I reserve the liquid for freezing and use it in soups or risottos, and leftover meat goes into tetrazzini.  

This is based on a recipe from FoodFit that my mom sent me one day with a note of “Do you think this would work in a crock pot?”  I read over the recipe and it seemed like it would work well enough, so I told her I’d try it out and report back to her.  The verdict is that, yes, it does work in a crock pot.  Quite well in fact!  The only real difficulty I run into when doing a whole chicken in the slow cooker is that it’s extremely hard to remove from the pot due to the meat falling completely off the bones.  

If you’ve never tried chicken in a slow cooker, I can’t recommend it enough.

Internet - FoodFit
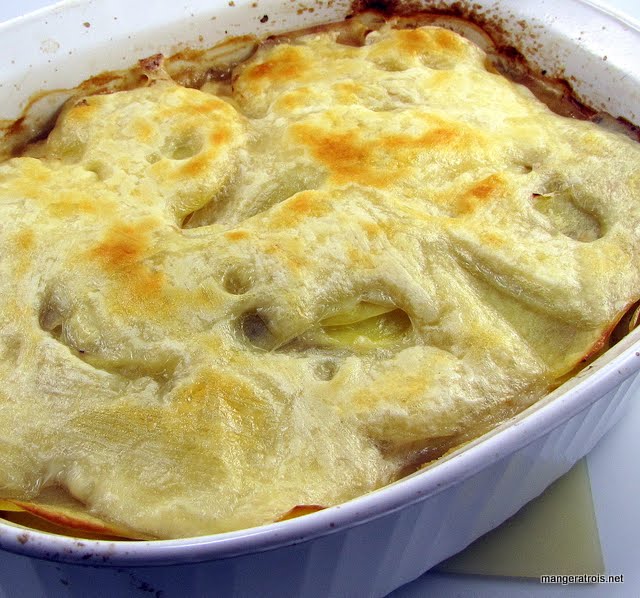
Turnip-Potato Gratin

Ingredients
1 14 pound turnips, peeled and cut into 14-inch-thick slices (I used all the turnips shown in the previous two CSA posts and I don’t have a scale)
Cooking spray
12 teaspoon kosher salt
12 teaspoon freshly ground black pepper
2 baking potatoes, peeled and cut into 18-inch-thick slices (about 2 pounds)
8 ounces  Swiss cheese, grated or sliced and divided
34 cup chicken broth

Instructions
1. Place turnips in medium saucepan; cover with water. Bring to a boil. Reduce heat, and simmer 15 minutes or until tender. Drain and pat dry.

2. Preheat oven to 350*F.

3. Arrange one-third of turnips in a 2-quart baking dish coated with cooking spray; sprinkle with one-third of salt and one-third of pepper. Arrange half of potato over turnip. Sprinkle 6 tablespoons of cheese evenly over potato. Arrange one-third of turnips over cheese; sprinkle with one-third of salt and one-third of pepper. Arrange remaining potato over turnip. Arrange remaining turnips over potatoes; sprinkle with remaining salt and pepper. Pour broth over vegetables. Cover with foil, pressing foil down into turnip slices. Bake at 350*F for 1 hour.

4. Preheat broiler.

5. Uncover vegetables; sprinkle with remaining 6 tablespoons cheese. Broil 8 minutes or until lightly browned.  

Turnip-Potato Gratin

Comments
This is another recipe adapted from Cooking Light.  I’d never eaten a turnip before tonight and I was pleasantly surprised.  Their taste is stronger than that of potatoes, I could definitely tell the difference between the turnip pieces and the potato pieces while eating this.  

This was a very tasty dish.  The only downside was it being a bit watery in the bottom of the dish, but a slotted spoon solved that problem.  If I made it again, I might try using some half and half for some of the broth called for in the recipe.  It might also be good with some Parmesan cheese added on top.  I greatly enjoyed it just the way it was and so did Art and Lance.

Cooking Light

Lemon Grilled (or not) Chicken

Ingredients
3 tablespoons fresh lemon juice
2 tablespoon olive oil
2 cloves garlic, minced
3-4 boneless, skinless chicken breasts, cut in half to make cutlets
12 teaspoon kosher salt
12 teaspoon freshly ground black pepper
Cooking spray

Instructions
1. Prepare grill, or other cooking surface, to medium-high heat.

2. Combine first 4 ingredients in a large zip-top plastic bag; seal. Marinate in refrigerator 30 minutes, turning occasionally. Remove chicken from bag; discard marinade. Sprinkle chicken evenly with salt and pepper.

3. Place chicken on grill rack, or skillet, coated with cooking spray; cook 6 minutes on each side or until done.  

Lemon Grilled Chicken

Comments
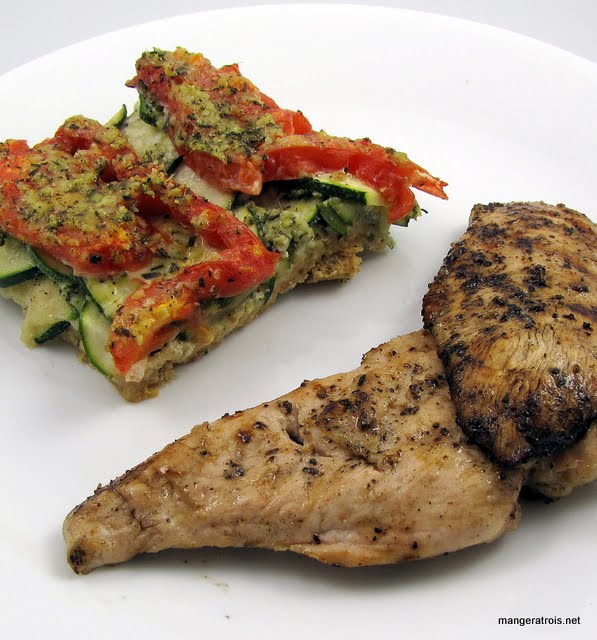
Another recipe adapted from Cooking Light.  This recipe calls for a grill but for reasons that shall go unmentioned; I do not have such a wondrous gadget.  Woe.  I cooked these in a skillet and they still turned out wonderfully.  I’m sure they’d work just as well on a griddle and, if you really wanted to, you could bake them at 350*F until done.  The goodness is in the marinade more so than the cooking method.  

I’m always looking for relatively simple ways to prepare protein to go along with more exciting side dishes and this method fits the bill.  It also had the bonus of reminding Art of the lemon chicken he used to have when he lived in Italy as a child.  This recipe is a keeper.

Shown here with Tomato Zucchini Tart with Herbs and Parmesan.

Cooking Light

Fajitas

Ingredients
Marinade
4 limes
Tequila (around 1 cup)
8 cloves garlic, peeled and minced
4 tablespoons cilantro leaves, chopped
2 tablespoons olive oil
4 teaspoons Worcestershire sauce
2 teaspoon dried oregano
2 teaspoon red pepper flakes
2 teaspoon ground cumin
2 teaspoon ground coriander

Filling
2 pounds preferred meat, trimmed (I’ve used chicken and flank steak, both are fantastic.)
Vegetables of choice: yellow onion, zucchini, yellow squash, bell peppers, mushrooms, anything that would work well in fajitas (I used 6 zucchini, 5 yellow squash, and 2 yellow onions)

For assembly
Flour tortillas, warmed
Sour cream
Salsa
Shredded cheese

Instructions
1. Zest limes into a 2-4 cup measuring cup.  Then squeeze the limes into the same cup.  Add an equal amount of tequila.  (For example, if you have 1 cup of zest and juice, add 1 cup of tequila.)  Add the garlic, cilantro, oil, Worcestershire sauce, oregano, pepper flakes, cumin and coriander; whisk or stir to mix.  Alternatively, you could add these ingredients whole to a container appropriate for a handheld blender, and blend them until fully incorporated.  That’s what I did.  I love my handheld blender.  

2. Pour half of marinade into a large zip-top bag, add the meat, and seal. Place in a container in case of leakage and refrigerate until ready to use, turning occasionally.  (Length of marination will depend on the meat you’re using.  I marinate chicken for 3-4 hours and flank steak for 12-14 hours.)  Reserve the rest of the marinade in a sealed container and refrigerate.  

3. About 45-75 minutes before you plan to eat, preheat the oven to 450*F.  Slice vegetables and place into a large bowl.  Pour the reserved marinade (NOT the marinade that has been on the chicken) into the bowl and gently stir the vegetables until evenly coated.  

4. Spread out vegetables on one or more baking sheets.  You’re aiming for a single layer of vegetables and will want do as many batches as necessary to achieve this.  

5. Place baking sheets into oven and roast for 30-60 minutes, until the edges of the vegetables are browning.  Stir the vegetables every 15-20 minutes, flipping as many over as you can.  (With the amounts of vegetables listed above, and the size of my baking sheets, I had to cook the vegetables in 4 batches.  Each batch took about 30-45 minutes to brown nicely.)  

6. Meanwhile, remove the meat from the bag and pat dry. Discard marinade.  Season both sides with salt and pepper.   Prepare a grill or skillet on medium to medium-high heat.  Grill or sauté meat until done, this will vary greatly based on the thickness of the meat, the type of meat, and your personal preferences for doneness.  When meat is done, remove to a cutting board and slice thinly.  

7. To assemble fajitas, place spoonfuls of meat and vegetables into your tortilla and add desired toppings.  

Fajitas

Comments
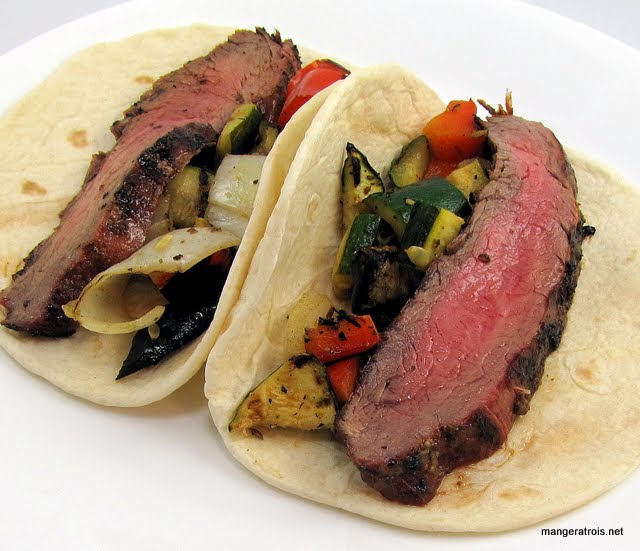
I have made fajitas many, many times in the last 12 years, but this is the first time I’ve done the seasoning from scratch.  In the past I’ve just used a spice packet from the store.  That works perfectly well and the method is similar to the one described here, just skipping the assembly of the marinade.  I decided that, for this post, I should do something cooler.  This is loosely based on a recipe from Emeril Lagasse.  

Fajitas are, in my opinion, one of the best ways to use zucchini.  Since this week marks the first zucchini of the season, it seemed like a requirement to make fajitas.  The marinade was delicious, a bit fiery, and extremely flavorful.  All of the components in the marinade were identifiable in the final product.  

While I might still use the packet method once in a while, when I want something quick and easy, this was amazing.  These were probably the best fajitas I’ve ever eaten and I’m looking forward to trying the recipe with flank steak in the future!

Edited 2014

I make these a lot during zucchini season.  Now, however, I grill the meat and vegetables.  I cut the zucchini into long planks and the onions into thick rounds.  Then I marinate them and grill them until starting to char.  After things are cooked, I chop them up.  

Internet - Emeril Lagasse

Frizzled Cabbage

Ingredients
14 medium green cabbage (I used an entire Jersey Wakefield cabbage which measured about 5-6 cups after slicing)
2 tablespoons butter
Salt and pepper
4 cloves garlic, minced (Feel free to use more if you love garlic.  You can even throw in some shallot or onion if you’ve got it)

Instructions
1. Core and very thinly slice the cabbage.

2. Melt the butter in a large non-stick skillet over medium heat.  When it is bubbling, add the cabbage and garlic.  Stir occasionally and cook until mostly wilted, about 10 minutes. (If you’re using a more tender cabbage, this will take less time.)

3. Salt and pepper the cabbage.  Turn the heat down to medium-low and let cook, stirring every few minutes, until cabbage is starting to brown, about 10 minutes. 

4. Taste, adjust seasoning with salt and pepper, and serve immediately.

Frizzled Cabbage

Comments
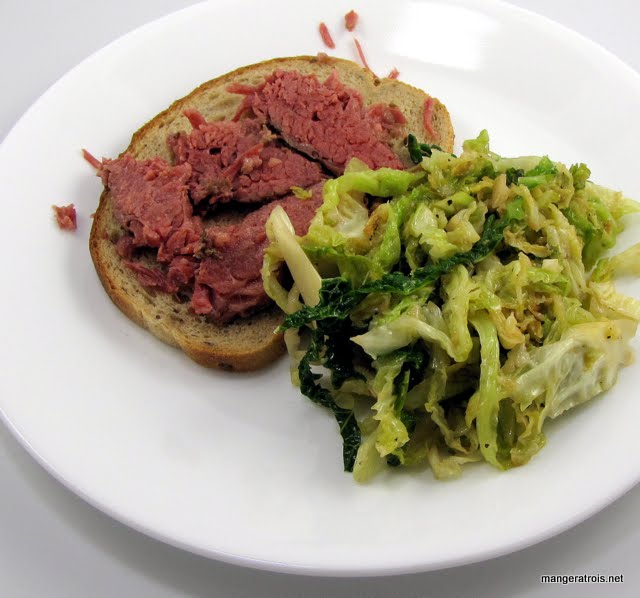
I didn’t grow up eating cabbage and I guess the best way to start to like any vegetable is to sauté it with butter.  Or bacon fat.  This recipe goes the butter route and is delicious.  The flavor of the cabbage really comes through in this simple dish.  Most often, I serve this with Corned Beef, but it is extremely versatile.  

This recipe came to me via a friend, and it came to her from Recipe Zaar.

Shown here with Slow Cooker Corned Beef.

Internet - Recipe Zaar

Pasta Caprese

Ingredients
14 cup olive oil
2-4 teaspoons fresh lemon juice (Start with 2 teaspoons and add more based on your preference and the ripeness of the tomatoes)
1 small clove garlic, minced (About 12 teaspoon)
1 small shallot, minced (About 2 tablespoons)
Salt and ground black pepper, to taste
1 12 pounds ripe tomatoes, cored and cut into 12-inch dice (I love tomatoes, I tend to use 2-3 nice big beefsteak tomatoes.  This is around 3-3 12 cups once diced.)
12 ounces fresh mozzarella cheese, cut into 12-inch cubes
1 pound penne pasta, or other short pasta
14 cup fresh basil, chopped
1 teaspoon sugar (To be added at the end if the dish is not sweet enough.  I’ve never had to add extra sugar when I make this in the summer)

Instructions
1. Whisk oil, 2 teaspoons lemon juice, garlic, shallot, 12 teaspoon salt, and 14 teaspoon pepper together in large bowl. Add tomatoes and gently toss to combine; set aside. Do not marinate tomatoes longer than 45 minutes.

2. While tomatoes are marinating, place mozzarella on plate and freeze until slightly firm, about 10 minutes. (If you freeze the mozzarella for longer than this, you might have a hard time separating it from the plate.  This step is crucial as it prevents the mozzarella from becoming a melted and gummy mess when added to the pasta.)  

3. Bring 4 quarts water to rolling boil in stockpot. Add 1 tablespoon salt and pasta, stir to separate, and cook until al dente. Drain well.  

4. Add pasta and mozzarella to tomato mixture and gently toss to combine. Let stand 5 minutes. Stir in basil; adjust seasonings with salt, pepper, and additional lemon juice or sugar, if desired, and serve immediately.

Pasta Caprese

Comments
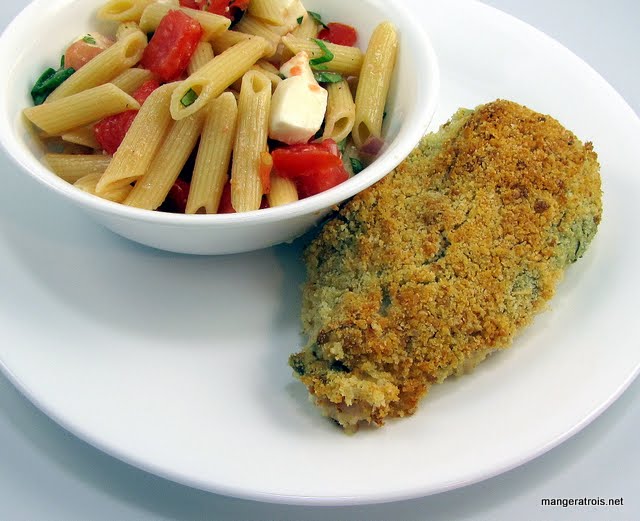
Sometimes I feel like I imagined the Cook’s Illustrated podcast, but it did exist, briefly, in 2008!  This recipe was from that podcast and it came right when I was trying to figure out new ways to use all the gorgeous tomatoes I was buying every week at the market.  It’s meant to be served warm, not hot, and is scrumptious.  

If you use tomatoes that are wetter, you might want to consider seeding them first in order to keep the dish from being too watery.

Shown here with Baked Chicken Breasts with Parmesan-Garlic Crust.

Cook’s Illustrated 2007

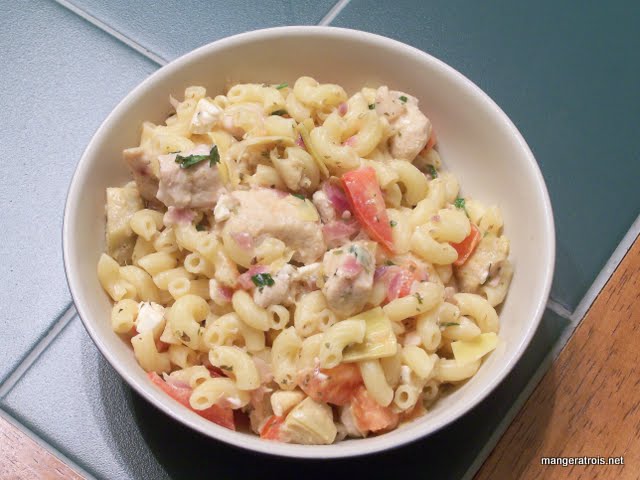
Greek Chicken Pasta

Ingredients
1 pound uncooked pasta (I used elbows but any small shape would work)
1 tablespoon olive oil
2 cloves garlic, minced
1 small red onion, chopped (About 34 cup, my onion was 3-4 inches in diameter)
3-4 boneless, skinless chicken breasts - cut into bite-size pieces (This was three breasts, but chicken varies so much in size these days)
1 (14 ounce) can marinated artichoke hearts, or more if you like, drained and chopped (I used about 20 ounces from a jar)
1 large tomato, chopped, or smaller tomatoes to equal about 1 cup
12 cup feta cheese, crumbled
3 tablespoons fresh parsley. chopped
Juice of 1 lemon, about 2 tablespoons
2 teaspoons dried oregano
Salt and pepper, to taste

Instructions
1. Bring a large pot of lightly salted water to a boil. Cook pasta in boiling water until al dente; drain.

2. Meanwhile, heat olive oil in a large skillet over medium-high heat. Add garlic and onion, and sauté for 2 minutes. Add in the chicken. Cook, stirring occasionally, until chicken is no longer pink and the juices run clear, about 5 to 6 minutes.

3. Reduce heat to medium-low, and add the artichoke hearts, tomato, feta cheese, parsley, lemon juice, oregano and cooked pasta. Stir until heated through, about 2 to 3 minutes. Remove from heat, season to taste with salt and pepper, and serve.

Greek Chicken Pasta

Comments
This recipe came to me through a community online and I knew I had to try it.  Artichokes?  Feta?  Tomatoes?  What’s not to love!  I have developed a weakness for artichokes in the last 5 years, I had never liked them before and now I can’t seem to get enough of them.  

This had a nice, lemony flavor and all of the components complimented each other well.  I think I might consider using frozen, thawed artichoke hearts in the future, since I find the marinade taste to be a bit unpleasant with the jarred variety, but that’s just a matter of personal preference.  I would also consider using grape or cherry tomatoes that are simply halved the next time to add more colour to the dish.  It was delicious and tasted great just the way it was, though!

Unknown

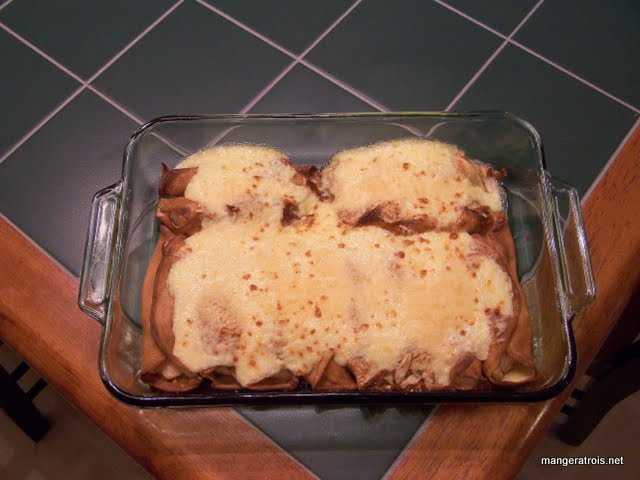
Chicken Crepes

Ingredients
Chicken Filling
5 tablespoons butter
14 cup all purpose flour
Salt, to taste
1 12 cups milk
1 bunch green onions, chopped
2 cups chicken, cooked and cut in 14” cubes
12 cup white wine
14 teaspoon Worcestershire sauce
18 teaspoon pepper
Dash cayenne

Crepes
1 cup milk
34 cup all purpose flour
14 teaspoon salt
Oil for skillet
2 eggs

Topping
1 egg yolk
18 teaspoon salt
4 tablespoons butter, melted
2 teaspoons lemon juice
14 cup sour cream
Parmesan cheese, grated

Instructions
1. Make Chicken Filling: To make white sauce, melt 4 tablespoons butter in medium saucepan; remove from heat. Stir in 14 cup flour and 12 teaspoon salt until smooth. Gradually stir in milk; bring to boiling, stirring constantly. Reduce heat and simmer 5 minutes. Remove from heat, and set aside.

2. In 1 tablespoon hot butter in medium skillet, sauté green onion 1 minute. Add chicken; sauté 2 minutes longer. Add wine, 14 teaspoon salt, the Worcestershire, pepper, and cayenne; cook over medium heat, stirring 3 minutes. Stir in 1 cup of the white sauce just until blended. Refrigerate while making crepes. Set aside remaining white sauce for topping.

3. Make Crepes: In medium bowl, with rotary beater, beat milk with flour and salt until smooth. Add eggs; beat until well combined.  Or blend the crepe ingredients in a blender until smooth.  (You can do this with a hand blender or a real blender.) 

4. Slowly heat a 5 12-inch skillet until a little water sizzles when dropped on it. Brush pan lightly with oil. Pour about 1 12 tablespoons batter into skillet, tilting pan so batter covers bottom.  (I pour the batter from a 2-cup measuring cup.  It makes this process much easier.) 

5. Cook until nicely browned on underside. Loosen edge; turn; cook until browned on other side. Remove from pan; cool on wire rack. Then stack on waxed paper. Repeat with rest of batter, to make about 18 crepes. Lightly brush pan with oil before cooking each one.

6. Preheat oven to 350*F. Remove filling from refrigerator. Spoon 1 rounded tablespoon into each crepe; fold two opposite sides over filling. Arrange in shallow baking dish, seam side up; cover with foil. Bake 20 to 25 minutes, or until heated through.

7. Meanwhile, make Topping: In small bowl, with rotary beater, beat egg yolk with salt until foamy. Gradually beat in 2 tablespoons melted butter. Mix remaining butter with lemon juice, gradually beat into egg yolk mixture. With wire whisk or rubber scrapper, fold in remaining white sauce just until combined. Fold in sour cream.  (I’ve always done all of this mixing with a fork, not a rotary beater.) 

8. Uncover hot crepes. Spoon topping over them; sprinkle lightly with grated Parmesan cheese. Broil, 4 to 6 inches from heat, until nicely browned. If desired, carefully transfer to chafing dish.

Chicken Crepes

Comments
When I was 13 or 14, my mom and brother went on a trip to visit colleges that my brother was interested in.  This left me home with my dad and I remember being pretty excited about planning meals and cooking for the two of us.  I had mentioned to my mom that I was interested in making chicken crepes, so she helped me find a recipe in one of her many cookbooks.  I can’t even remember what the cookbook was called, I think it might have been something like “McCall’s French Cuisine.”  I pretty sure that the requirement for a recipe to be in this cookbook is “must dirty every pot in a normal household, plus one.”  

I believe that the original recipe called for curry powder and maybe heavy cream instead of the sour cream?  I’m not entirely sure, though, as I’ve been making it this way for so long that I can’t imagine having it any other way.  

I’m pretty sure that was during the phase I went through where I refused to touch raw meat, so my mom even cut the chicken into cubes for me before she left with my brother.  

The big night came and I started cooking dinner around 5pm, thinking that it would take about an hour and be ready at 6pm.  My dad was working in the basement.  Around 6pm he asked how much time he had to keep working and I said, probably sheepishly, “another hour?”  

7pm rolled around and I called down the stairs to him, asking if he was feeling super hungry.  I guessed that dinner was probably still about an hour out.  

If memory serves me correctly, we probably ate around 8pm that night, if not closer to 9pm.  

In the 18 years I’ve been cooking this recipe, I have gotten much faster and more frugal in my pot usage.  It now only uses 2 skillets, a saucepan, a blender, and only an hour or so!  Impressive, eh?  I still wonder what I did that first time to make this so complicated!

This is definitely a well-loved recipe in my family and it’s always the first recipe that comes to mind when I want to impress new friends and company.  It’s safe to say that everyone who has eaten in my home has eaten this, assuming they eat chicken.

McCall’s French Cuisine

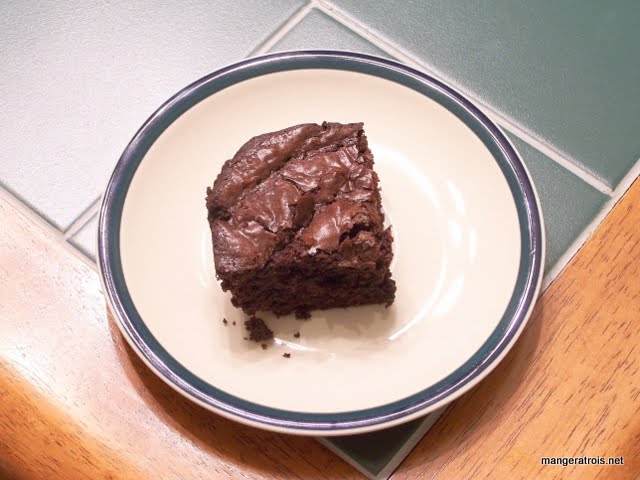
Three Cup Brownies

Ingredients
3 cups chocolate**
2 sticks (1 cup) unsalted butter
6 eggs
2 12 cups sugar
1 tsp vanilla extract
1 12 cups all purpose flour
1 tsp baking powder

Instructions
1. Preheat oven to 350*F.   Place rack in center of oven and grease a 9x13-inch baking pan.  

2. Place chocolate and butter into a microwave safe dish and microwave on high for 1 minute.  Remove container and stir chocolate.  Repeat until chocolate is fully melted and mixed with the butter.  Let cool for 5 minutes.  

3. Mix the eggs, sugar, and vanilla in a bowl.  

4. In a separate bowl, mix flour and baking powder.  

5. Add the chocolate mixture, one scoop at a time, to the egg mixture, stirring to incorporate fully.  

6. Add flour mixture to chocolate and egg mixture and fold until completely combined.  

7. Bake for 45-55 minutes, or until a table knife inserted into the center comes out clean.  Let cool and serve.  

**The original recipe called for semi-sweet chips however, I only had about a cup of those.  I topped off this cup of chips with about 4 ounces of 100% Cacao Baking Bar and all the unsweetened cocoa powder I had in the house.  I recommend using 3 cups of whatever chocolate stuff you have in the house.  If it’s sweeter chocolate, reduce the amount of sugar called for in the recipe.  If it’s more bitter chocolate, increase the amount of sugar.

Three Cup Brownies

Comments
I used to tell people that I’m not really a baker.  Over time, I’ve come to realize that I do enjoy baking, but I tend to only get the urge to do so at 10pm at night.  There is also the problem with the whole “eating” thing when it comes to baking.  This wasn’t so much of a problem when Art worked out of the house as baked goods could easily be sent to work; now it takes a bit more planning.   The choir I belong to certainly appreciates the results of my late night urges to bake.  

The original recipe came to Art from a friend and he asked me to make it.  I realized, after I’d already decided I would be making them, that I didn’t have all the right ingredients and that some of the measurements didn’t translate well from the original metric.  I have no idea if this recipe, which is what I made and suggest you make, is anywhere close to the original, but it’s delicious in its own right and that’s what matters.  

These turned out lighter than most brownies I’ve made in the past which means Lance finally likes them.  They’re perhaps a tidge to bitter as a result of the chocolate mix I used, but that just made them perfect for Art’s tastes.  All in all, I’d say this was a great success!

Unknown

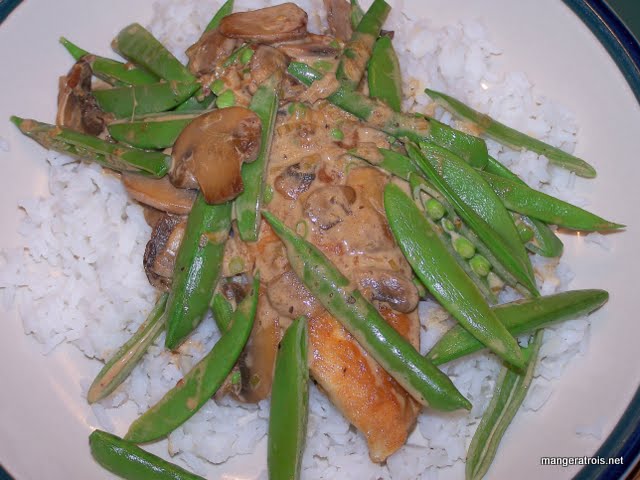
Chicken with Creamy Mushrooms and Snap Peas

Ingredients
3 boneless, skinless chicken breasts (about 1 12 pounds), cut in half – like you’re butterflying them, but cut all the way through and patted dry
Kosher salt and freshly ground pepper
2 tablespoons olive oil
All-purpose flour (about 1/4  cup)
1 tablespoon unsalted butter
2 green onions, thinly sliced
8 ounces mushrooms, sliced (I used regular button mushrooms since they’re my favorite)
1 14 cups chicken broth
34 cup half and half (or cream)
2 cups sugar snap peas, stemmed and halved lengthwise

Instructions
1. Preheat the oven to 250*F. Heat a large skillet over medium-high heat. Season the chicken with salt and pepper. Add 1 tablespoon oil to the skillet. Dredge 3 chicken pieces in flour, shake off any excess and place in the skillet. Cook until golden, about 2 minutes per side; transfer to a baking dish. Repeat with the remaining 1 tablespoon oil and the other 3 chicken pieces. Cover the dish loosely with foil; place in the oven while you prepare the vegetables.

2. Add the butter to the hot skillet, then add the green onions and mushrooms; cook, stirring occasionally, until the mushrooms brown, about 4 minutes. Pour in the broth and bring to a boil, scraping up any browned bits with a wooden spoon. Cook until the liquid is reduced by half, about 3 minutes. Add the half and half and boil until the sauce thickens slightly, 3 to 4 more minutes. Stir in the snap peas and heat through; season with salt and pepper.

3. Serve the chicken over rice and topped with the creamy vegetables.

Chicken with Creamy Mushrooms and Snap Peas

Comments
This recipe is adapted from Food Network.  I found it while looking for a recipe to use the gorgeous sugar snaps that I got from my farmer’s market.  Cutting them lengthwise seemed odd, but it had the effect of making them into pea pod shells that captured the sauce of the dish perfectly.  The peas also fell out so added colour, taste and crunch throughout the dish.  

I don’t always want to be singing the praises of local produce, but I was really struck by how much more flavorful fresh green onions are than the ones I get in the grocery store out of season.  I wouldn’t have expected such a significant difference in taste, but it’s amazing.

Internet - Food TV