Dessert

Perfect Pecan Pie

Ingredients
Pie Shell for Pecan Pie (recipe follows)
6 tablespoons unsalted butter, melted
1 cup dark brown sugar, packed
12 teaspoon salt
3 large eggs
34 cup light corn syrup
1 tablespoon vanilla extract
3 cups pecans, toasted and roughly chopped

Instructions
1.  Adjust oven rack to center position and heat oven to 275*F. Place pie shell in oven if not already warm.

2.  Mix butter, sugar and salt in medium bowl with wooden spoon until butter is absorbed. Beat in eggs, then corn syrup and vanilla. Return bowl to skillet of hot water; stir until mixture is shiny and warm to the touch, about 130*F. Remove from heat; stir in pecans.

3. Pour mixture into warm shell; bake until center feels set yet soft, like gelatin, when gently pressed. 50 to 60 minutes. Transfer to pie rack; let cool completely, at least 4 hours. Serve pie at room temperature or warm, with lightly sweetened whipped cream or vanilla ice cream if desired.

Note: Toast pecans in a dry skillet or in the oven while baking the pie shell.  

Pie Shell for Pecan Pie
Ingredients
1 14 cups all purpose flour, plus extra for dough and surface
2 tablespoons powdered sugar
12 teaspoon salt
8 tablespoons unsalted butter, chilled and cut into 14-inch pats
2 tablespoons vegetable shortening, frozen solid and cut into small pieces
1 large egg white, chilled and mixed with ice water to equal 14 cup
1 large egg yolk, beaten with 18 teaspoon water

Instructions
1. Mix flour, sugar, and salt in food processor fitted with steel blade. Scatter butter and shortening over dry ingredients and pulse until mixture resembles coarse cornmeal. 10 to 15 seconds. Turn mixture into medium bowl.

2. Sprinkle egg white mixture over flour mixture and, with blade of rubber spatula, use folding motion to mix. Press down on dough with broad side of spatula until dough sticks together. Shape dough into ball with hands, and then flatten into 4-inch disk. Dust dough lightly with flour, wrap tightly in plastic wrap, and place in refrigerator for at least 1 hour or up to 2 days.

3. Roll dough on lightly floured surface into 13-inch circle and transfer to 9-inch pie pan, preferably glass. Press dough into corners and sides of pan, being careful not to stretch dough. Trim edges of dough to make 12-inch overhang. Tuck overhanging dough under so that folded edge is flush with rim of pan. Flute edge.

4. Chill shell until firm, about 1 hour. Prick sides and bottom with fork and line entire shell with heavy-duty aluminum foil, pressing foil firmly against shell and extending it over fluted rim. Prick foil with fork and return shell to refrigerator while oven is heating.

5. Adjust oven rack to center position and heat oven to 400*F. Bake, pressing once or twice with mitt-protected hands, if necessary, to flatten any puffing, until crust is firmly set, about 15 minutes. Remove foil and continue to bake until bottom begins to color, about 10 minutes longer. Remove from oven, brush sides and bottom with egg yolk, and return to oven until yolk glazes over, about 1 minute longer.
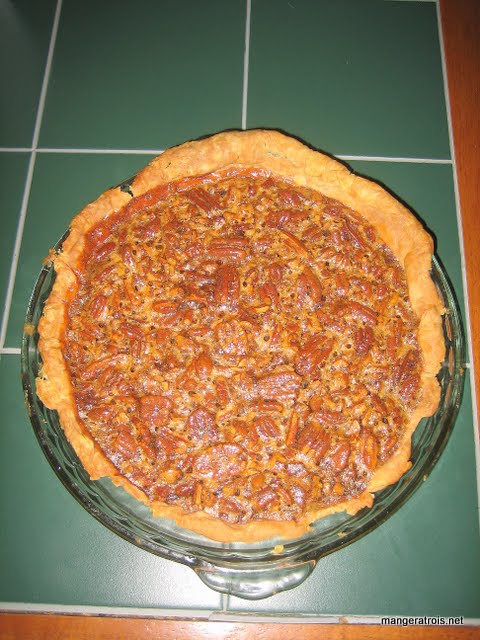
Pecan Pie

Comments
Once upon a time, I needed to find a recipe for the best pecan pie in the world to make for a friend’s birthday.  This is that recipe.  Even Art, who dislikes pecan pies because they’re always just “a thin layer of pecans over treacle,” gobbles this up when I make it for Thanksgiving.  My friend also loved the pie so I considered the whole experiment a great success. 

The crust is time-consuming but very well worth the effort of making it.  After the crust is made, it’s pretty quick to come together.  I think I’ve gotten better at making the crust look pretty, this picture is from the first time I made the recipe.  

I believe that the initial recipe came from an issue of Cook’s Illustrated.  The original recipe recommends a glass pie plate and I’ve had great success with sticking to glass.  Since it is a time-consuming recipe, I tend to make two at a time.  They also travel very well via airplane.

Cook’s Illustrated 1995
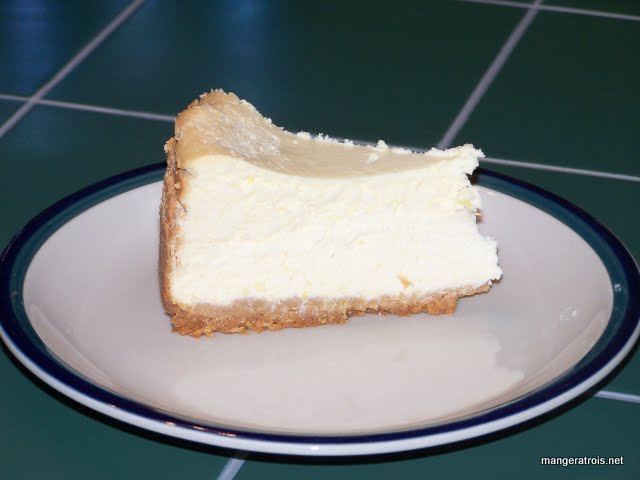
Lemon Ricotta Cheesecake

IngredientsSlice For the crust
1 12 cups crushed vanilla wafers (I used a 7.5oz bag of Barbara’s Vanilla Animal Crackers because all the vanilla wafers I could find at the store had HFCS)  
1 tablespoon lemon zest
13 cup melted butter

For the cheesecake
16 ounces cream cheese, softened
15 ounces ricotta cheese
1 14 cups sugar
14 cup cornstarch
4 eggs
2 cups half and half
13 cup lemon juice
4 teaspoons lemon zest
2 teaspoons vanilla extract

Instructions
1. Preheat oven to 325*F.  

2. In a bowl, combine wafer crumbs, butter and lemon peel. Press onto the bottom of a greased 9-in. spring-form pan. Bake for 15 minutes or until lightly browned.  Cool.

3. In a large bowl, beat cream cheese and ricotta until smooth. Combine sugar and cornstarch; add to cheese mixture and beat well. Add eggs and cream, beating on low speed just until combined. Beat in lemon juice, peel, and vanilla until blended. Pour into crust. Place pan on a baking sheet.

4. Bake for 70-80 minutes or until center is almost set. Cool on a wire rack for 10 minutes. Carefully run a knife around edge of pan to loosen; cool 1 hour longer. Refrigerate overnight. Remove sides of pan and serve.  

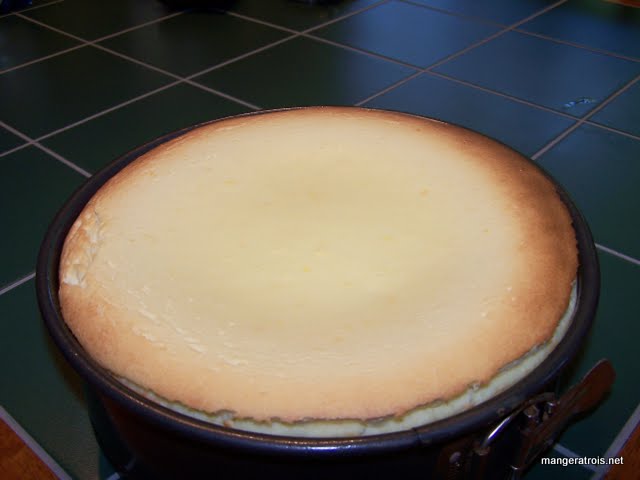
Lemon Ricotta Cheesecake

Comments
It’s still cooling, I’ll add comments tomorrow.  :)

Added Later
We all tried a slice of this after it had cooled for about 3-4 hours and, while the flavors were nice, it wasn’t that amazing.  We tried it again after it had chilled for a full 12-14 hours and it was amazing.  Please don’t neglect the “Refrigerate overnight” step, it’s rather important.  The lemon and ricotta flavors are both prevalent throughout and noticeable.  This cheesecake is creamy, but it’s also very light and airy compared to a normal creamy cheesecake. 

It’s safe to say that Art loved it, since he managed to eat 34 of the cake all by himself over the course of three days.  This one is a keeper.

Unknown

Mexican Chocolate Pudding

Ingredients
2 tablespoons cornstarch
3 cups half and half
3 egg yolks
18 teaspoon salt
2 tablets Mexican drinking chocolate (I use Ibarra brand, anything similar would work, I’m sure)
2 teaspoons vanilla extract

Instructions
1. In a large heavy-bottomed saucepan, gradually whisk together cornstarch, half-and-half, egg yolks, and salt.  

2. Cook over medium-high heat, whisking constantly, until the pudding starts to thicken.  Turn the heat down to medium and switch to stirring with a heat-resistant spatula.  

3. When the pudding is thick (around 200*F on an instant-read thermometer) remove it from the heat.  

4. Add chocolate tablets.  They’ll fall apart in the hot pudding so just keep stirring until the chocolate is fully melted, the sugar is dissolved, and the pudding is smooth.  

5. Strain the pudding into a large bowl and stir in vanilla.  Press plastic wrap directly onto the surface of the pudding so that it won’t form a skin on top.  Refrigerate until cold.  Serve with whipped cream or berries, as desired.  

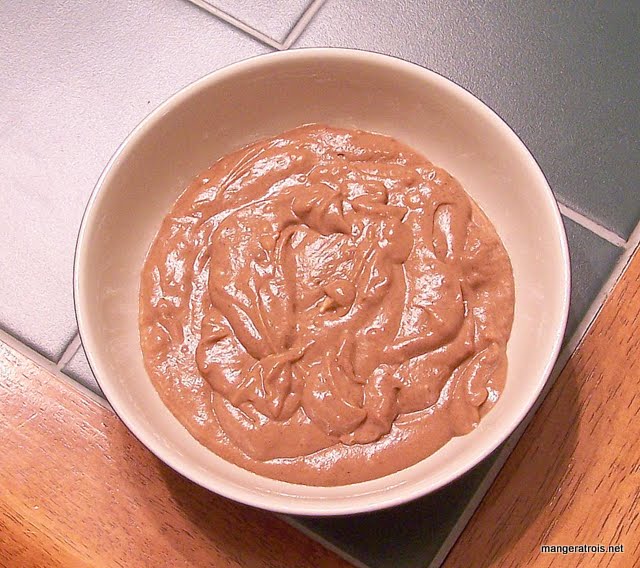
Mexican Chocolate Pudding

Comments
I ran across this recipe online and it went into my “Untried Sweets” folder.  I’ve got quite a few recipes in there and I’ve made it my goal to start cooking sweets more often so I can actually make the delicious recipes I’ve saved.  Of course I didn’t plan for this when I went grocery shopping, so Mexican Chocolate Pudding was the only recipe I had all the ingredients I needed on hand.  

Mexican chocolate is sugary and spicy with cinnamon.  I find it delicious.  I’d never made pudding from scratch before and this worked very well!  It thickened up well, the texture was great.  Lance, apparently, is not so much of a fan of Mexican chocolate so he took one bite and passed his bowl to me.  If you happen to have Mexican drinking chocolate hanging around, like I did, I suggest giving this a try.

Unknown

Three Cup Brownies

Ingredients
3 cups chocolate**
2 sticks (1 cup) unsalted butter
6 eggs
2 12 cups sugar
1 tsp vanilla extract
1 12 cups all purpose flour
1 tsp baking powder

Instructions
1. Preheat oven to 350*F.   Place rack in center of oven and grease a 9x13-inch baking pan.  

2. Place chocolate and butter into a microwave safe dish and microwave on high for 1 minute.  Remove container and stir chocolate.  Repeat until chocolate is fully melted and mixed with the butter.  Let cool for 5 minutes.  

3. Mix the eggs, sugar, and vanilla in a bowl.  

4. In a separate bowl, mix flour and baking powder.  

5. Add the chocolate mixture, one scoop at a time, to the egg mixture, stirring to incorporate fully.  

6. Add flour mixture to chocolate and egg mixture and fold until completely combined.  

7. Bake for 45-55 minutes, or until a table knife inserted into the center comes out clean.  Let cool and serve.  

**The original recipe called for semi-sweet chips however, I only had about a cup of those.  I topped off this cup of chips with about 4 ounces of 100% Cacao Baking Bar and all the unsweetened cocoa powder I had in the house.  I recommend using 3 cups of whatever chocolate stuff you have in the house.  If it’s sweeter chocolate, reduce the amount of sugar called for in the recipe.  If it’s more bitter chocolate, increase the amount of sugar.

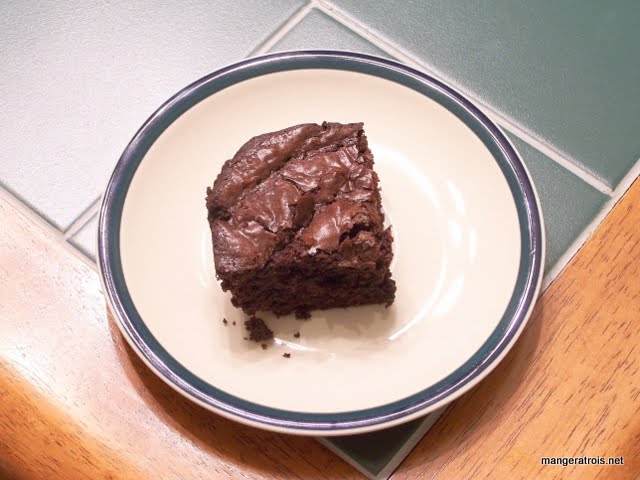
Three Cup Brownies

Comments
I used to tell people that I’m not really a baker.  Over time, I’ve come to realize that I do enjoy baking, but I tend to only get the urge to do so at 10pm at night.  There is also the problem with the whole “eating” thing when it comes to baking.  This wasn’t so much of a problem when Art worked out of the house as baked goods could easily be sent to work; now it takes a bit more planning.   The choir I belong to certainly appreciates the results of my late night urges to bake.  

The original recipe came to Art from a friend and he asked me to make it.  I realized, after I’d already decided I would be making them, that I didn’t have all the right ingredients and that some of the measurements didn’t translate well from the original metric.  I have no idea if this recipe, which is what I made and suggest you make, is anywhere close to the original, but it’s delicious in its own right and that’s what matters.  

These turned out lighter than most brownies I’ve made in the past which means Lance finally likes them.  They’re perhaps a tidge to bitter as a result of the chocolate mix I used, but that just made them perfect for Art’s tastes.  All in all, I’d say this was a great success!

Unknown